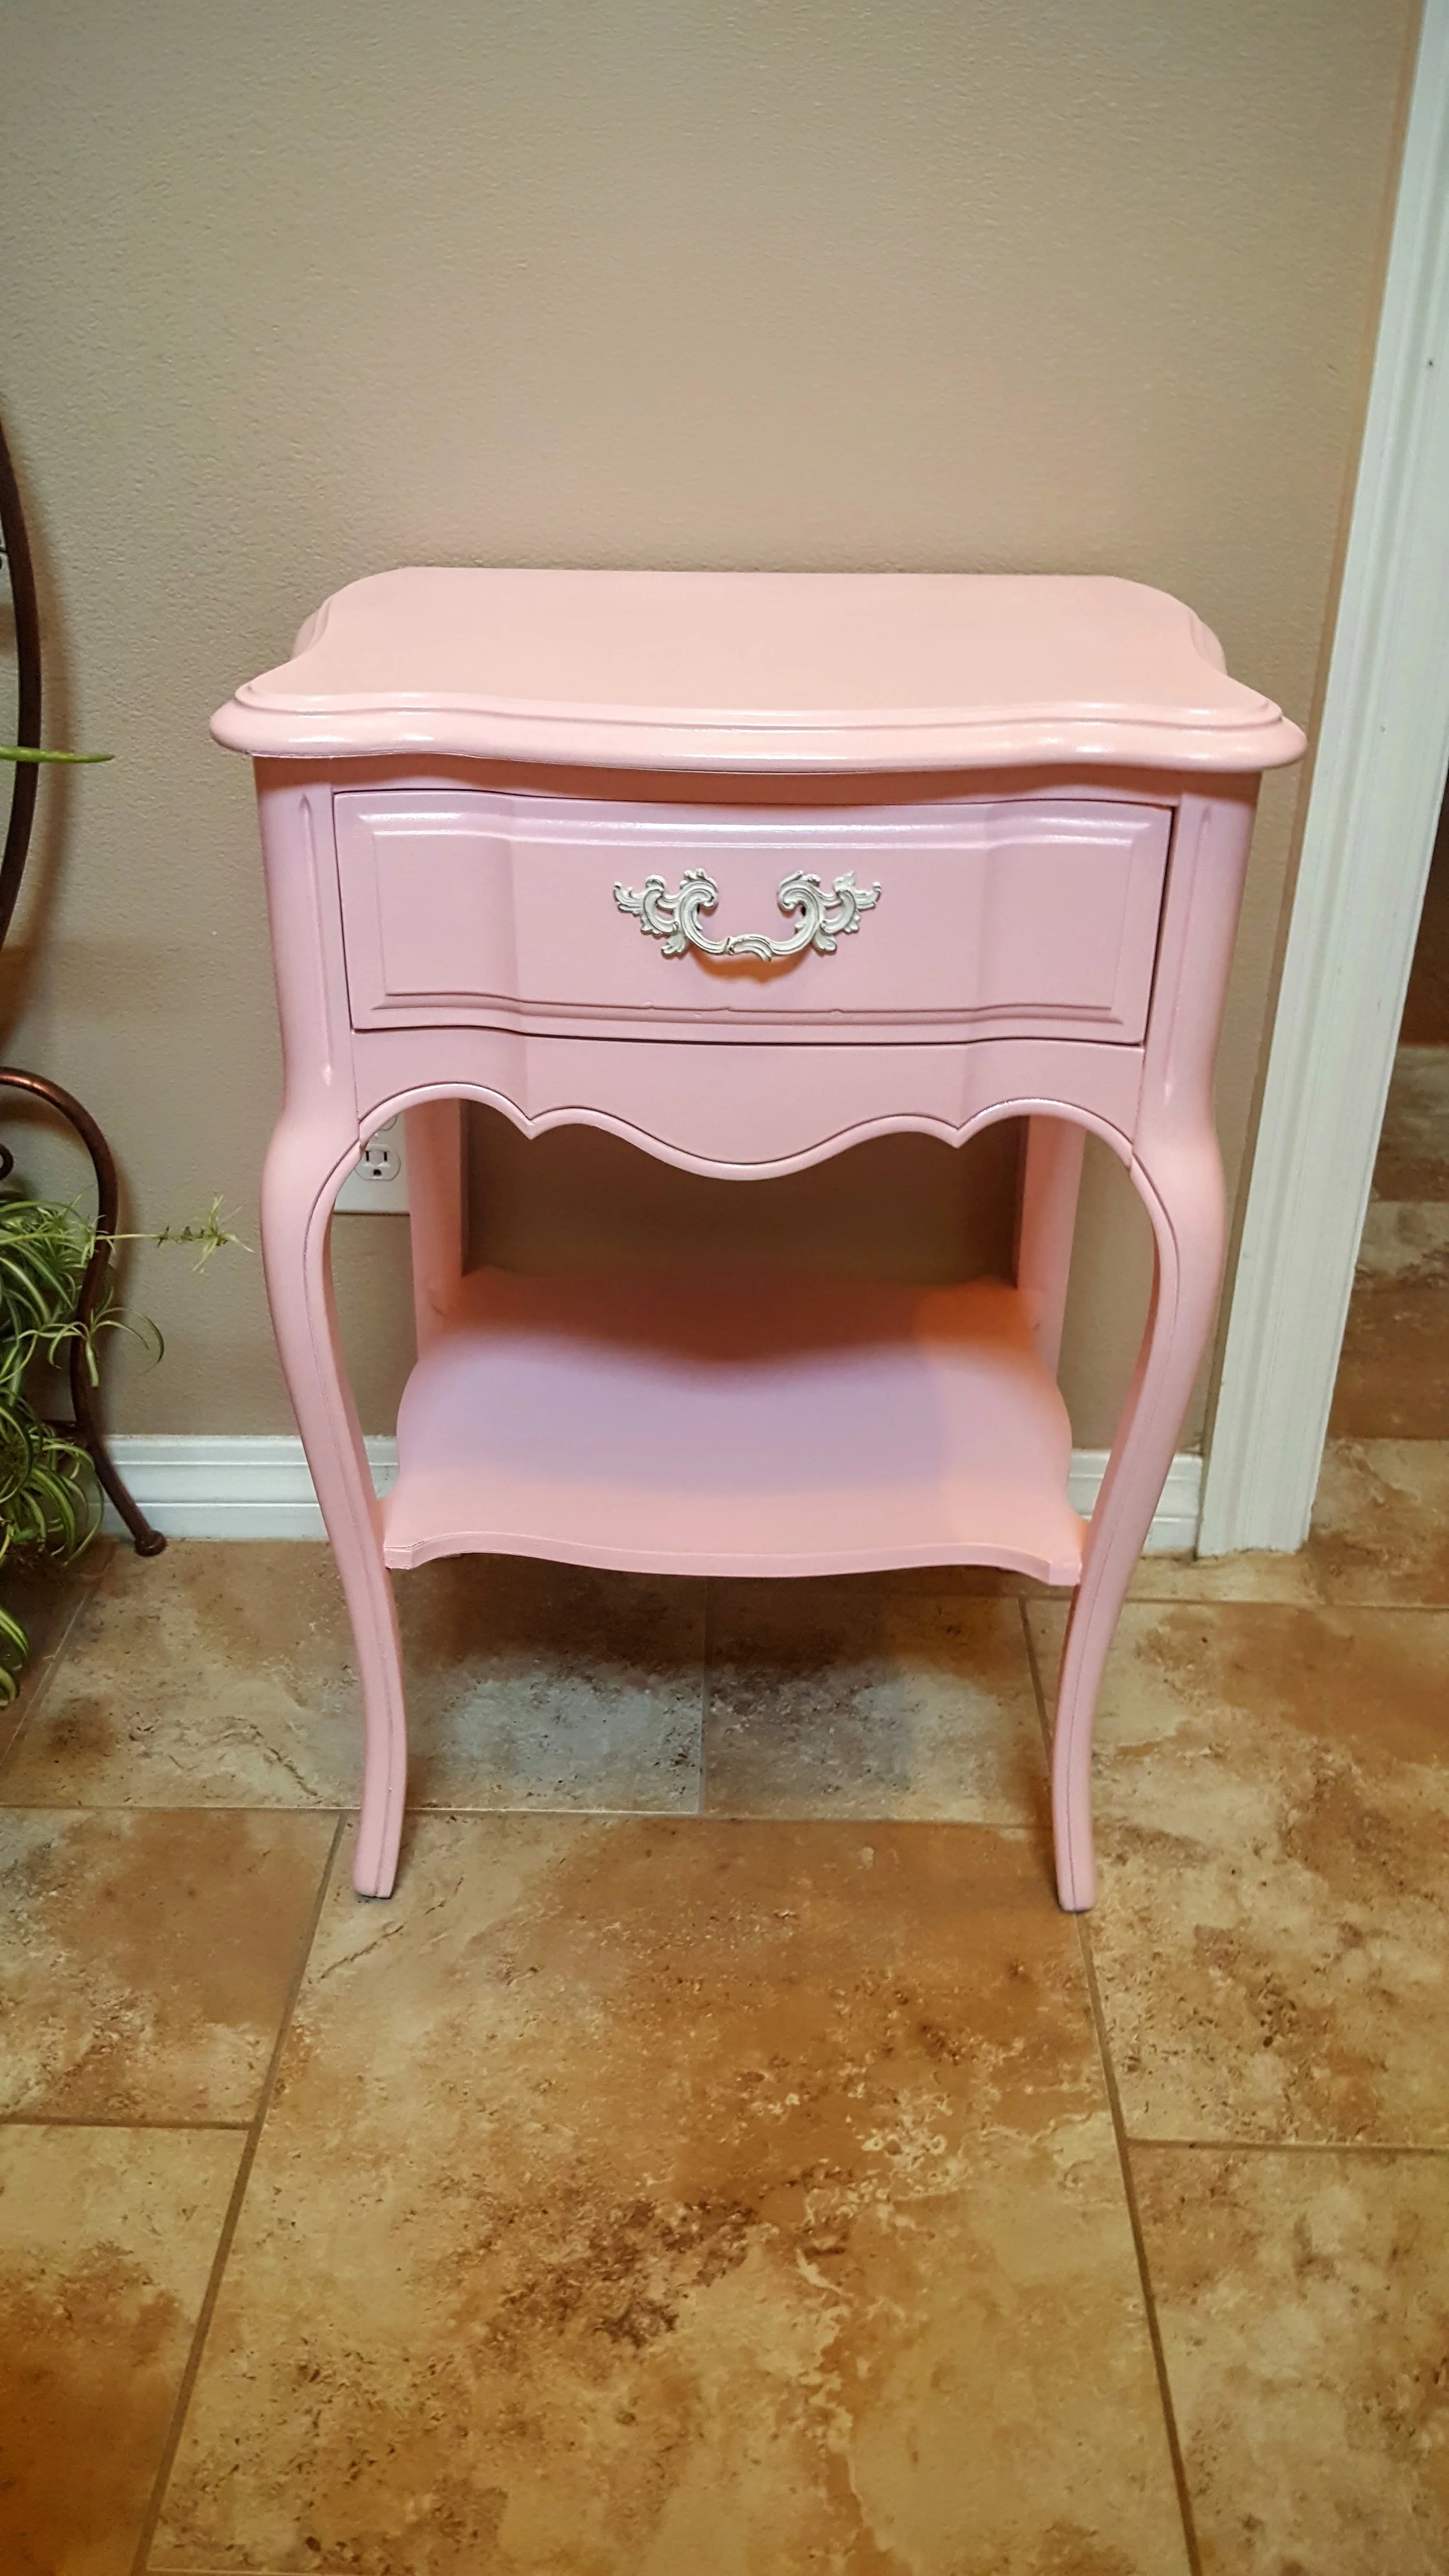


First time I saw this...it was scary.

And now...it's all lovely and ish. Perfect for a Princess' bedroom. Isn't it gorg?
First time I saw this...it was scary.
And now...it's all lovely and ish. Perfect for a Princess' bedroom. Isn't it gorg?
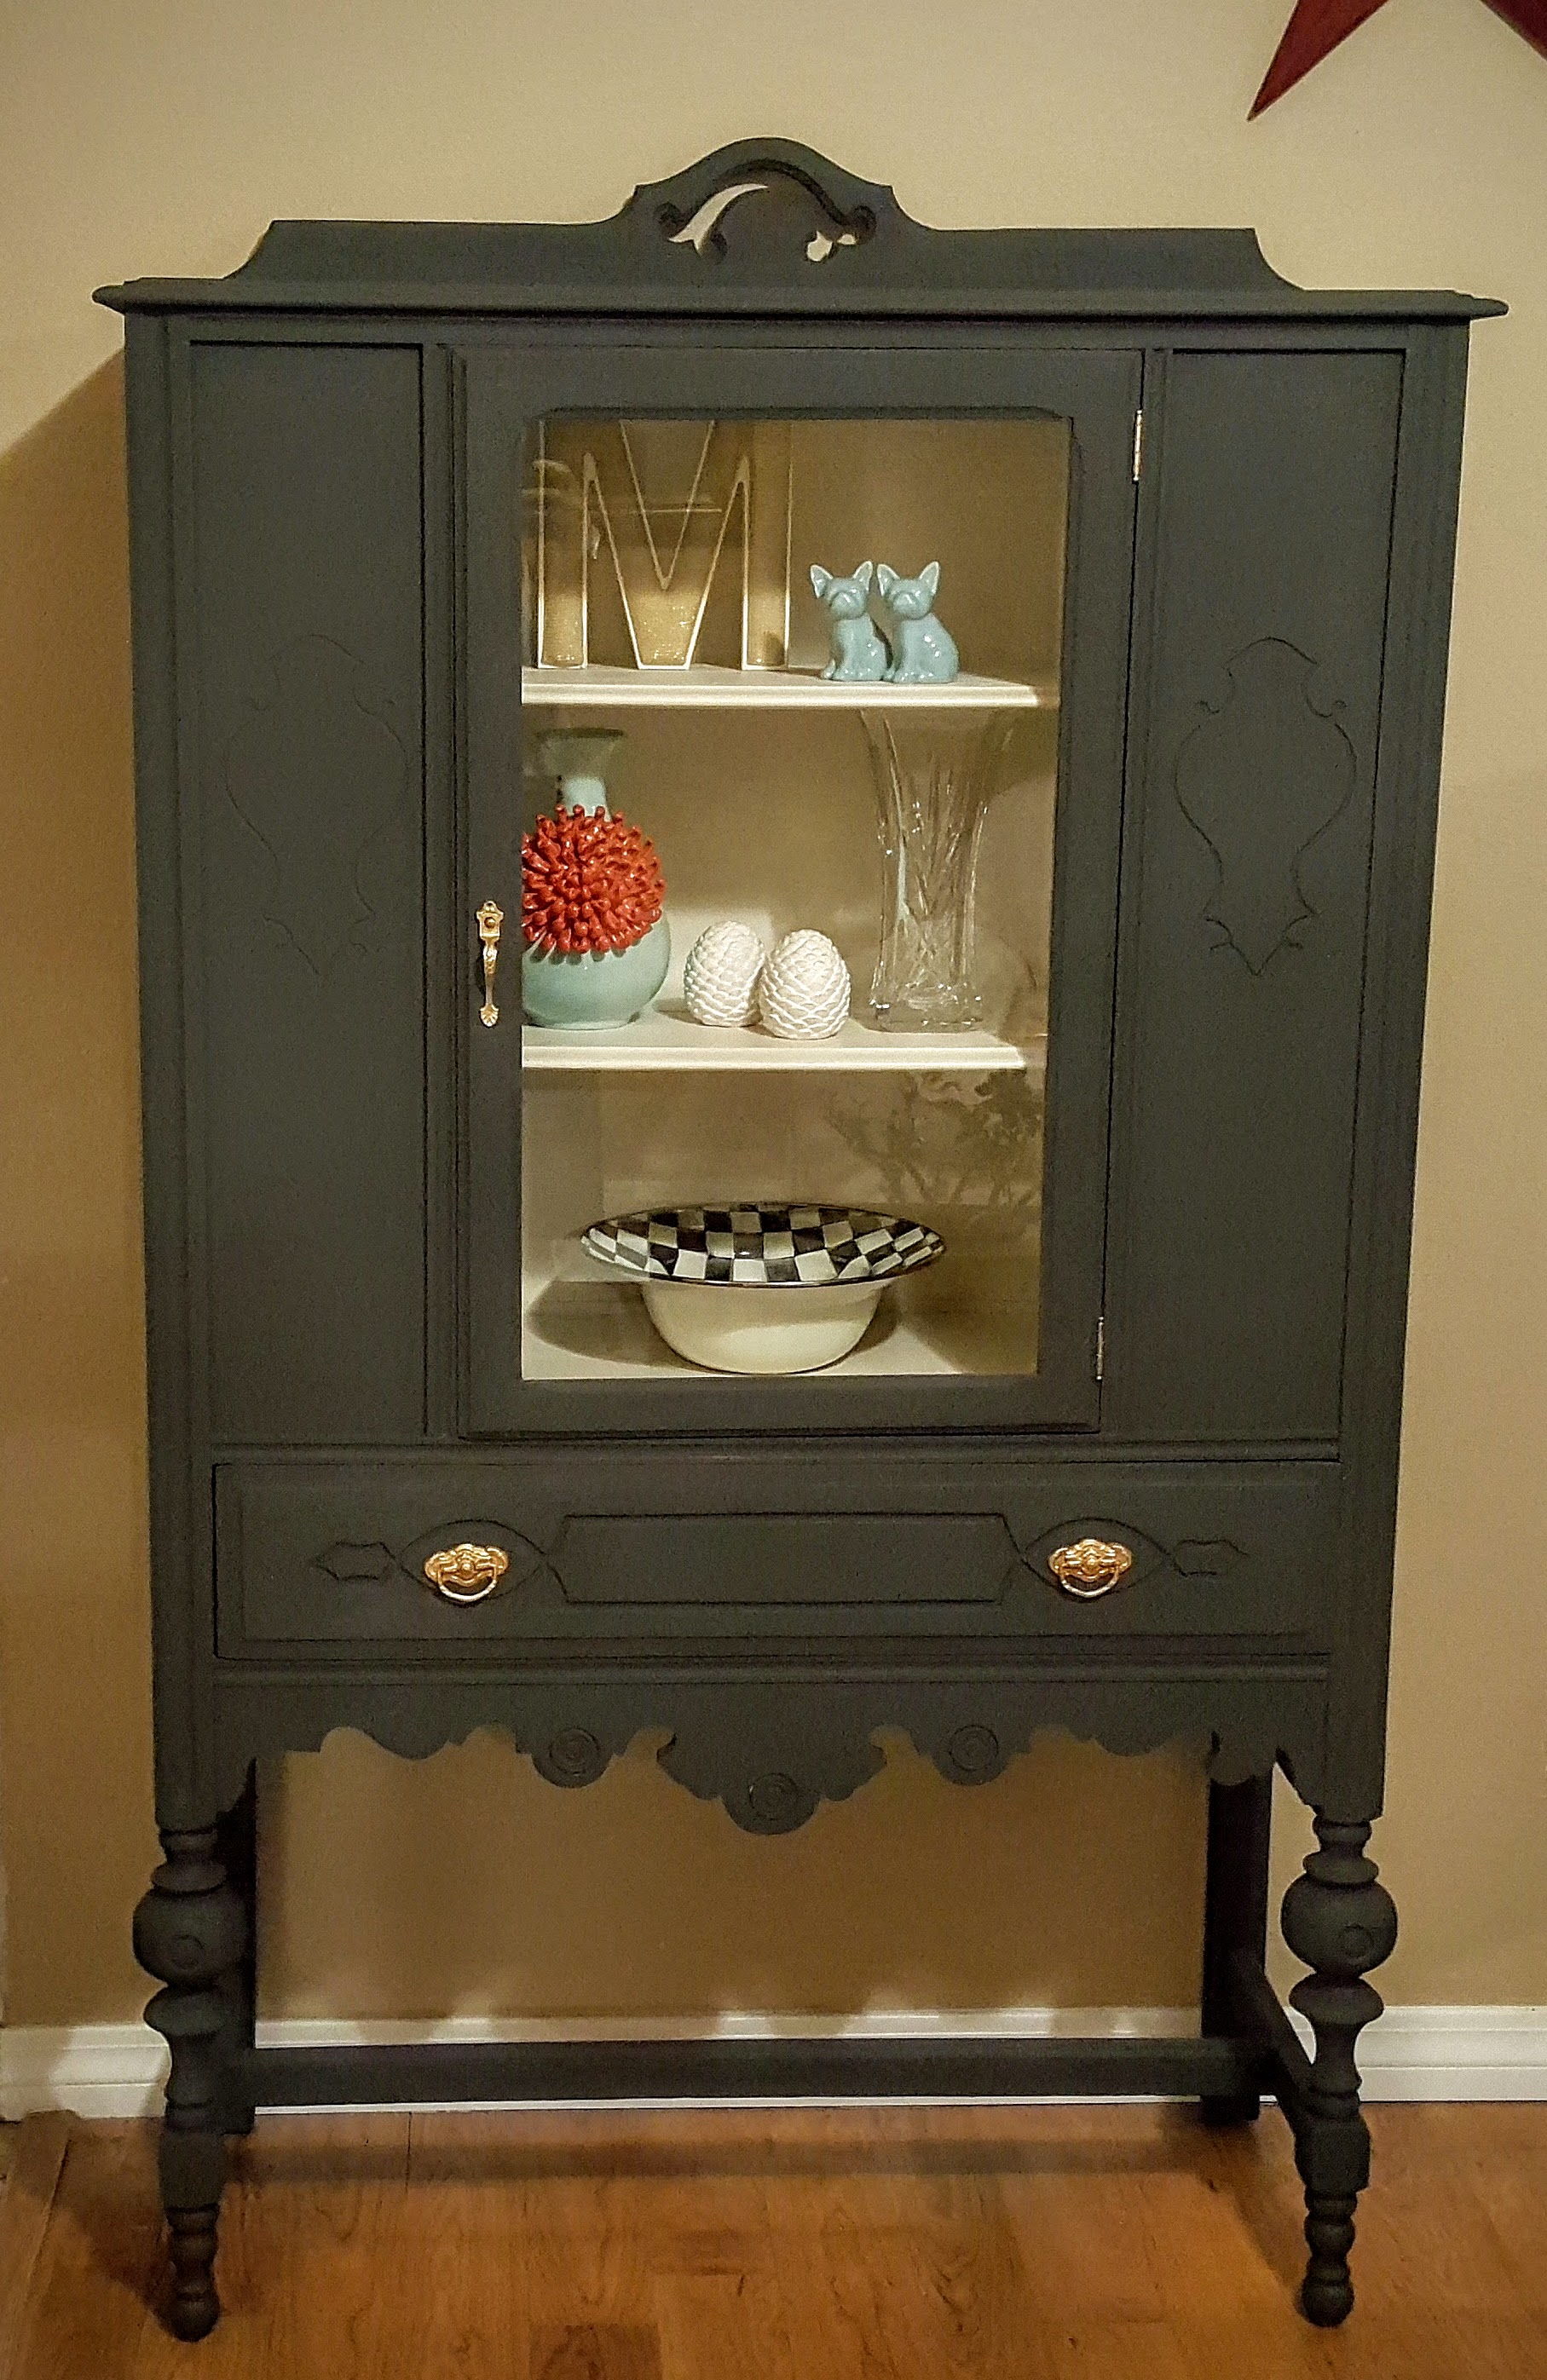
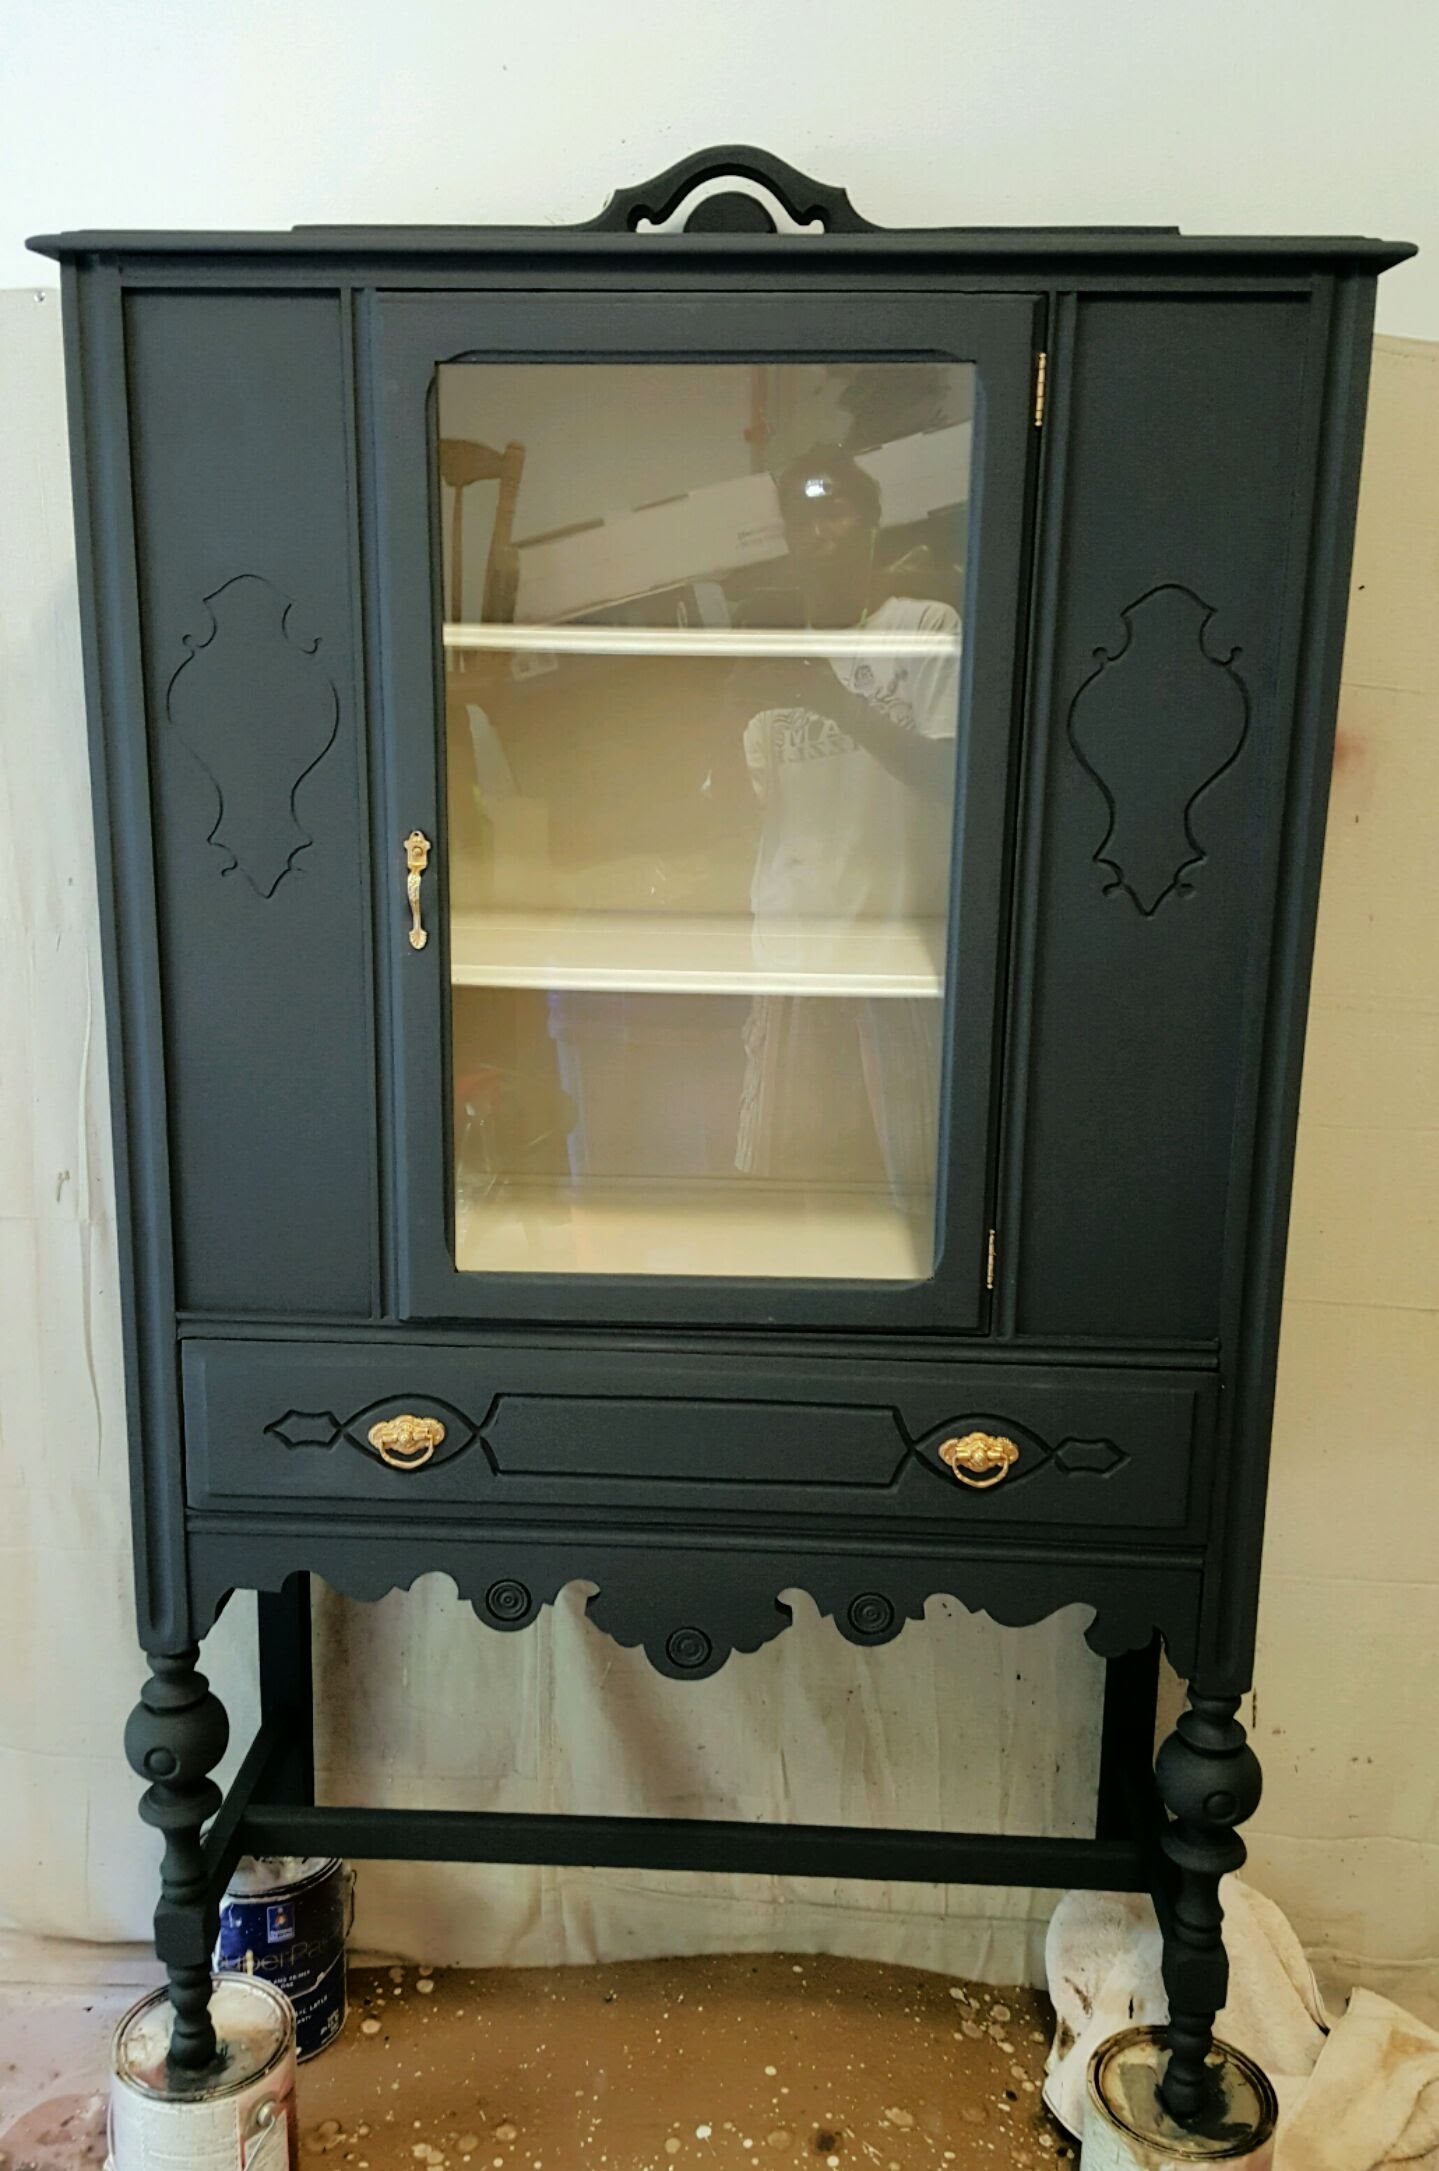
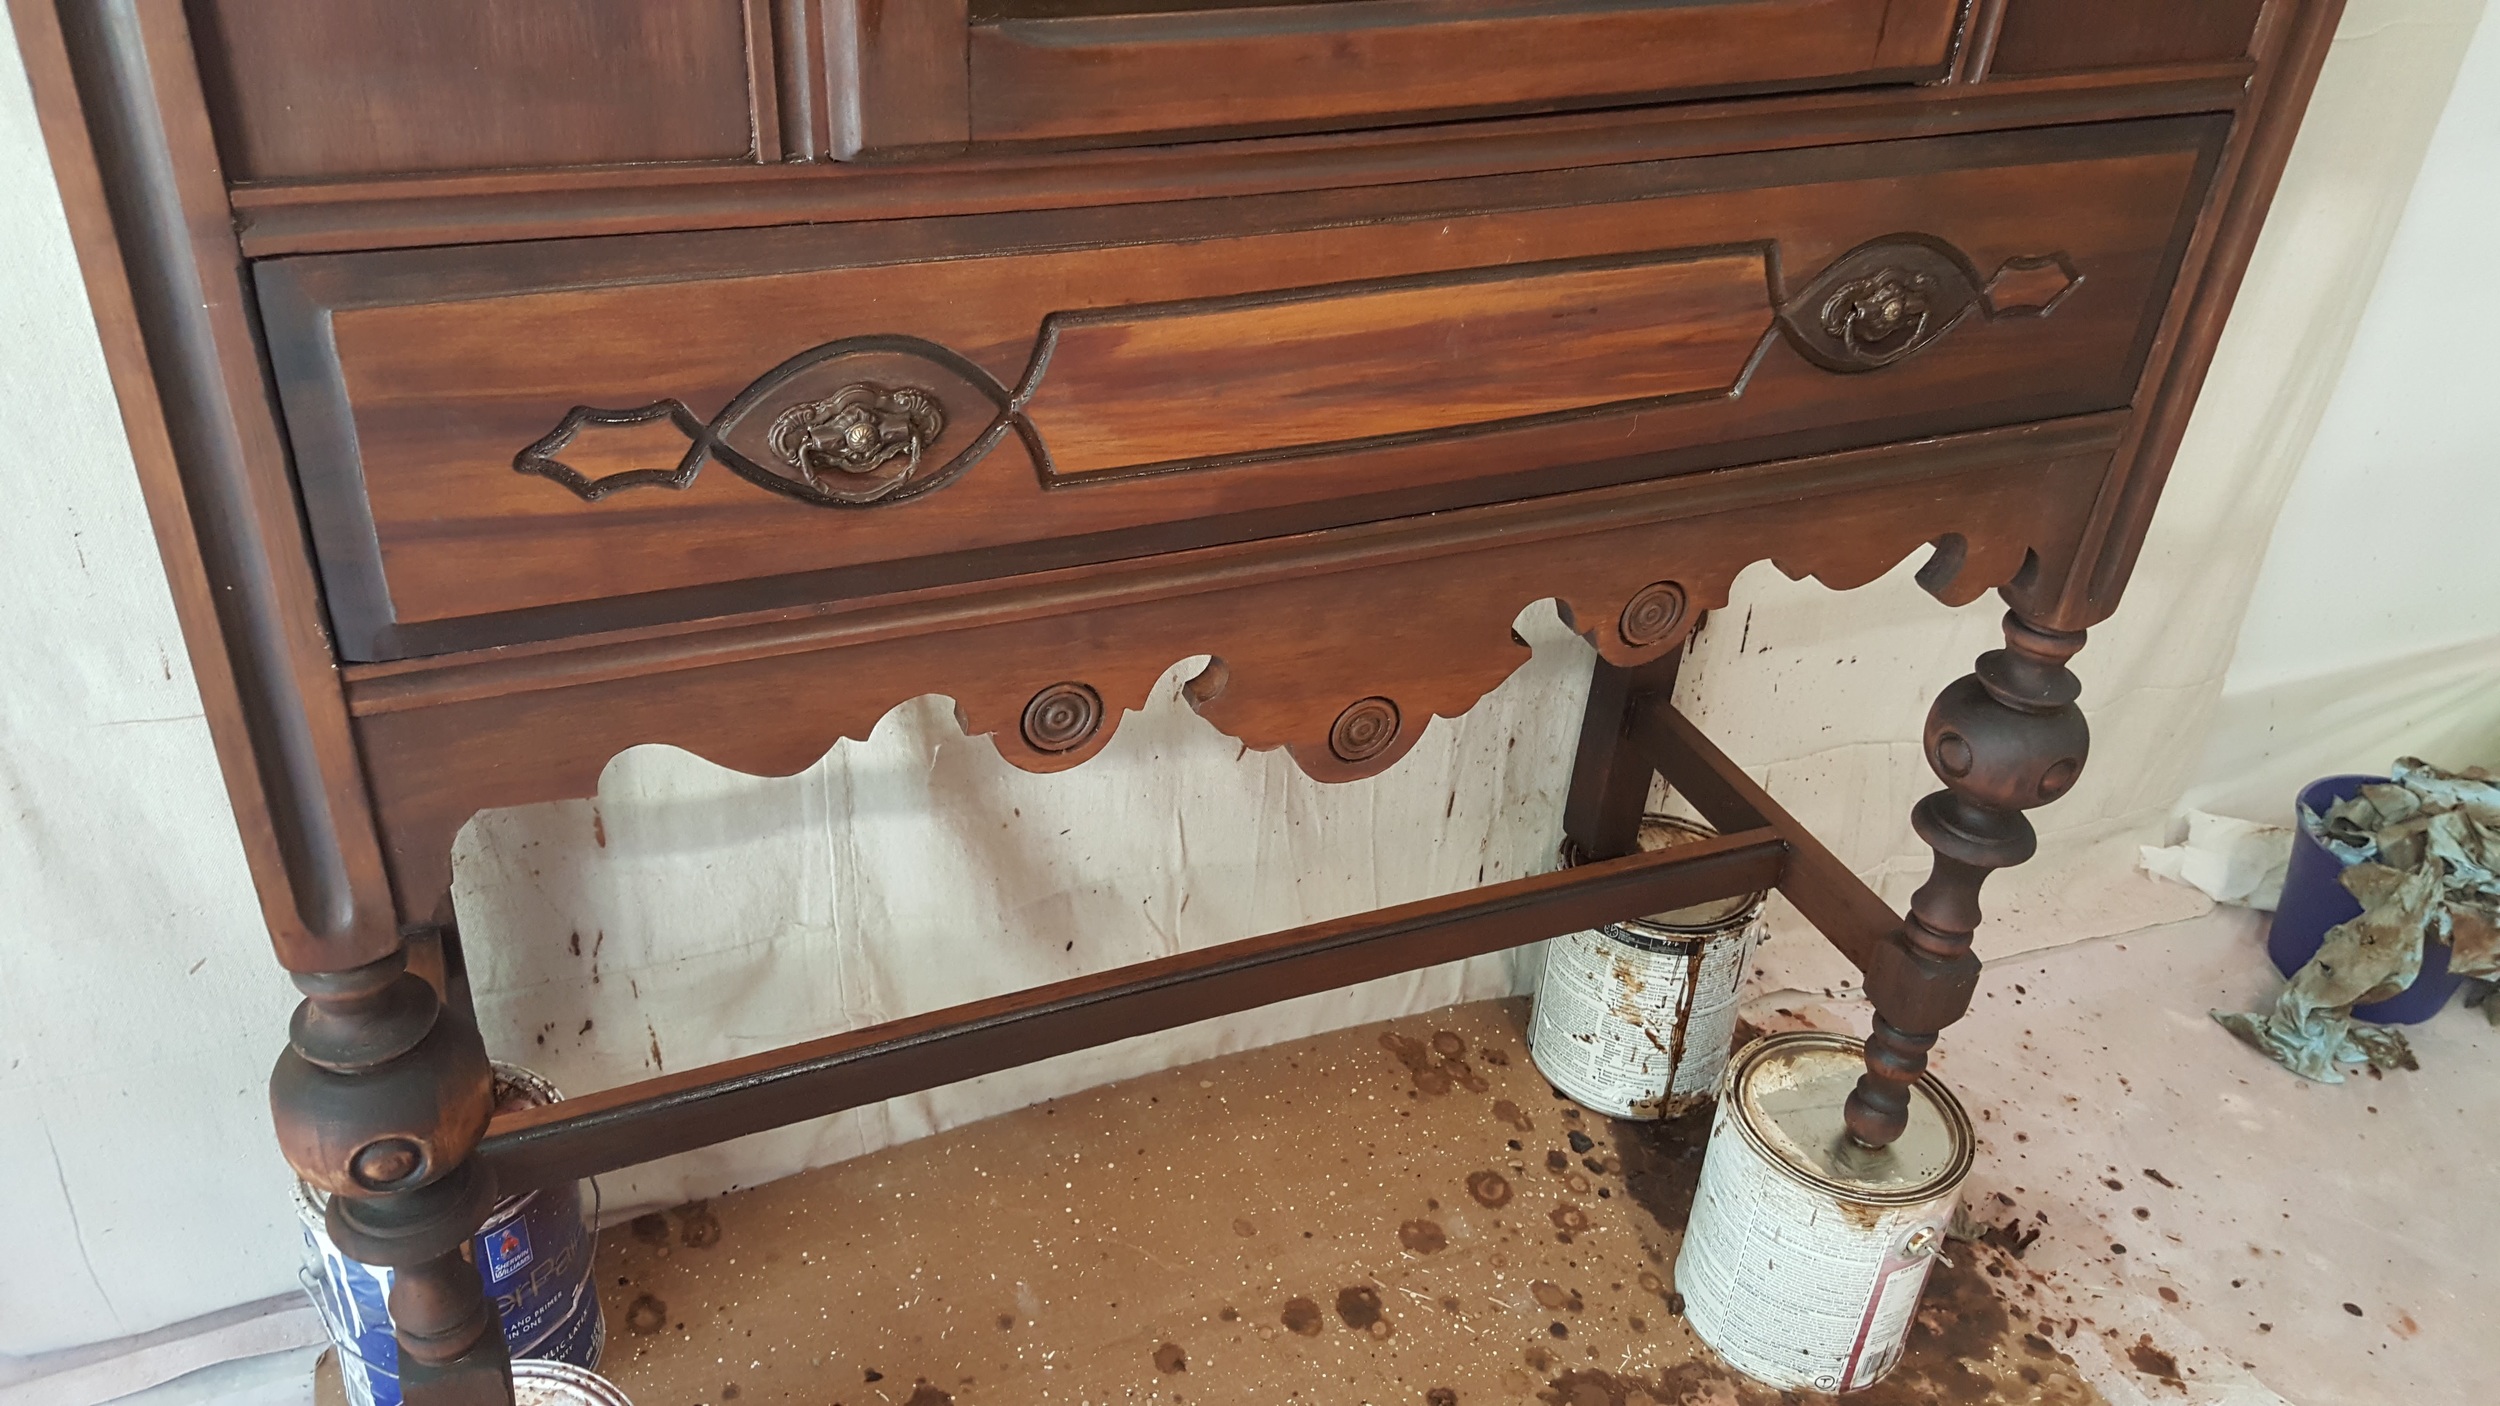
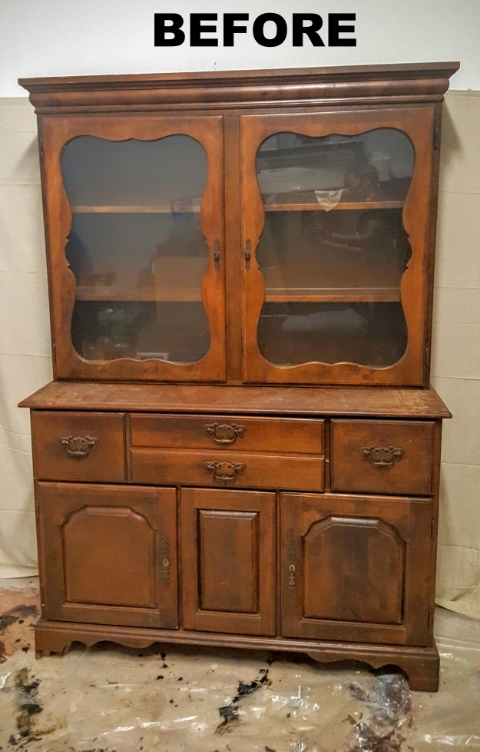
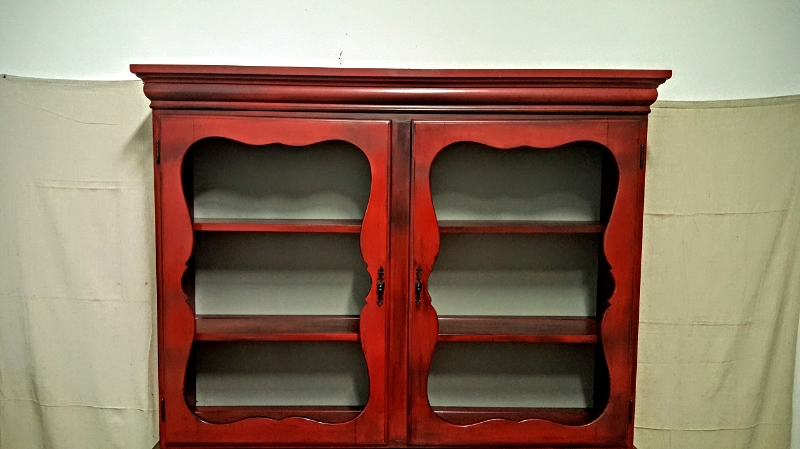
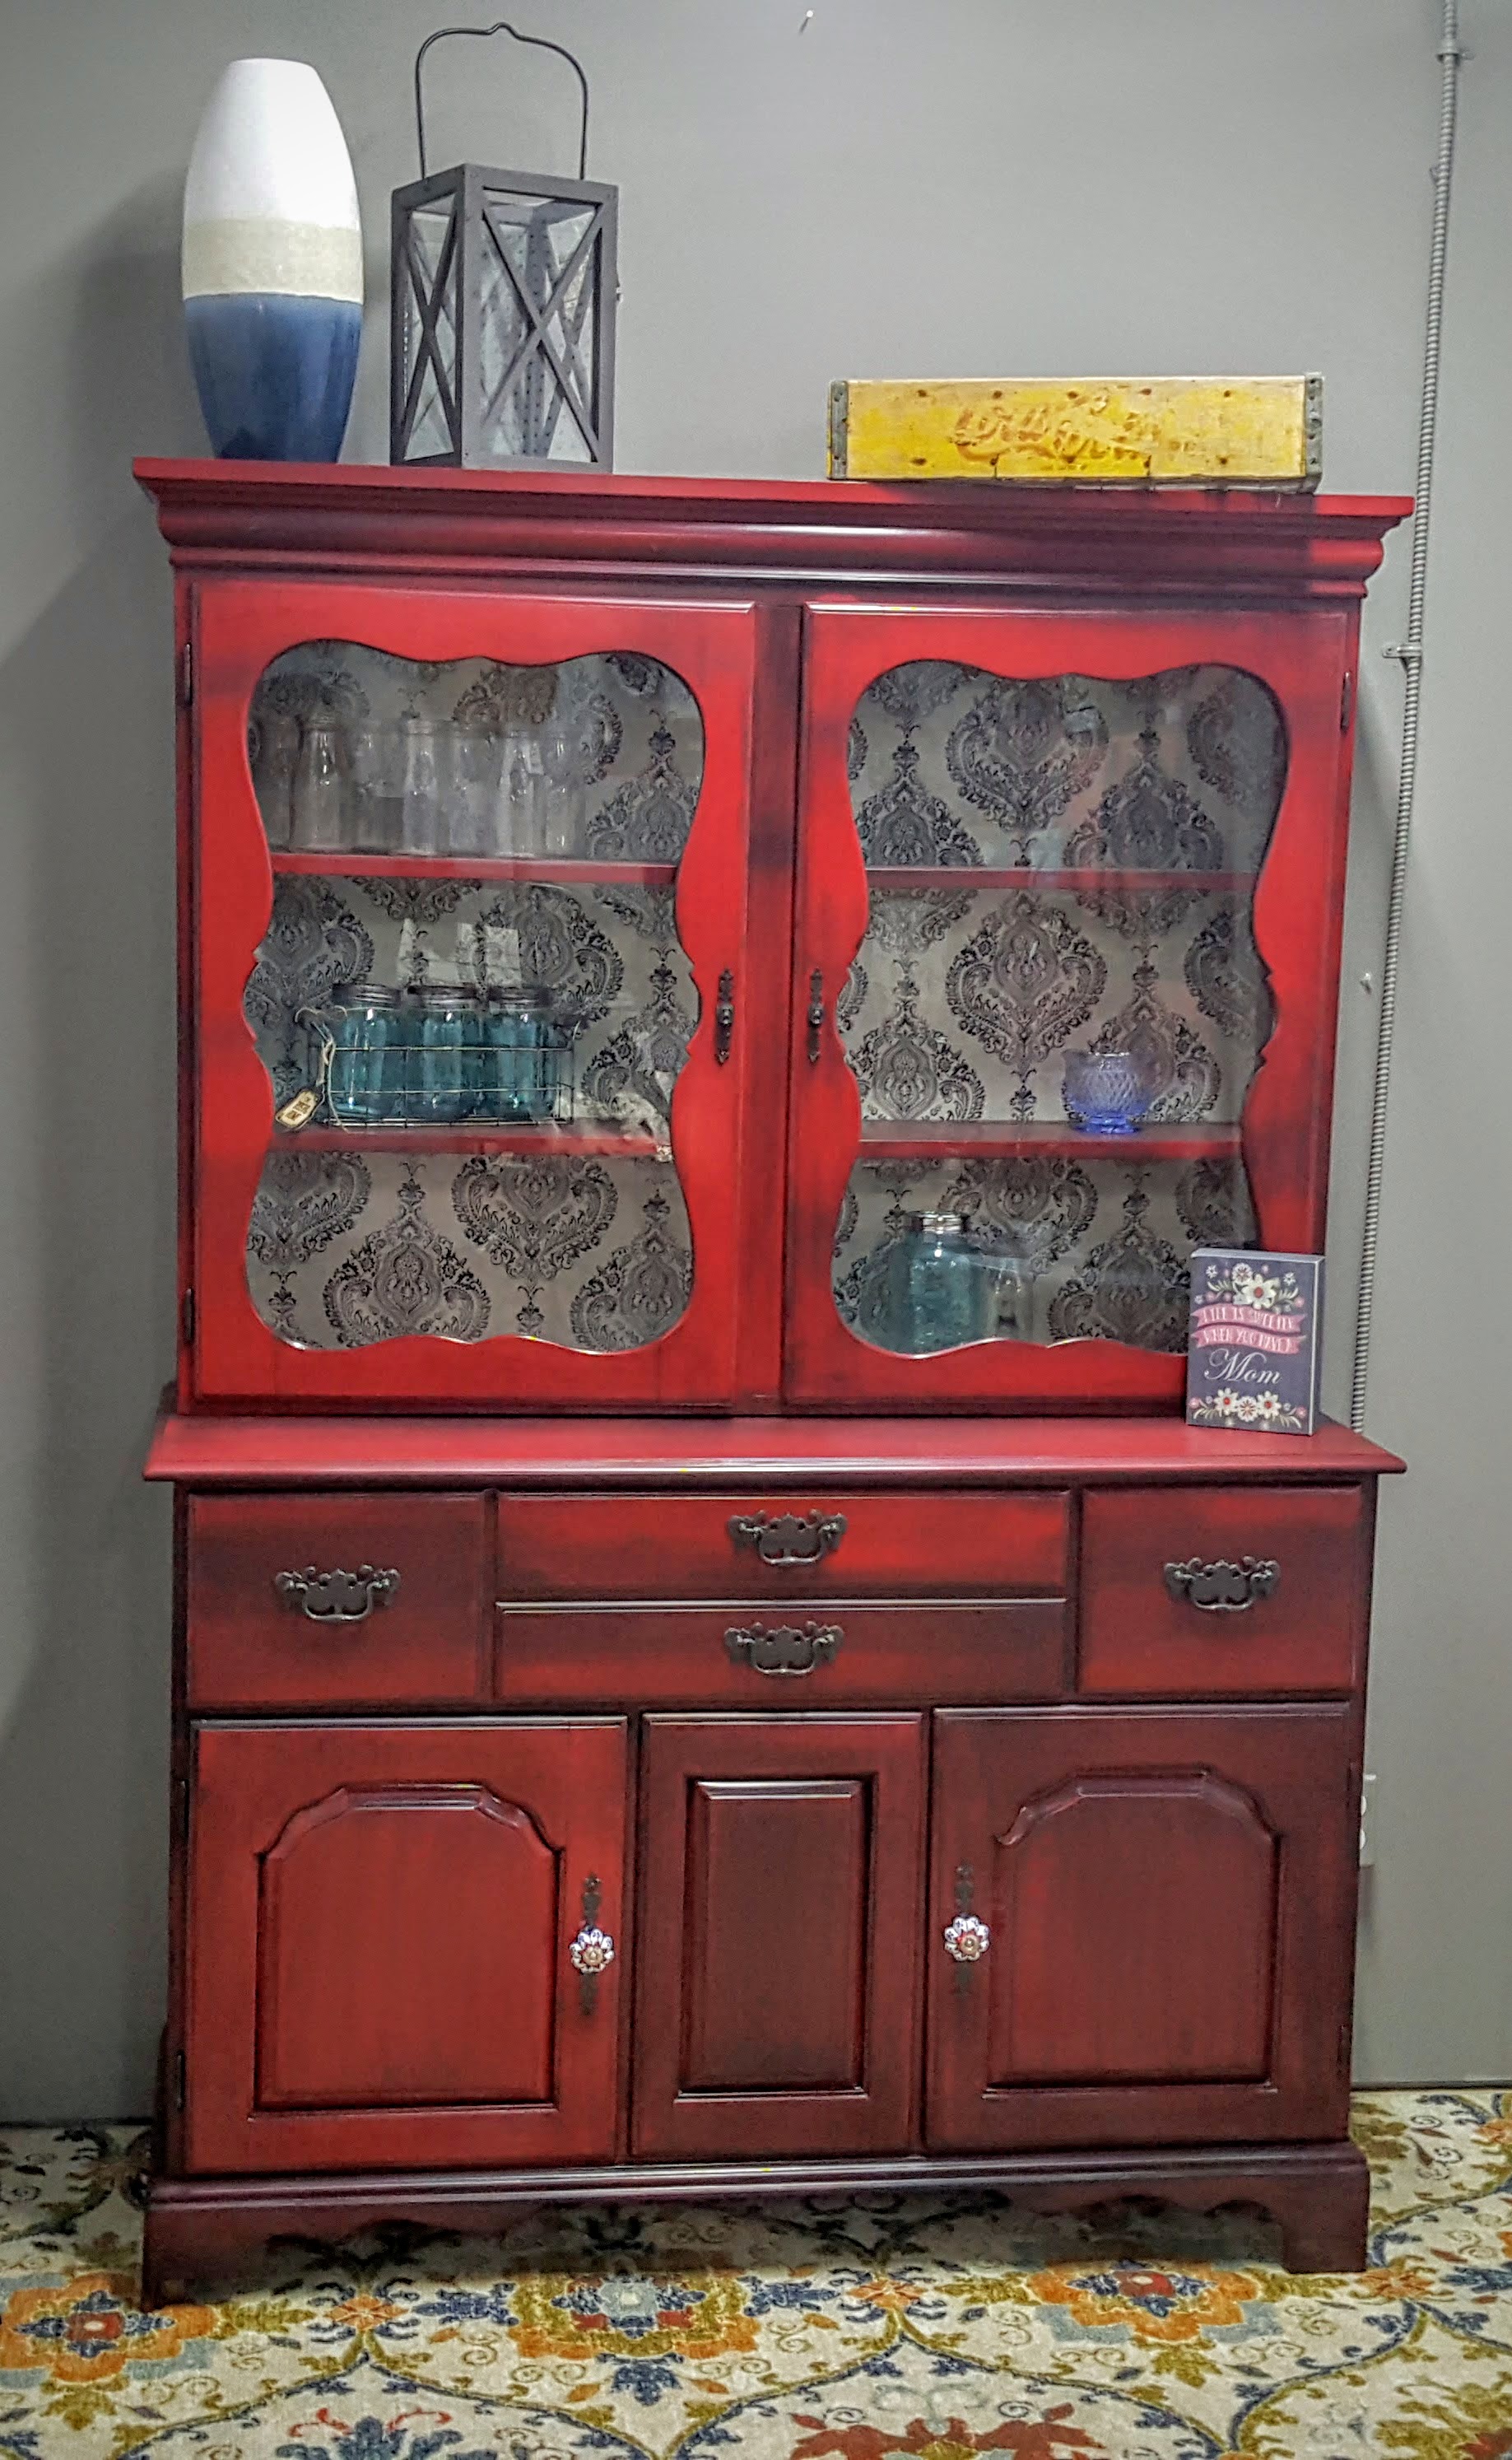
When I found this piece...it looked tragic. It was covered in brown paint with faux wood grain contact paper on the shelves. I bought it because I liked the details and well...I was also looking for a nice piece to use Annie Sloan Graphite on. It is such a rich color that I figured it could be used to make anything look elegant.
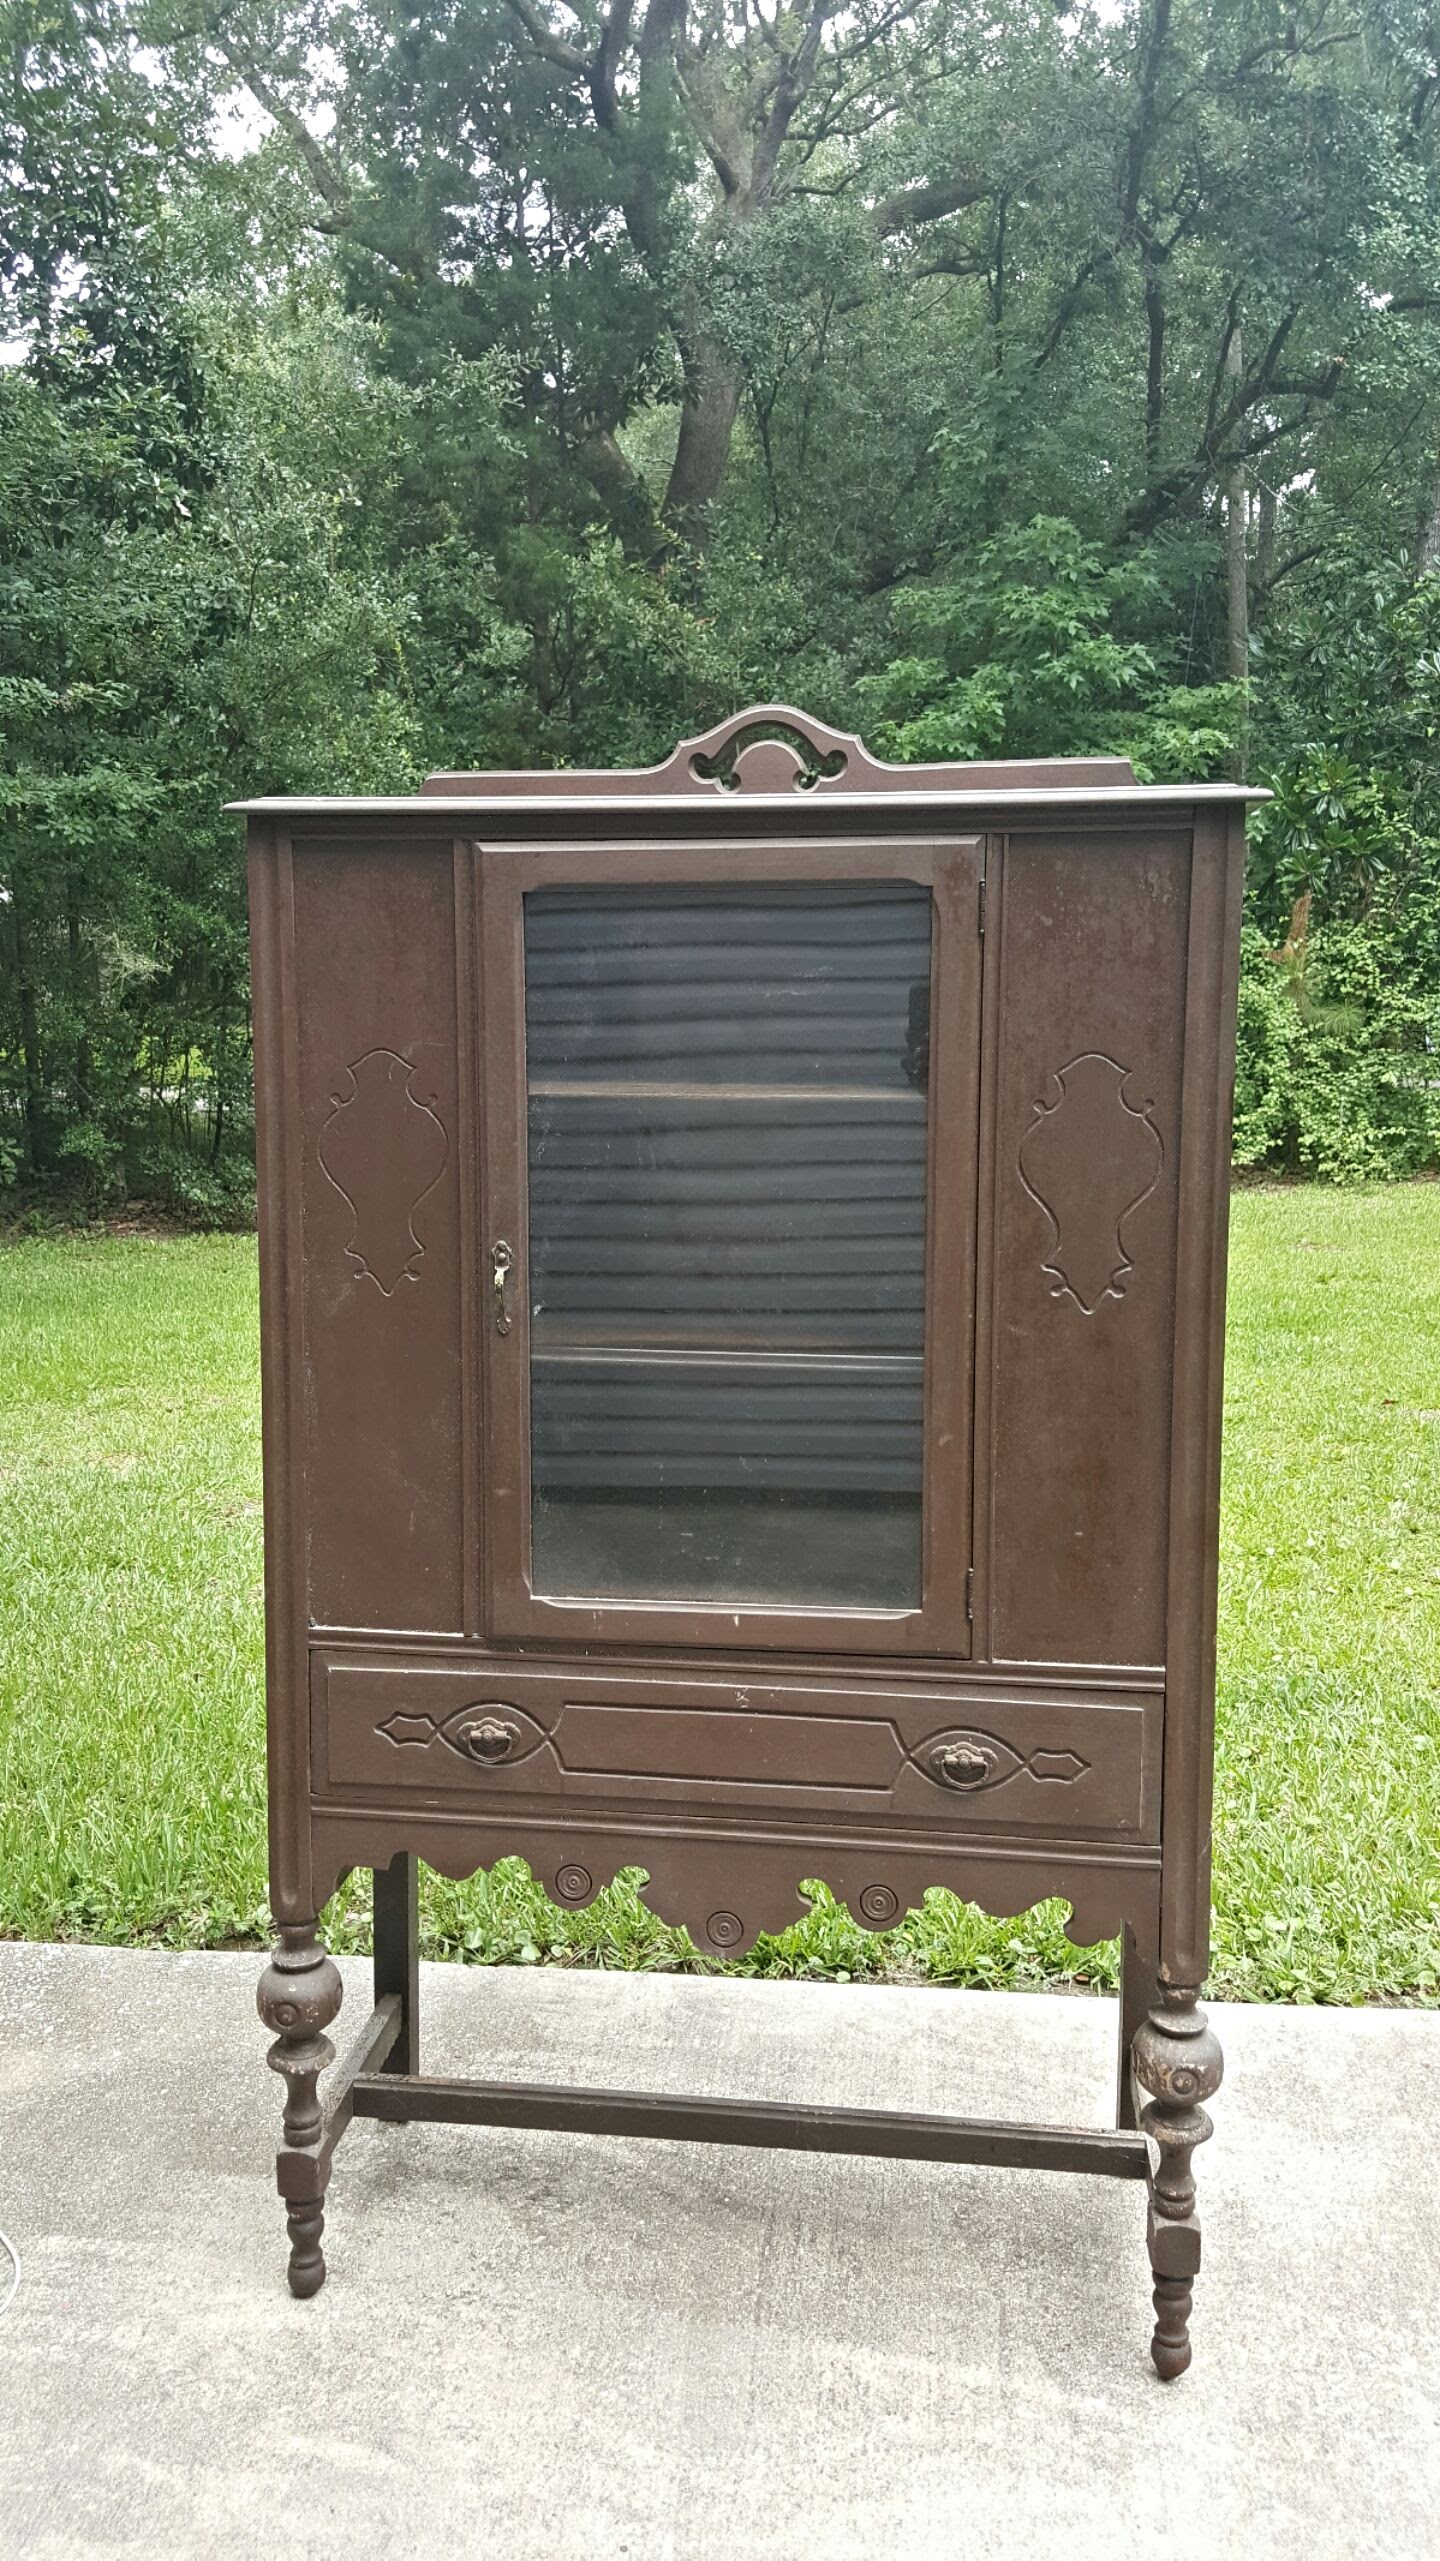
When I got it home...I was curious as to what kind of wood it was made out of so I decided to strip it. You don't need to strip paint to use Annie Sloan paint mind you...I just wanted to see it in it's original state. So I did it...and was shocked to find that the beautiful wood underneath the horrible paint was none other than rare mahogany.
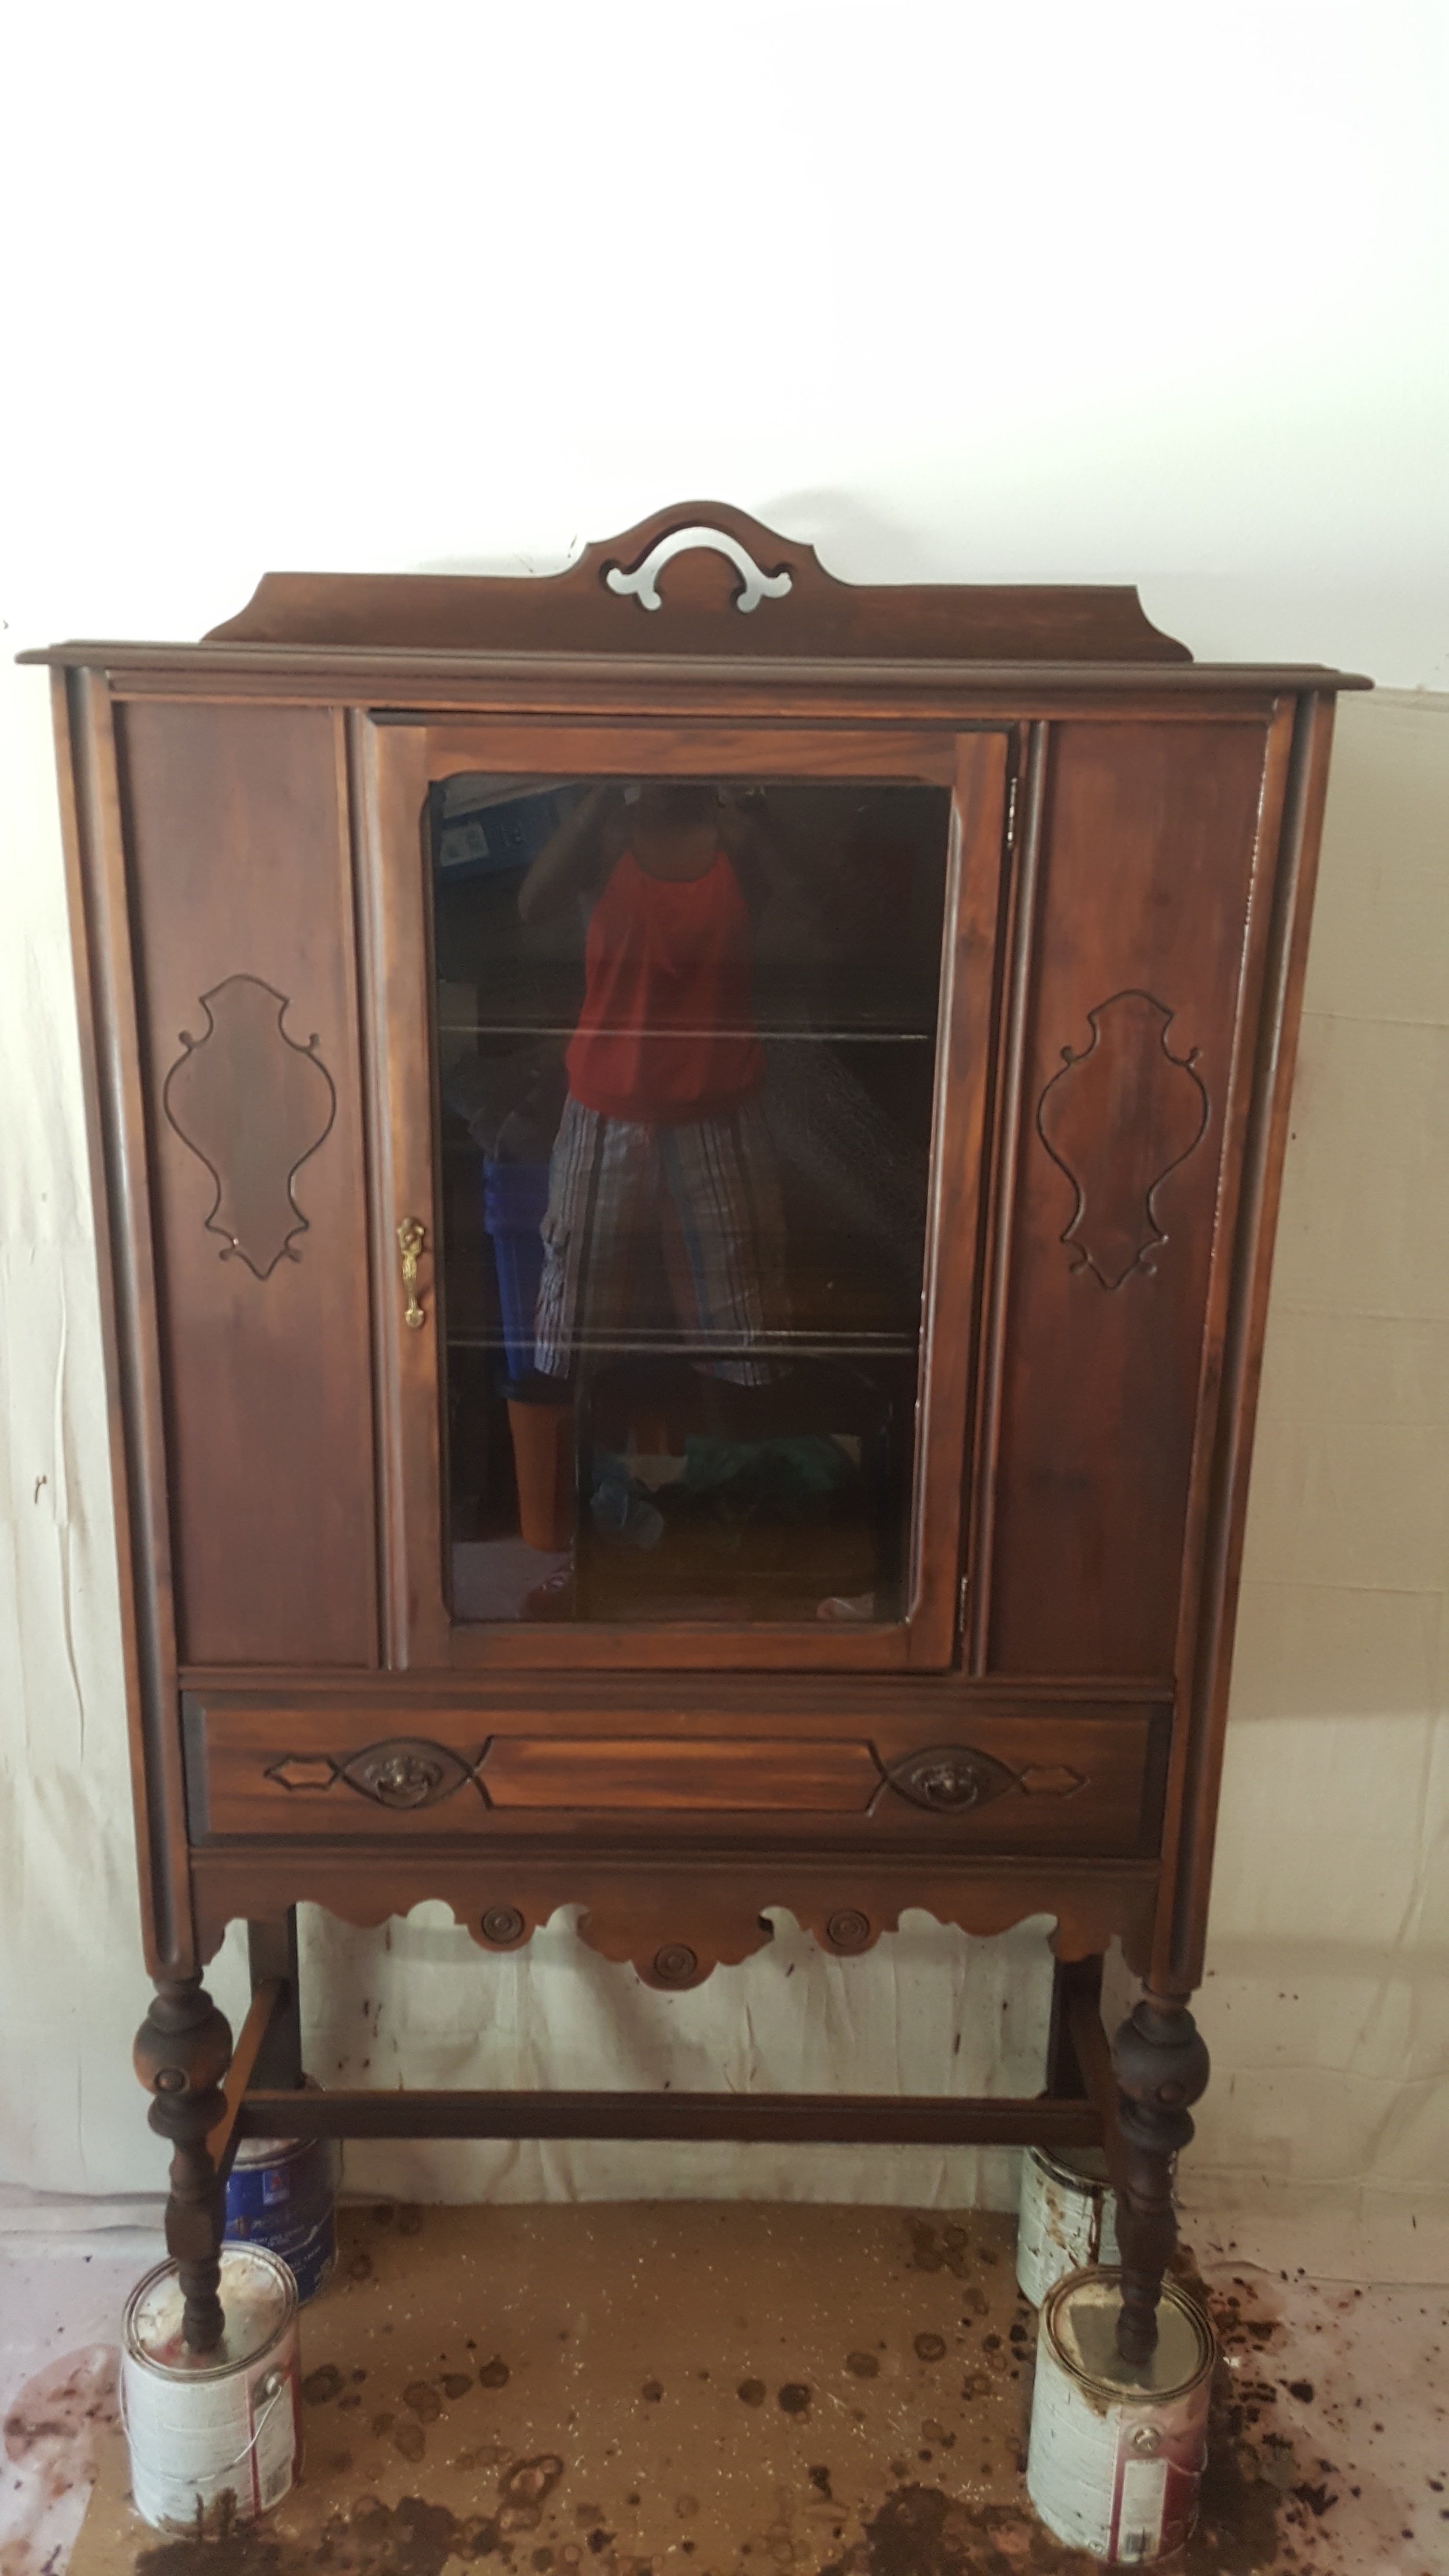
Wow.
I honestly sat there and stared at it for a long time and then I moved around a bit just so I could make SURE I was doing the right thing by painting it. Then...I decided that hey...no matter what...I could always strip the paint off again if I wanted to right? RIGHT.
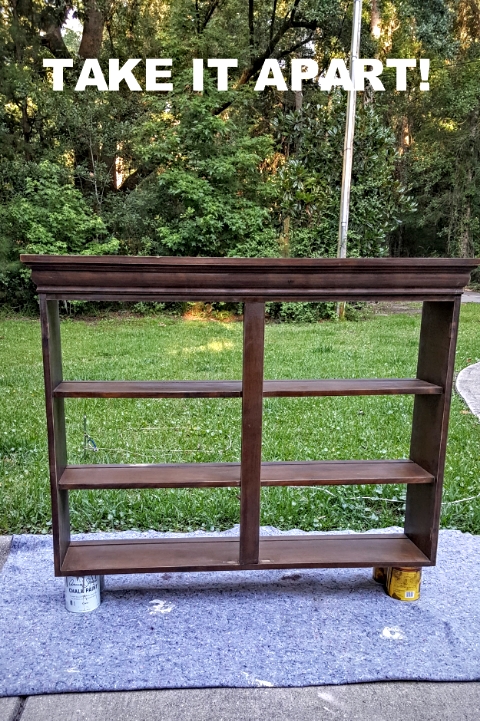
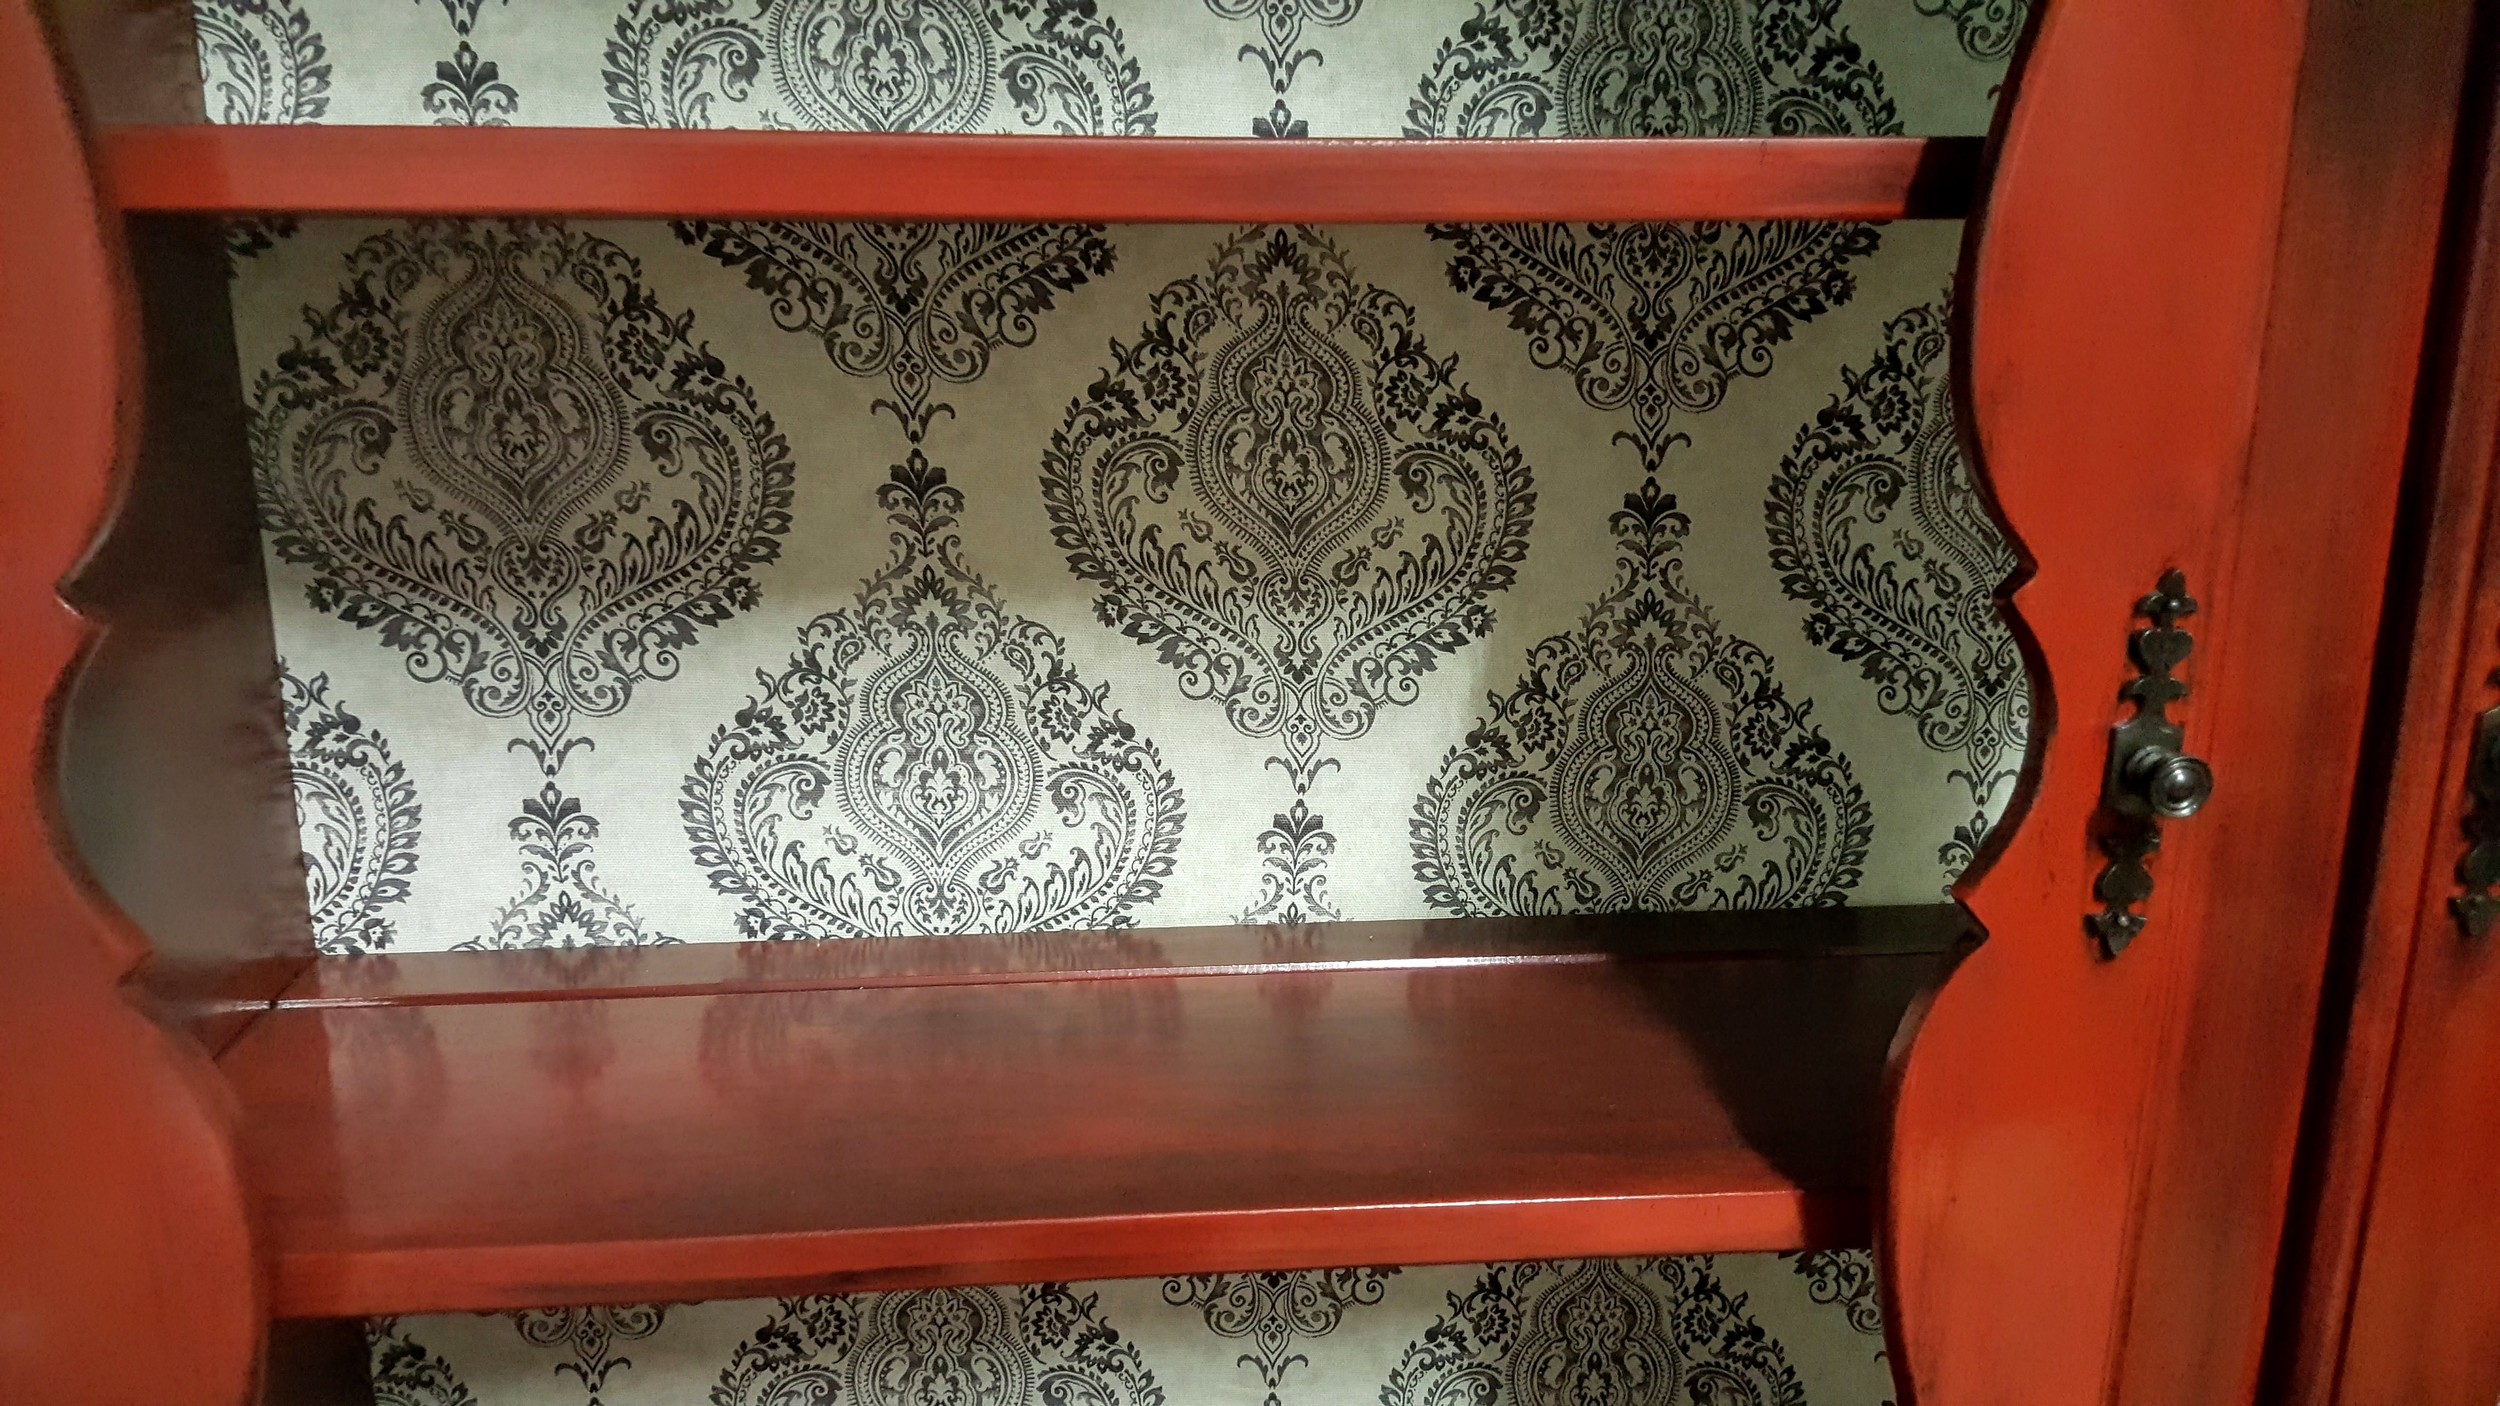
So I took the hardware and door off. Then I collapsed the shelves and got to painting. Since it was such a dark piece anyway...I knew I'd have to do a light color inside of it. The hardware was pretty nice but I wanted it to seriously pop so I used a bit of Antique Gold Rub-N-Buff to make the color really stand out.
I put two coats of paint on it and then let it dry for a full day. Next, I used General Finishes top coat for protection and now I'm sitting here debating whether I should wax it too.
This piece is so lovely to me that yeah...it might already be SOLD too. :)


MATERIALS USED:
Sandpaper
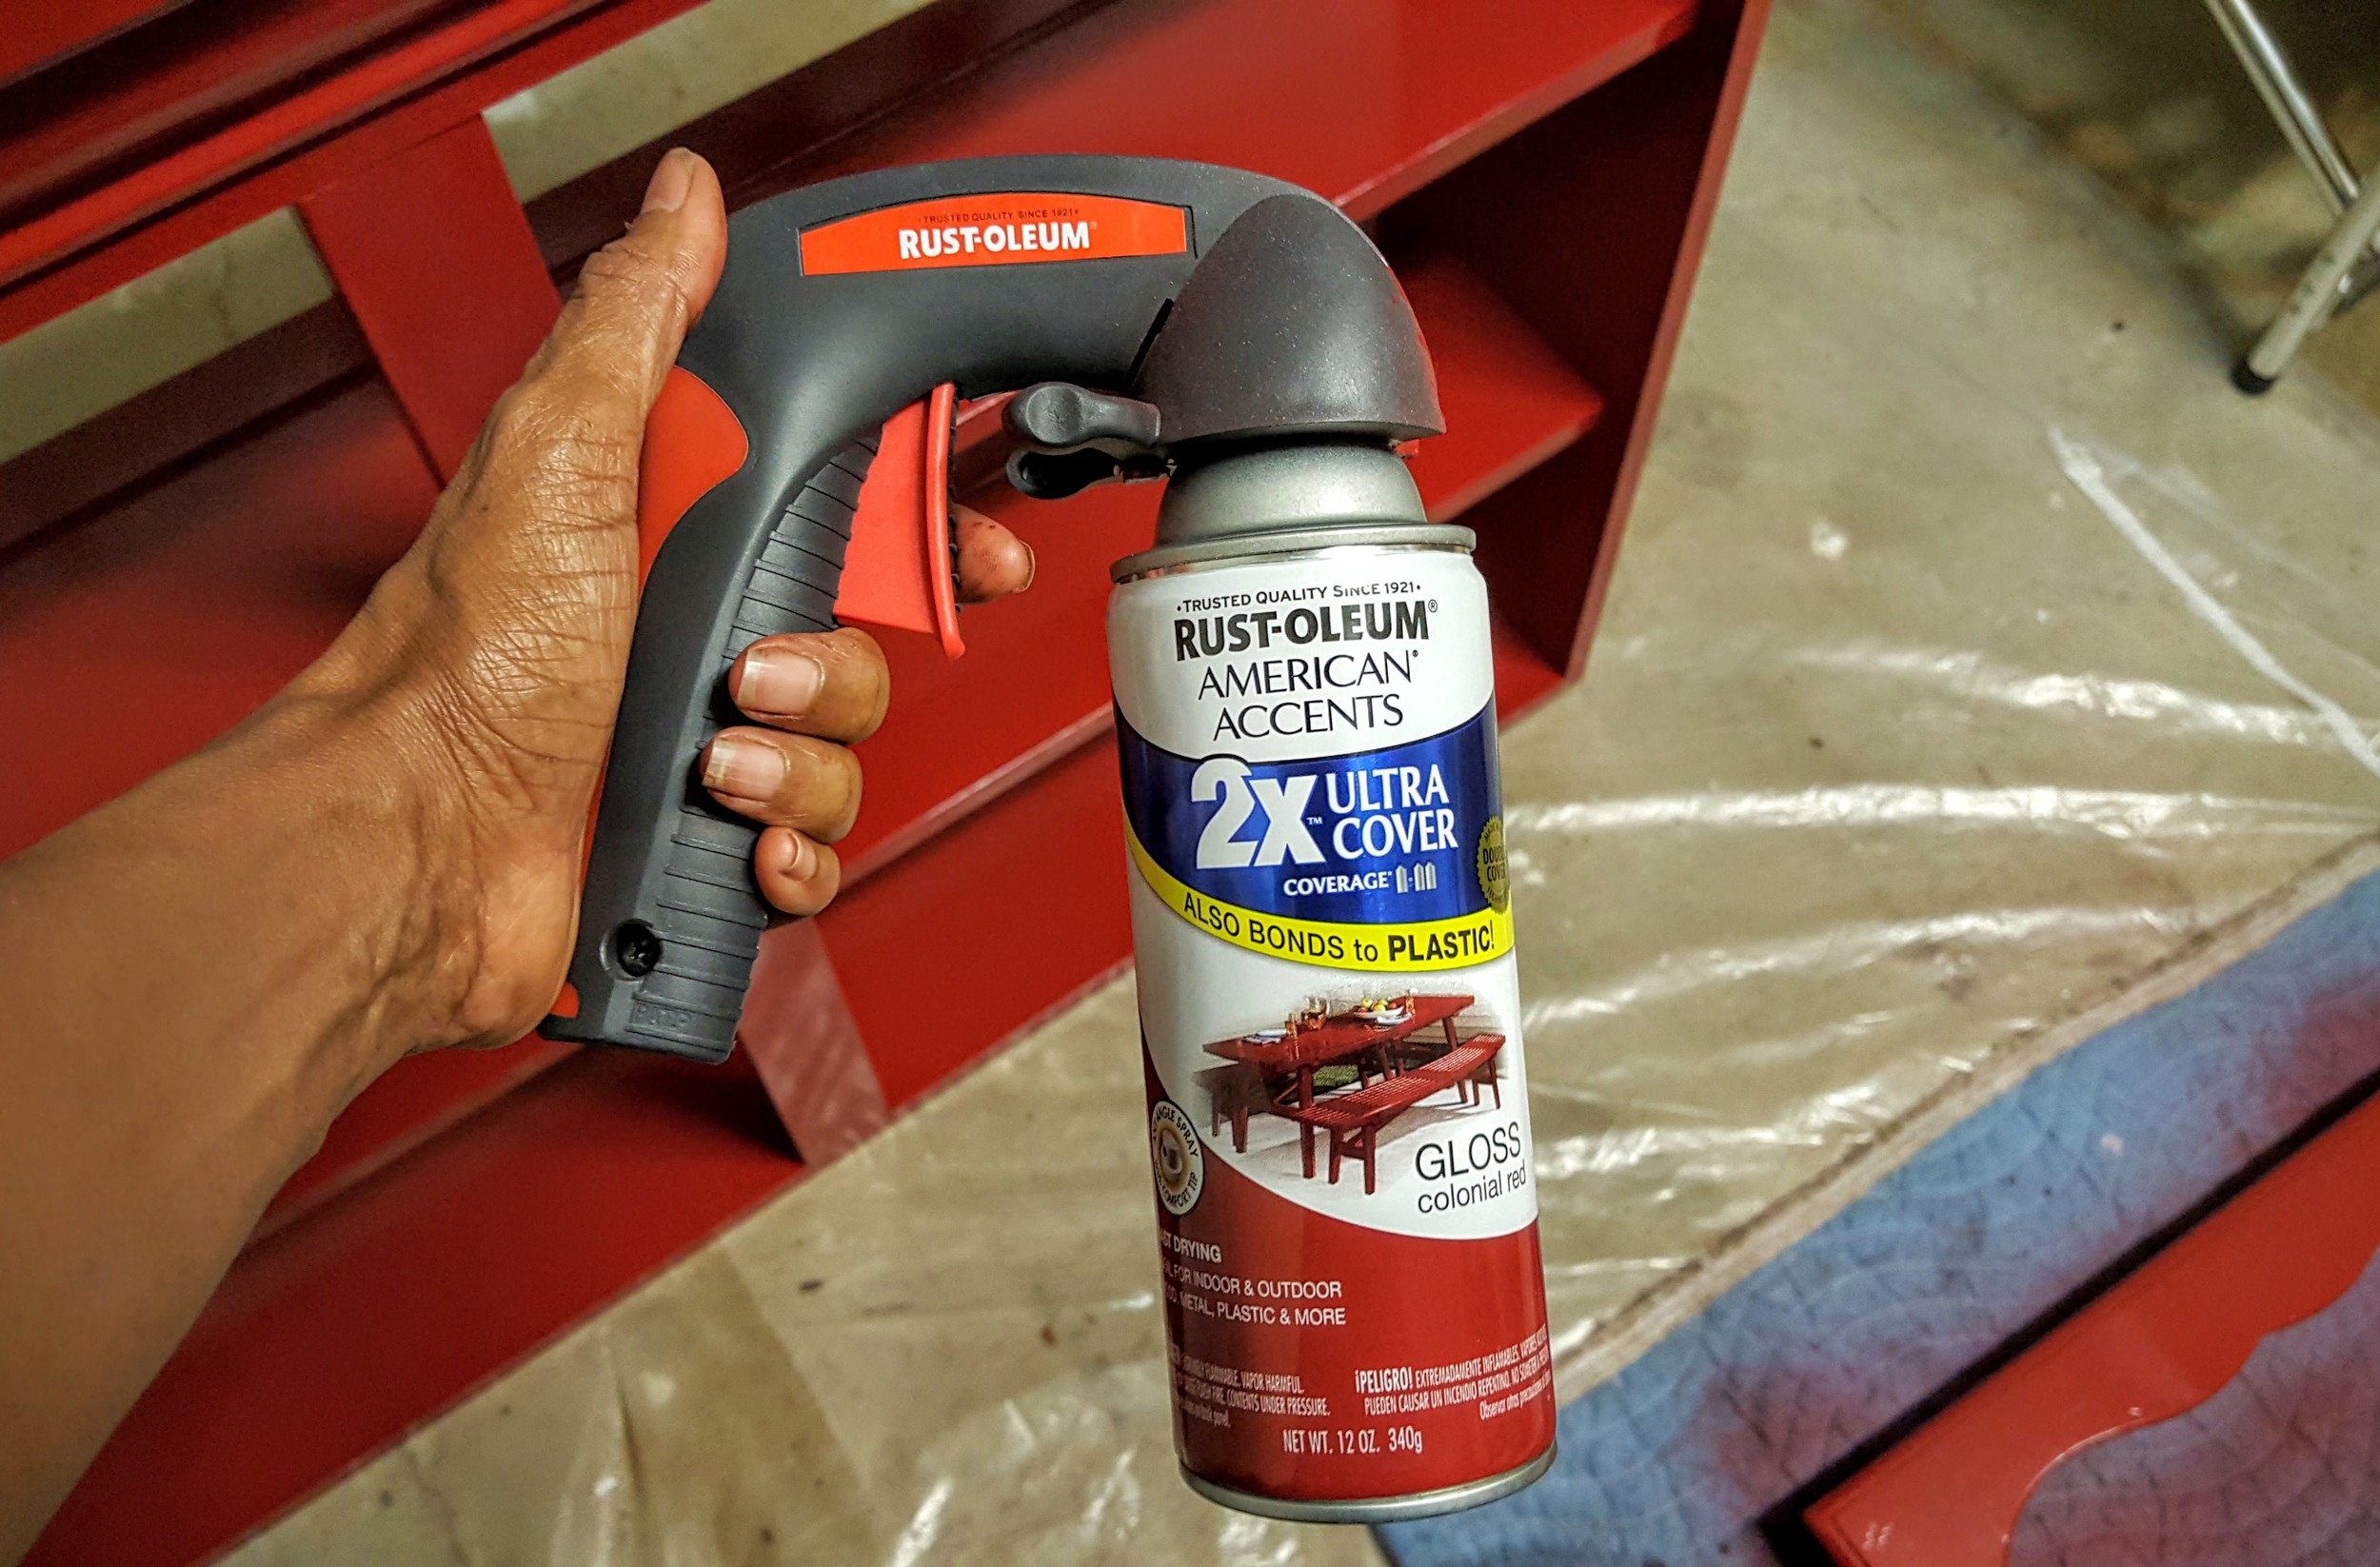
Rust-Oleum Comfort Grip Spray Paint Handle
Rust-Oleum 2x Red Primer (3 cans)
Rust-Oleum 2x Colonial Red Gloss Spray Paint (5 cans)
Rust-Oleum Hammered Black Metal Spray Paint (I've used one can for three projects so far on hardware.)
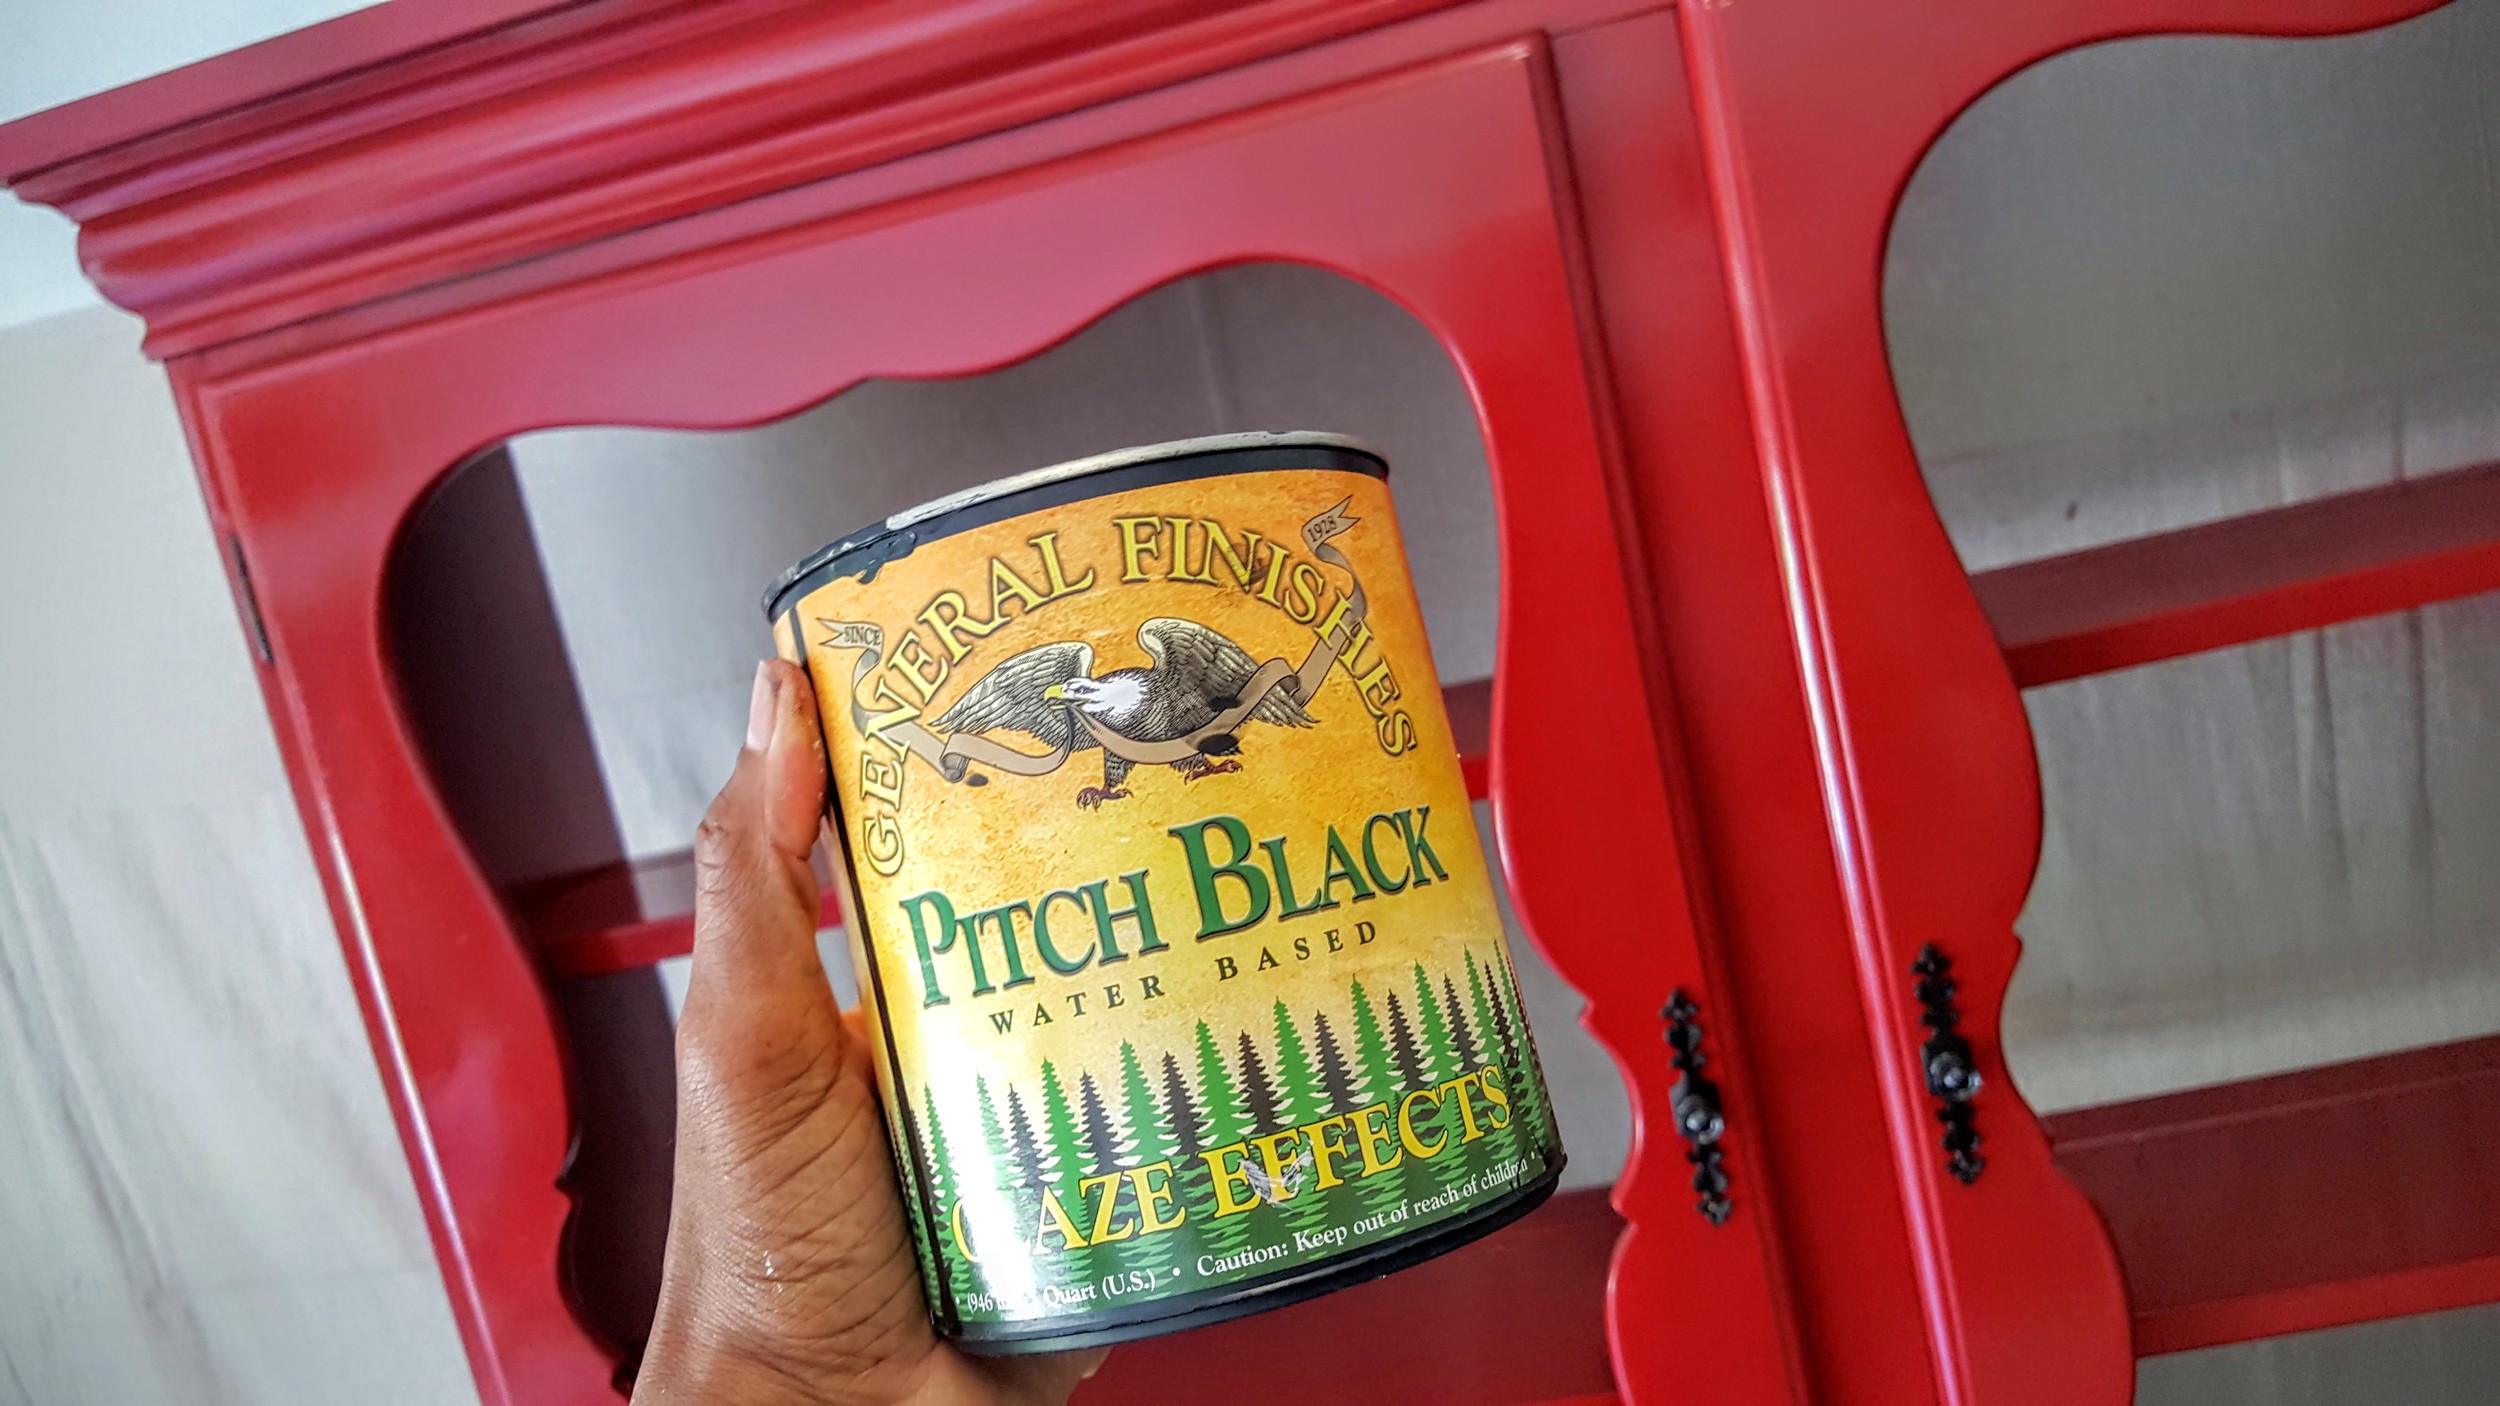
General Finishes Pitch Black Glaze
The before and after of this piece makes me super giddy. I knew I wanted to go with a bold color from jump and I also knew that I wanted it to look smooth like a showroom piece at Ethan Allen so I decided to spray paint it!
Steps to get a super smooth finish?
1. Vacuum and wipe down with a bit of dish liquid in a bucket of water. Don't wet it, mind you...but wipe it clean with a well-wrung towel. Use Goo Gone to remove anything sticky, hard or icky. Then...let it dry completely.
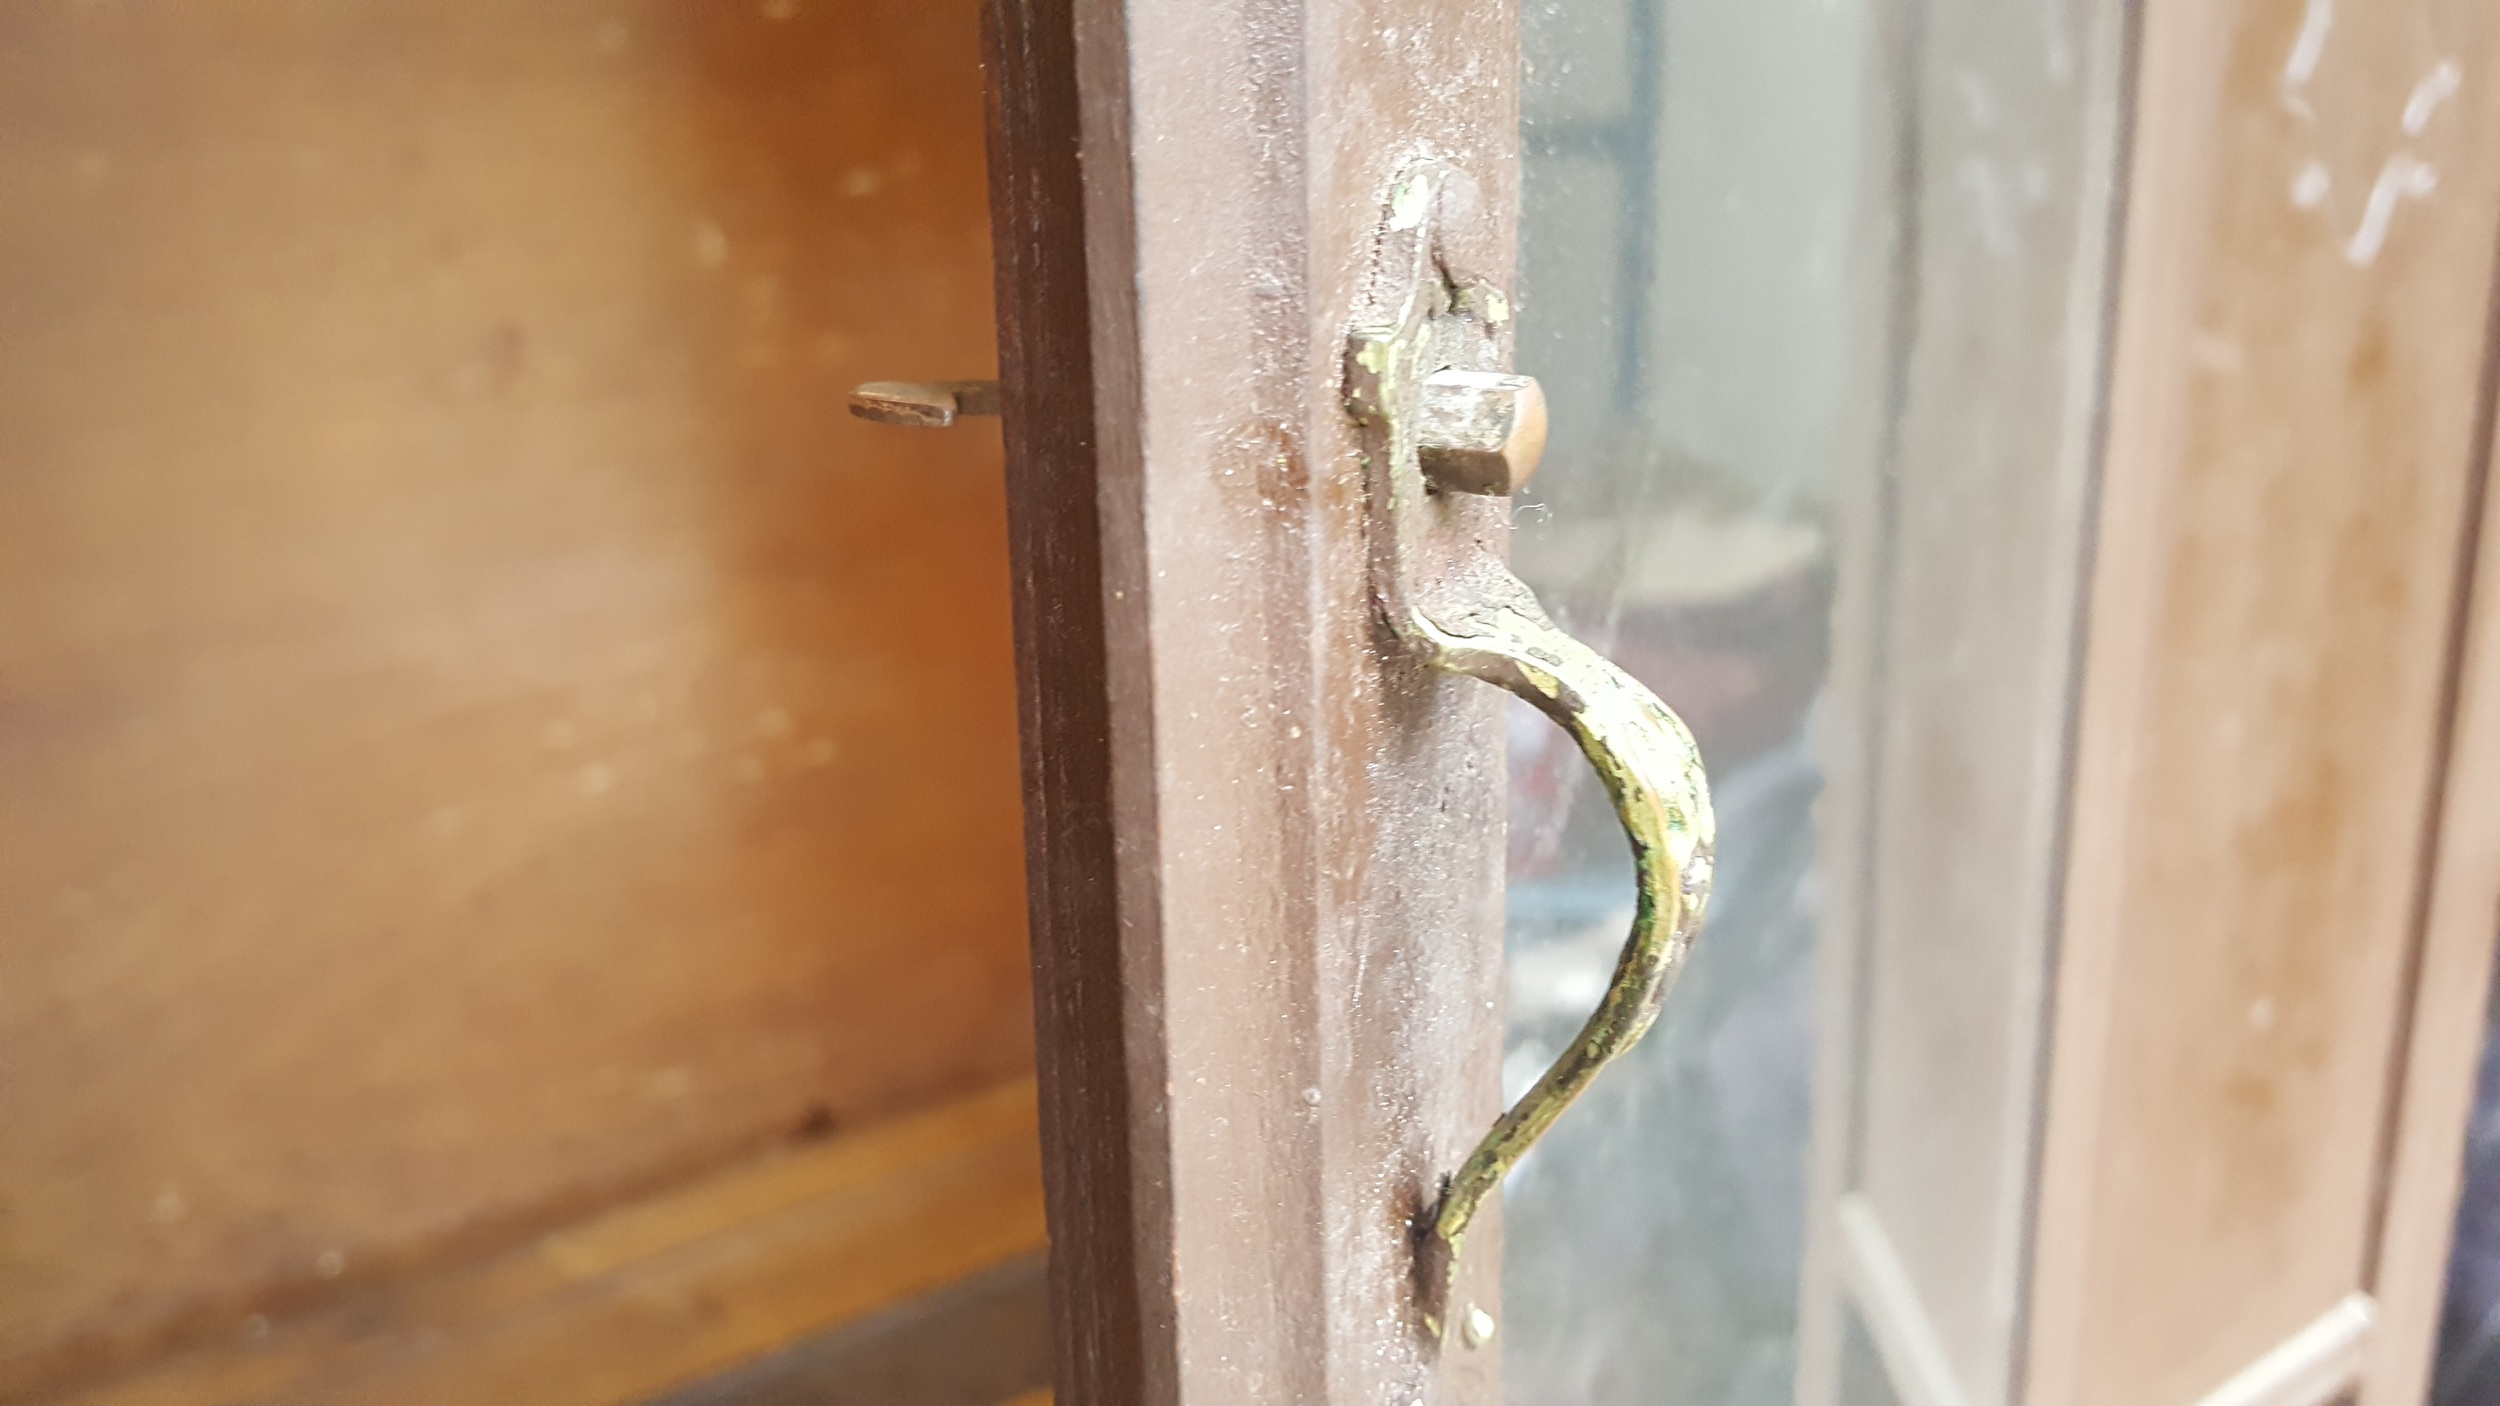
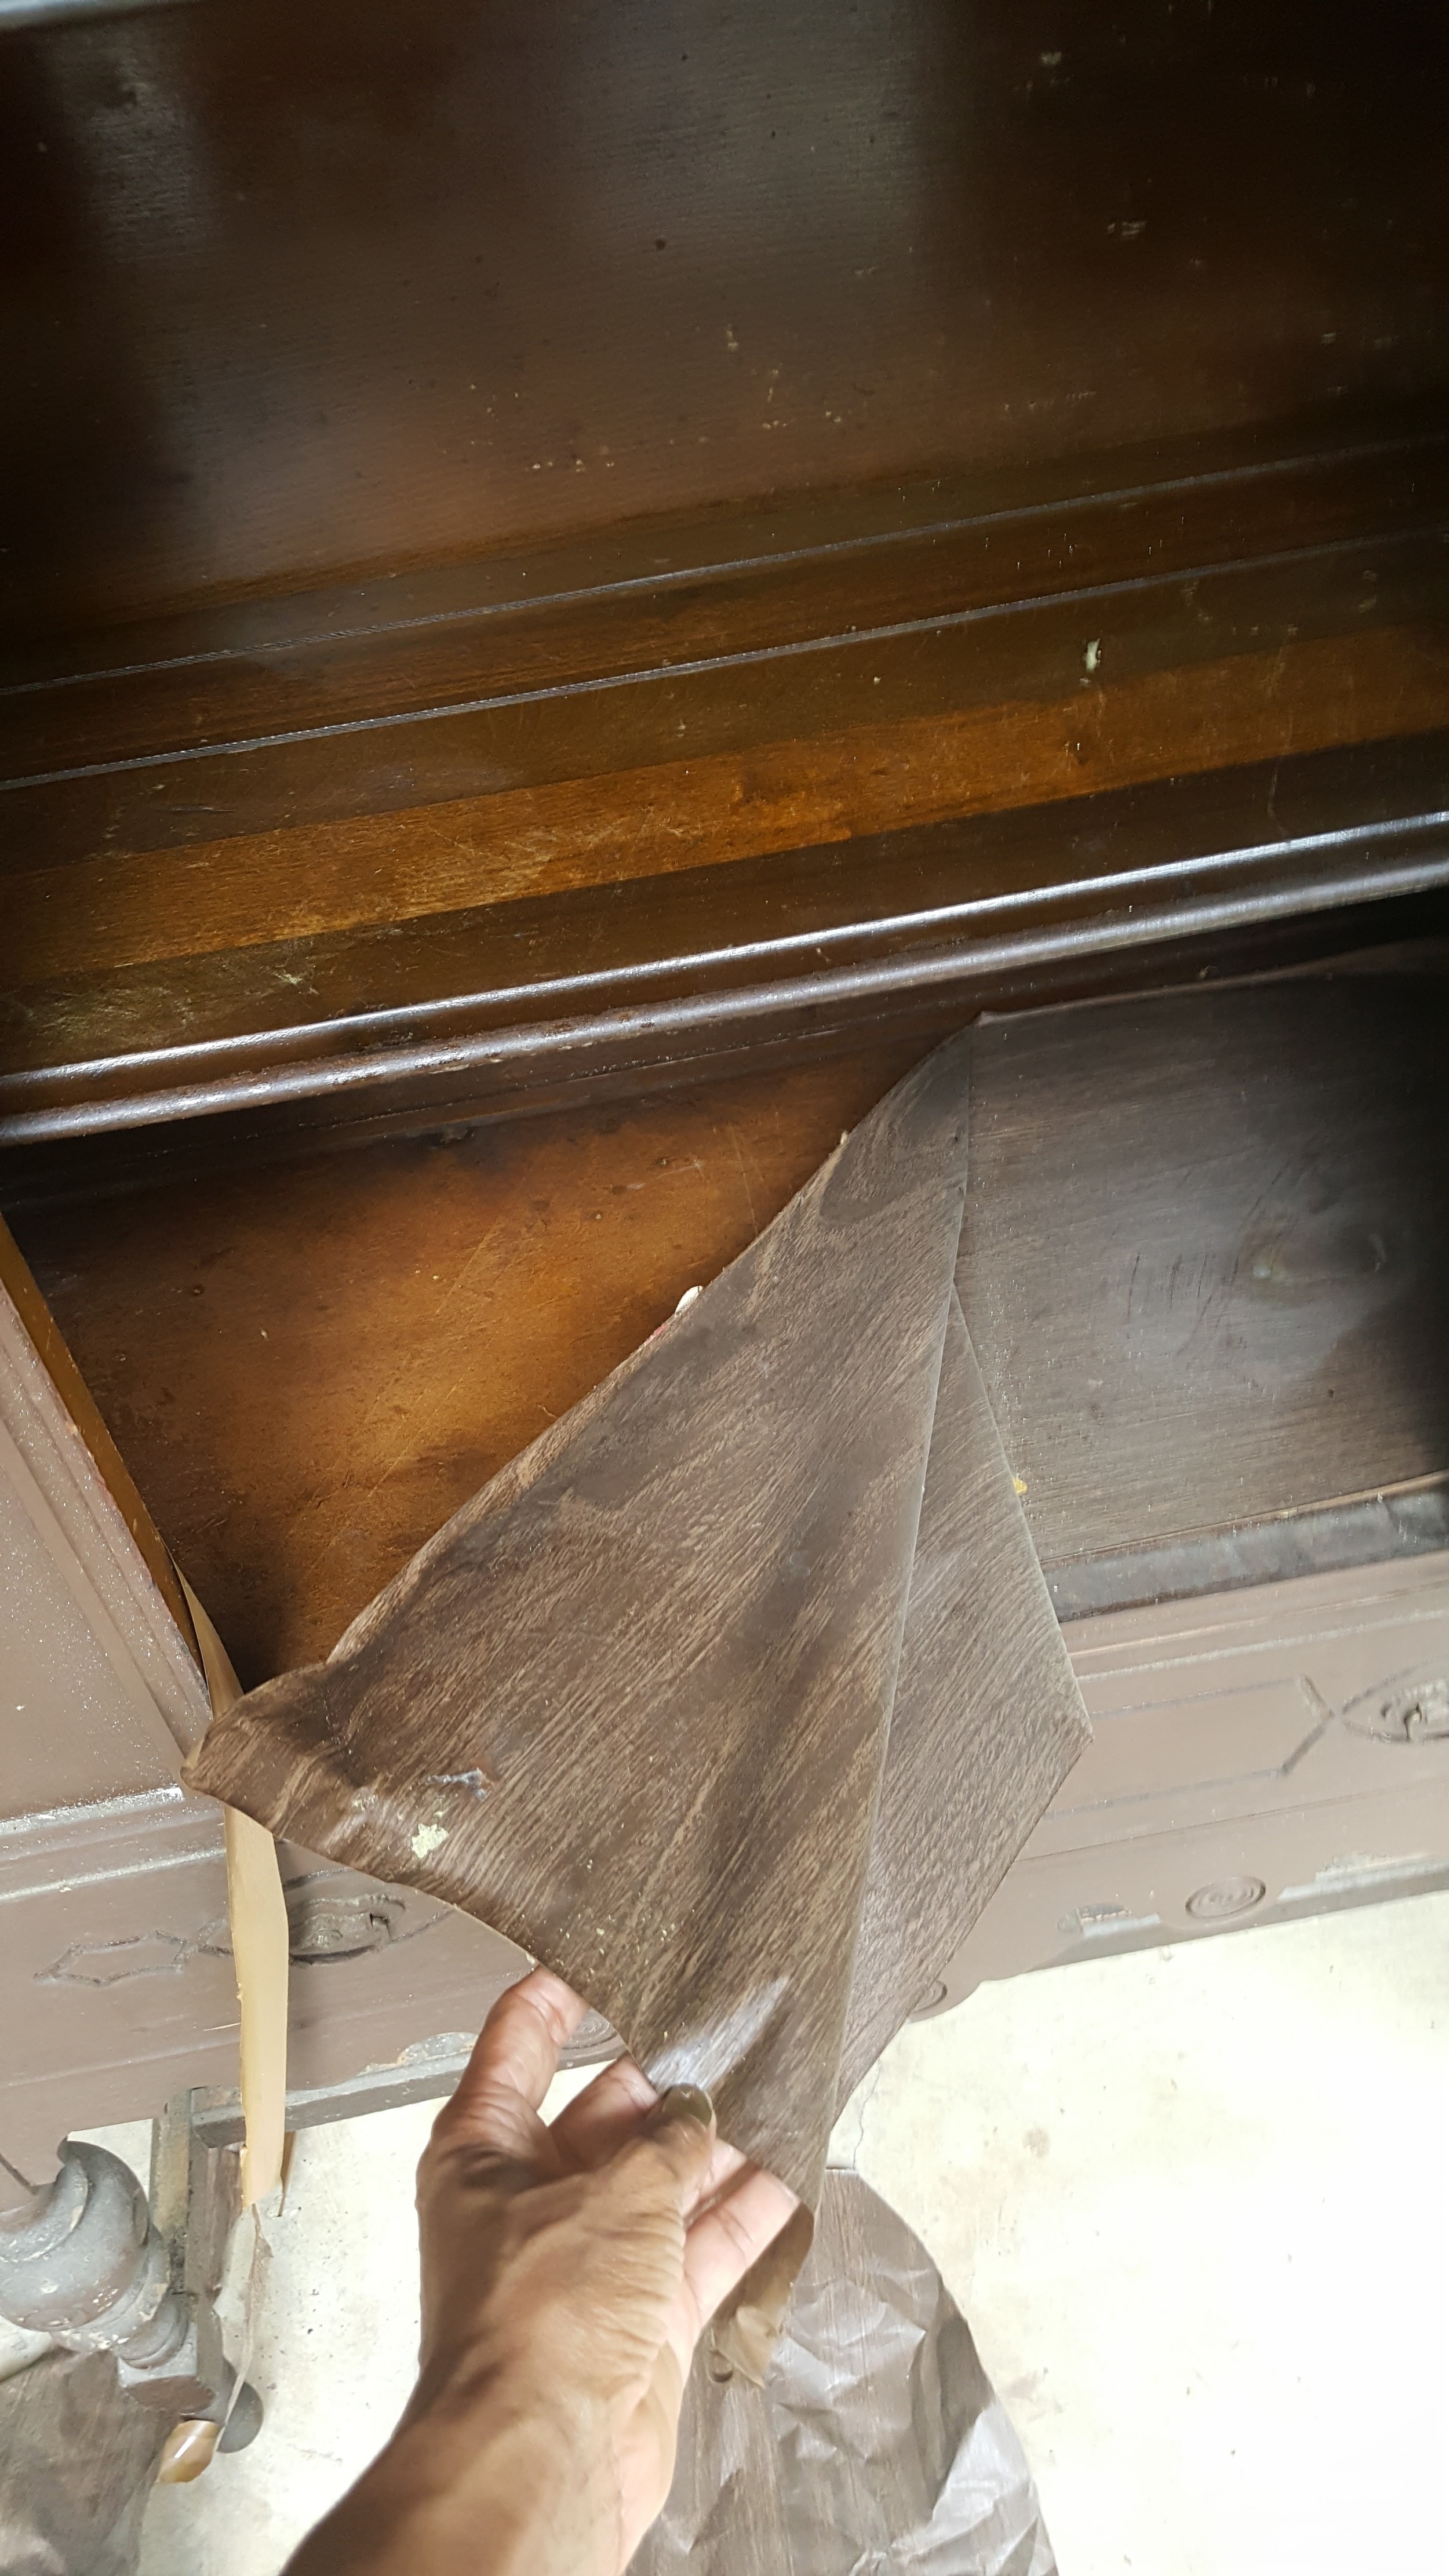
2. Take it apart. No...seriously...remove all screws, put hardware by type in Ziploc bags so you don't lose them and keep them together so you can get them ready to be painted too if you're using them. Take the back off carefully using a hammer, pliers and a flat tool. Either paint or add a piece of fabric using a spray adhesive as I did.
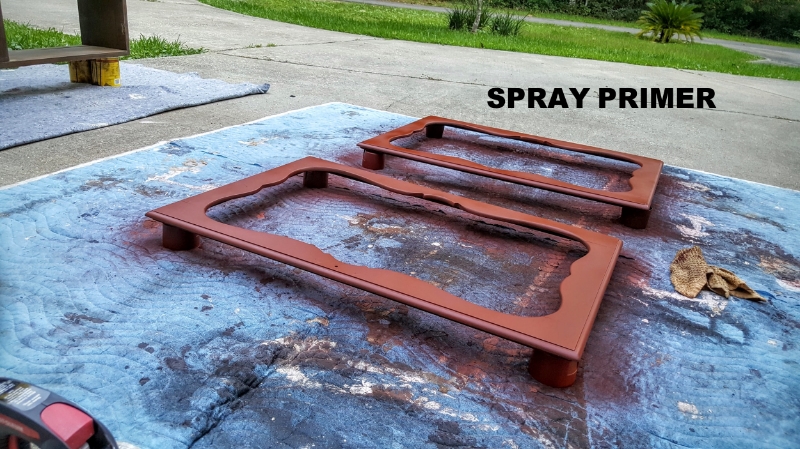
3. Use paint cans and spray paint tops to sit pieces on and sand. Wipe down with damp cloth and then prime after it dries. (I used a spray primer for red paint.)
4. One coat of primer on all pieces if you're using the same kind of 2x primer I used.
5. Let dry COMPLETELY. I didn't paint until the next day.
6. Spray paint using the spray paint handle so your finger doesn't get in the way or get tired from depressing that lil' thingy. You should have a good rhythm and method since you spray painted the primer on. Hold the can back far enough where you can do light sprays without paint runs. Just spray evenly and lightly. Follow the directions and apply your second coat when the can says to. LOL!
7. Remove rust with a rust remover, clean, dry and spray paint hardware. Let dry completely.
8. If you're going to add a glaze, as I did, do it the next day after the paint has dried completely and you've corrected any mistakes or paint drips. (Sand, wipe clean, repaint.) Glaze one section at a time so your glaze doesn't dry on you making it too dark in some areas. If you love the super shiny, super bright pop of color...don't glaze. For example...if I were to do a dresser or end table for a little girl's room in a pretty pink or raspberry I wouldn't glaze it. The color would just be so happy to me as is. LOL!
9. Let dry completely and add a coat of polycrylic to any part where you'd sit stuff on like shelves and the top of the bottom piece. This is just an added layer of protection. I actually used the spray polyurethane for the first time on this piece and I adore the satin finish it gave.
10. Put it back together. Add the hardware. Sit back and admire your handiwork with a smug smile knowing that BAAAAAAAAAABY! YOU DID THAT!
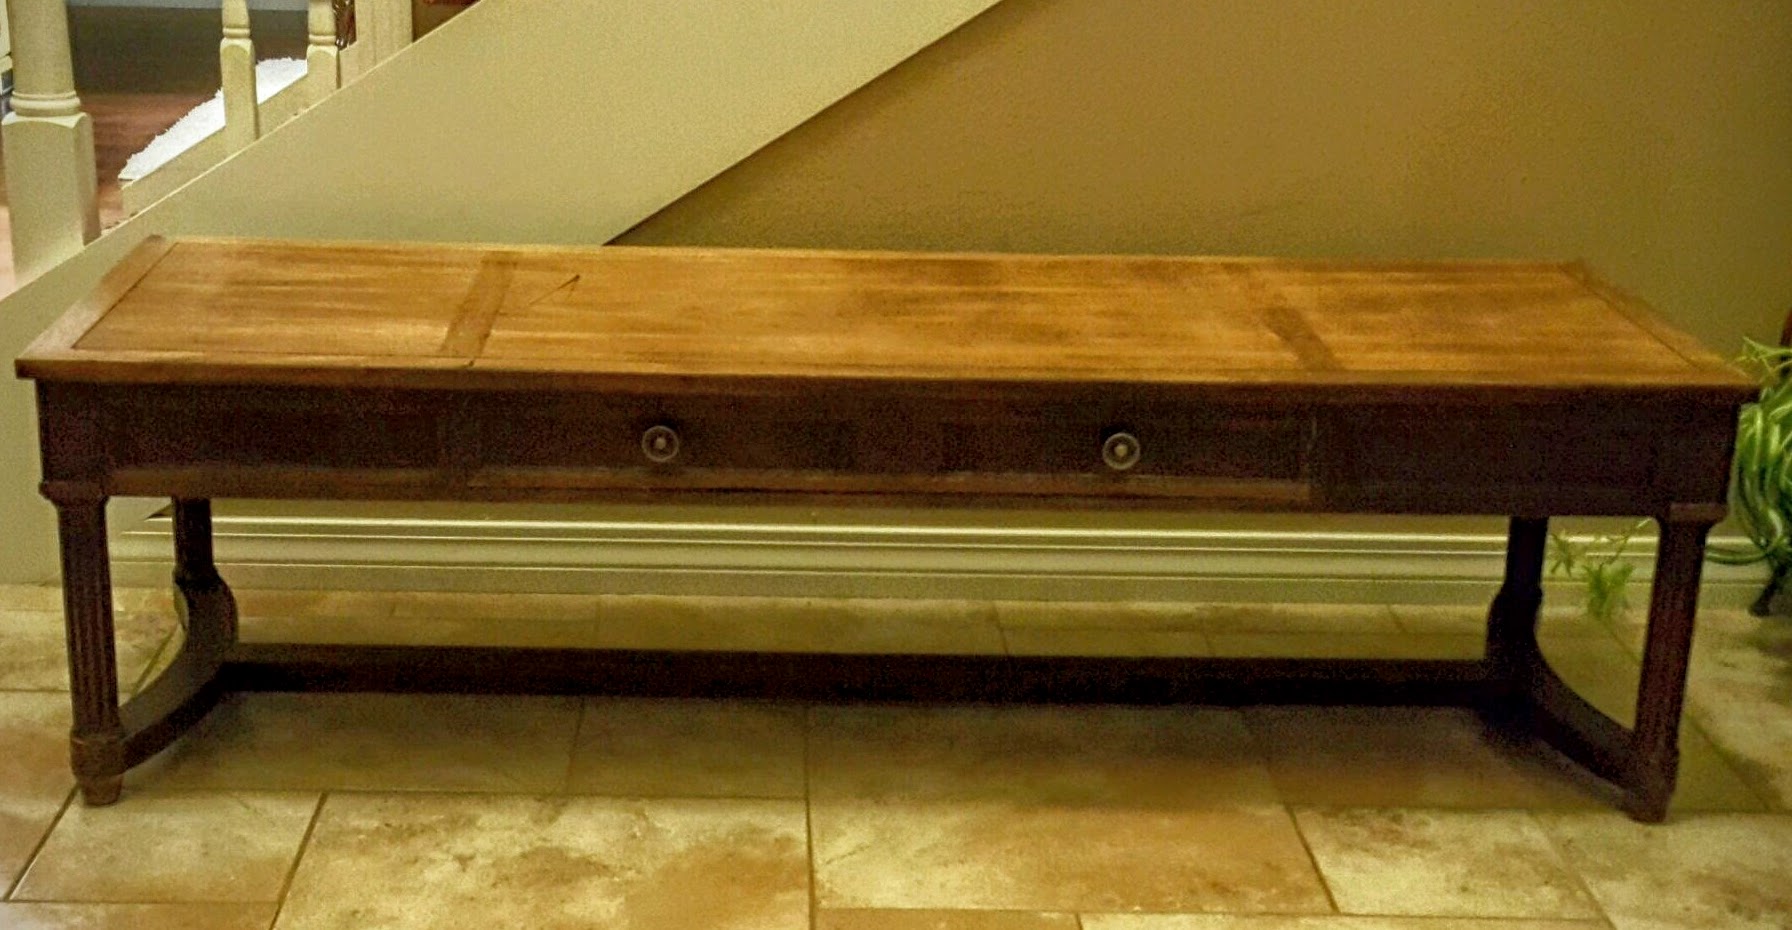
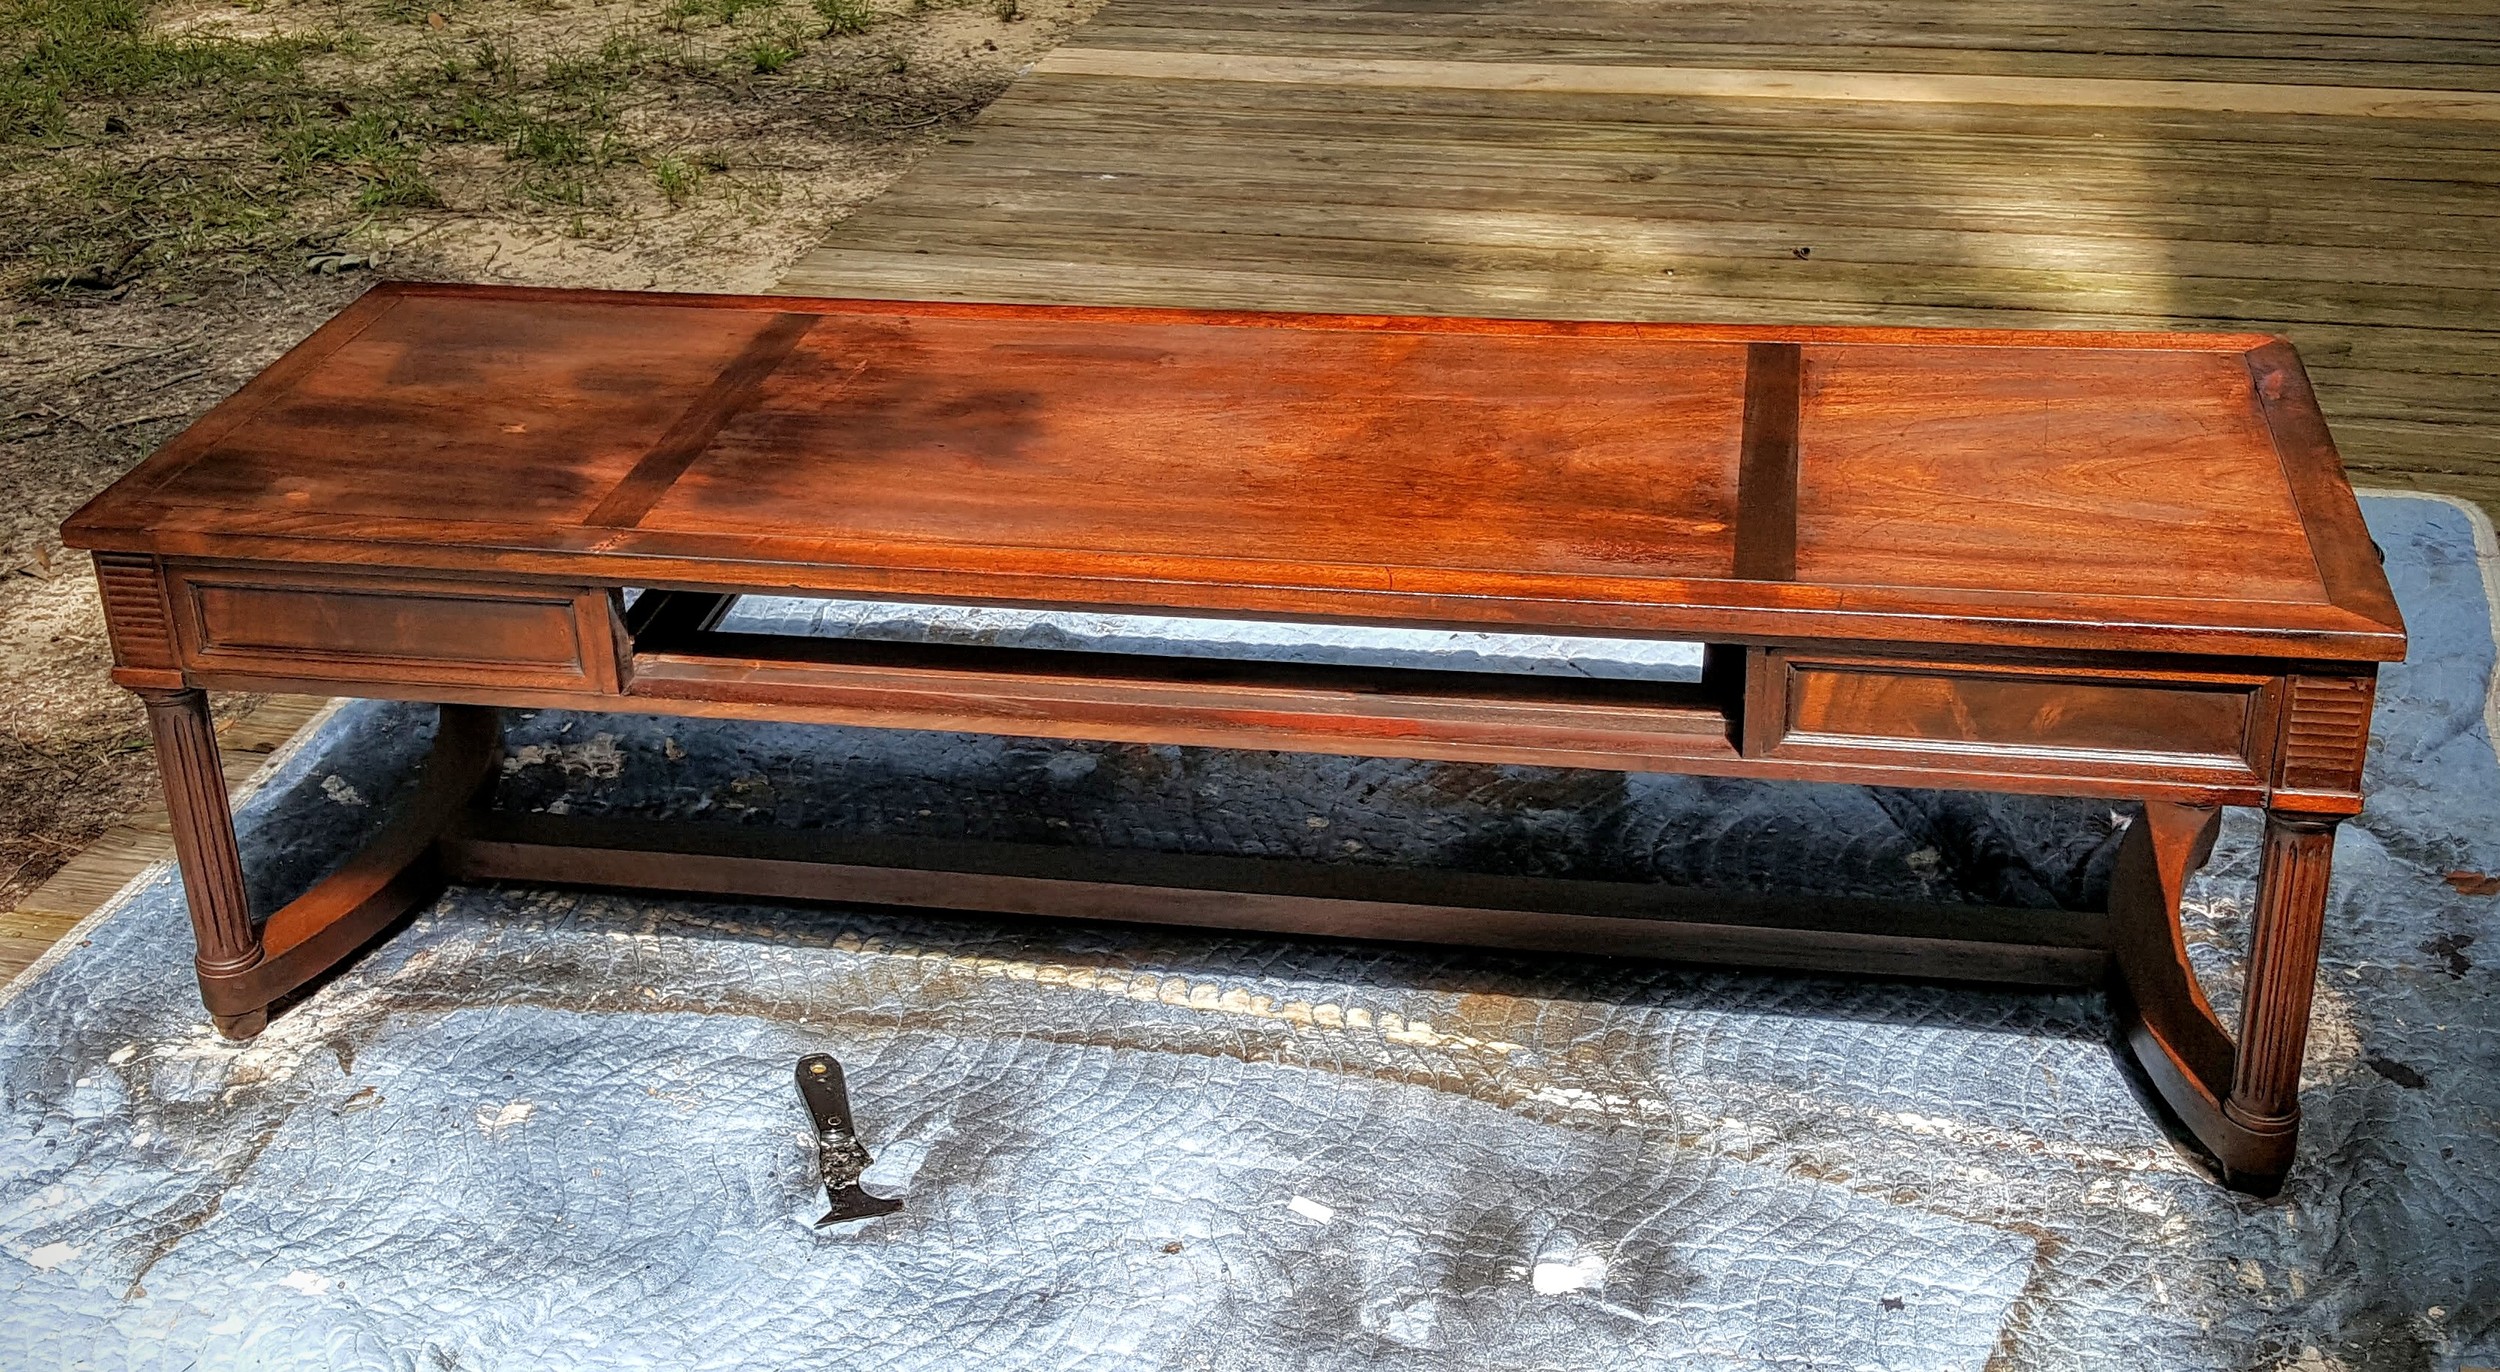
This piece just might be my favorite so far. Seriously. The lines and heft of it are just so perfect that it makes me smile. I know every inch of this table as I've stripped it and started over twice because I love it so. I just had a vision for it you know and I knew I could make it look like exactly what I wanted it to look like.
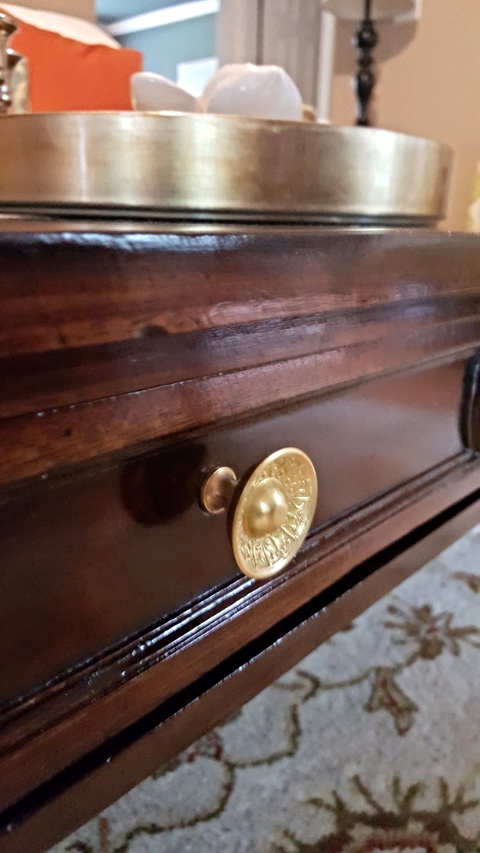
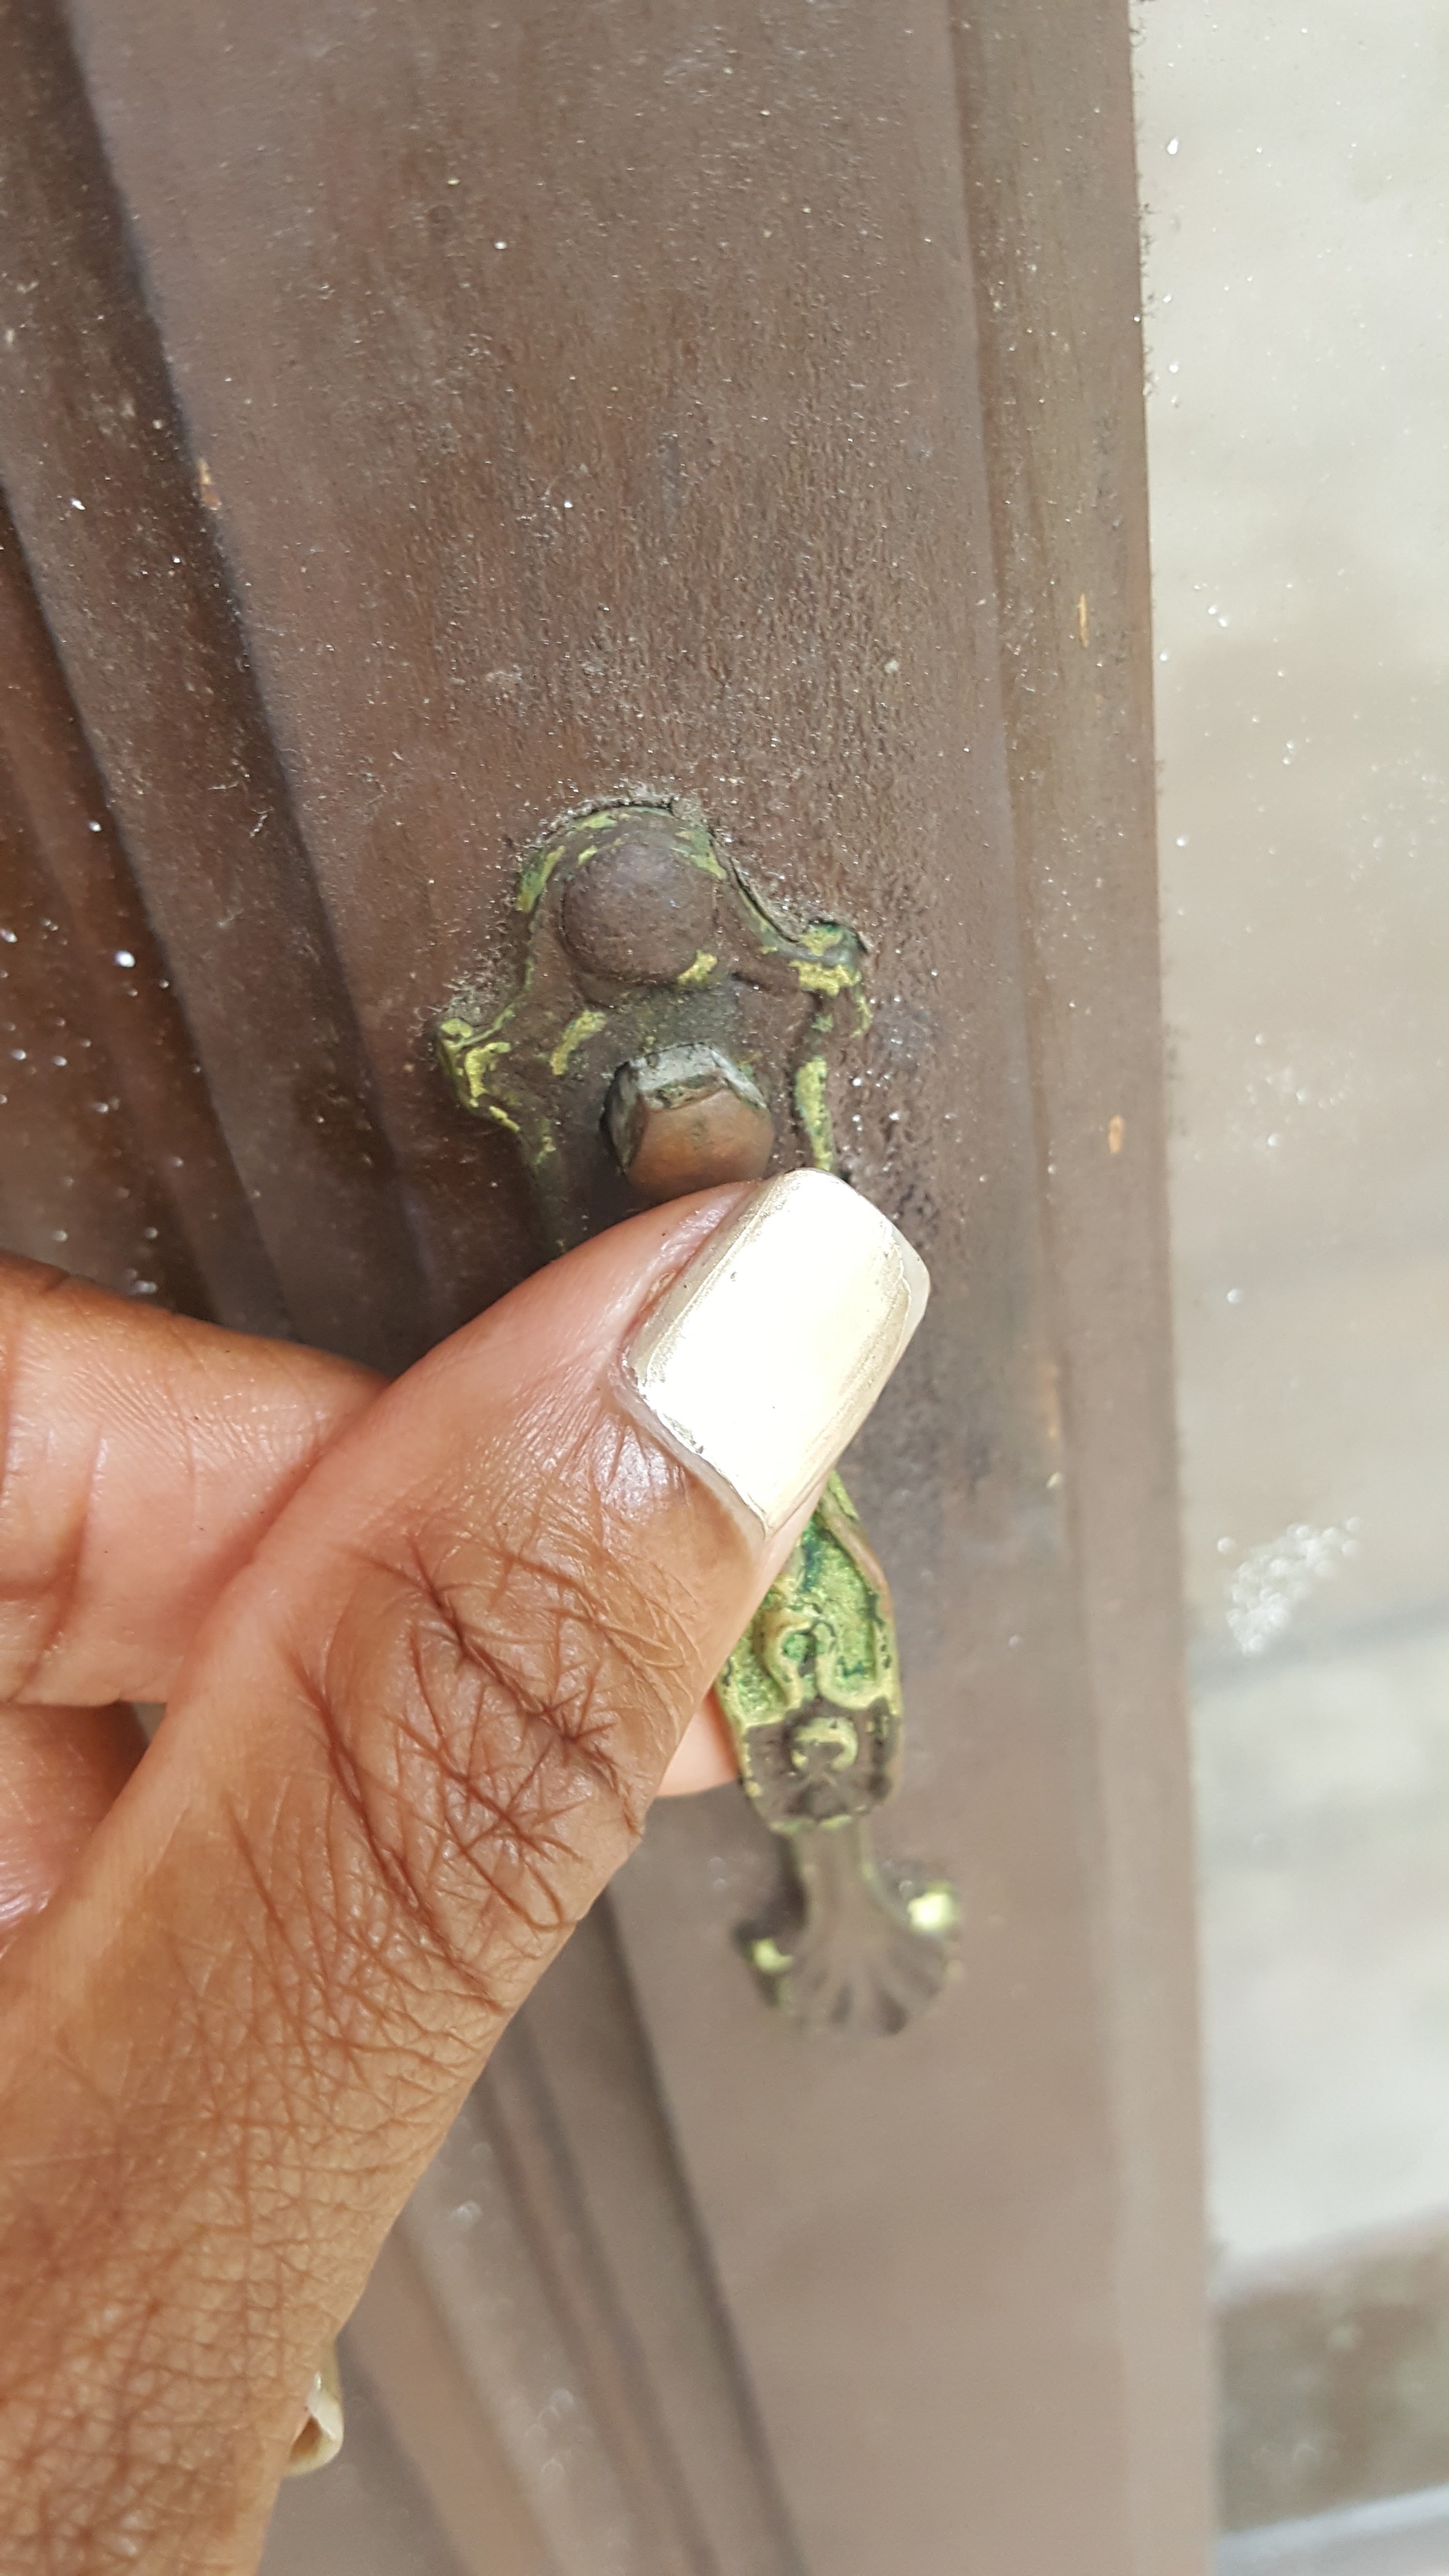
The brass hardware is original and took 3 separate scrubbing cleanings to get all of the old grime off it with Brasso, 0000 steal wool and using cheesecloth as a polishing cloth. The scratches on top have been mostly buffed out and the deeper gouges were filled in with stainable wood filler so the top is smooth to the touch. I love this piece so much, I would want it to have a custom glass top cut to put on top of it for protection.
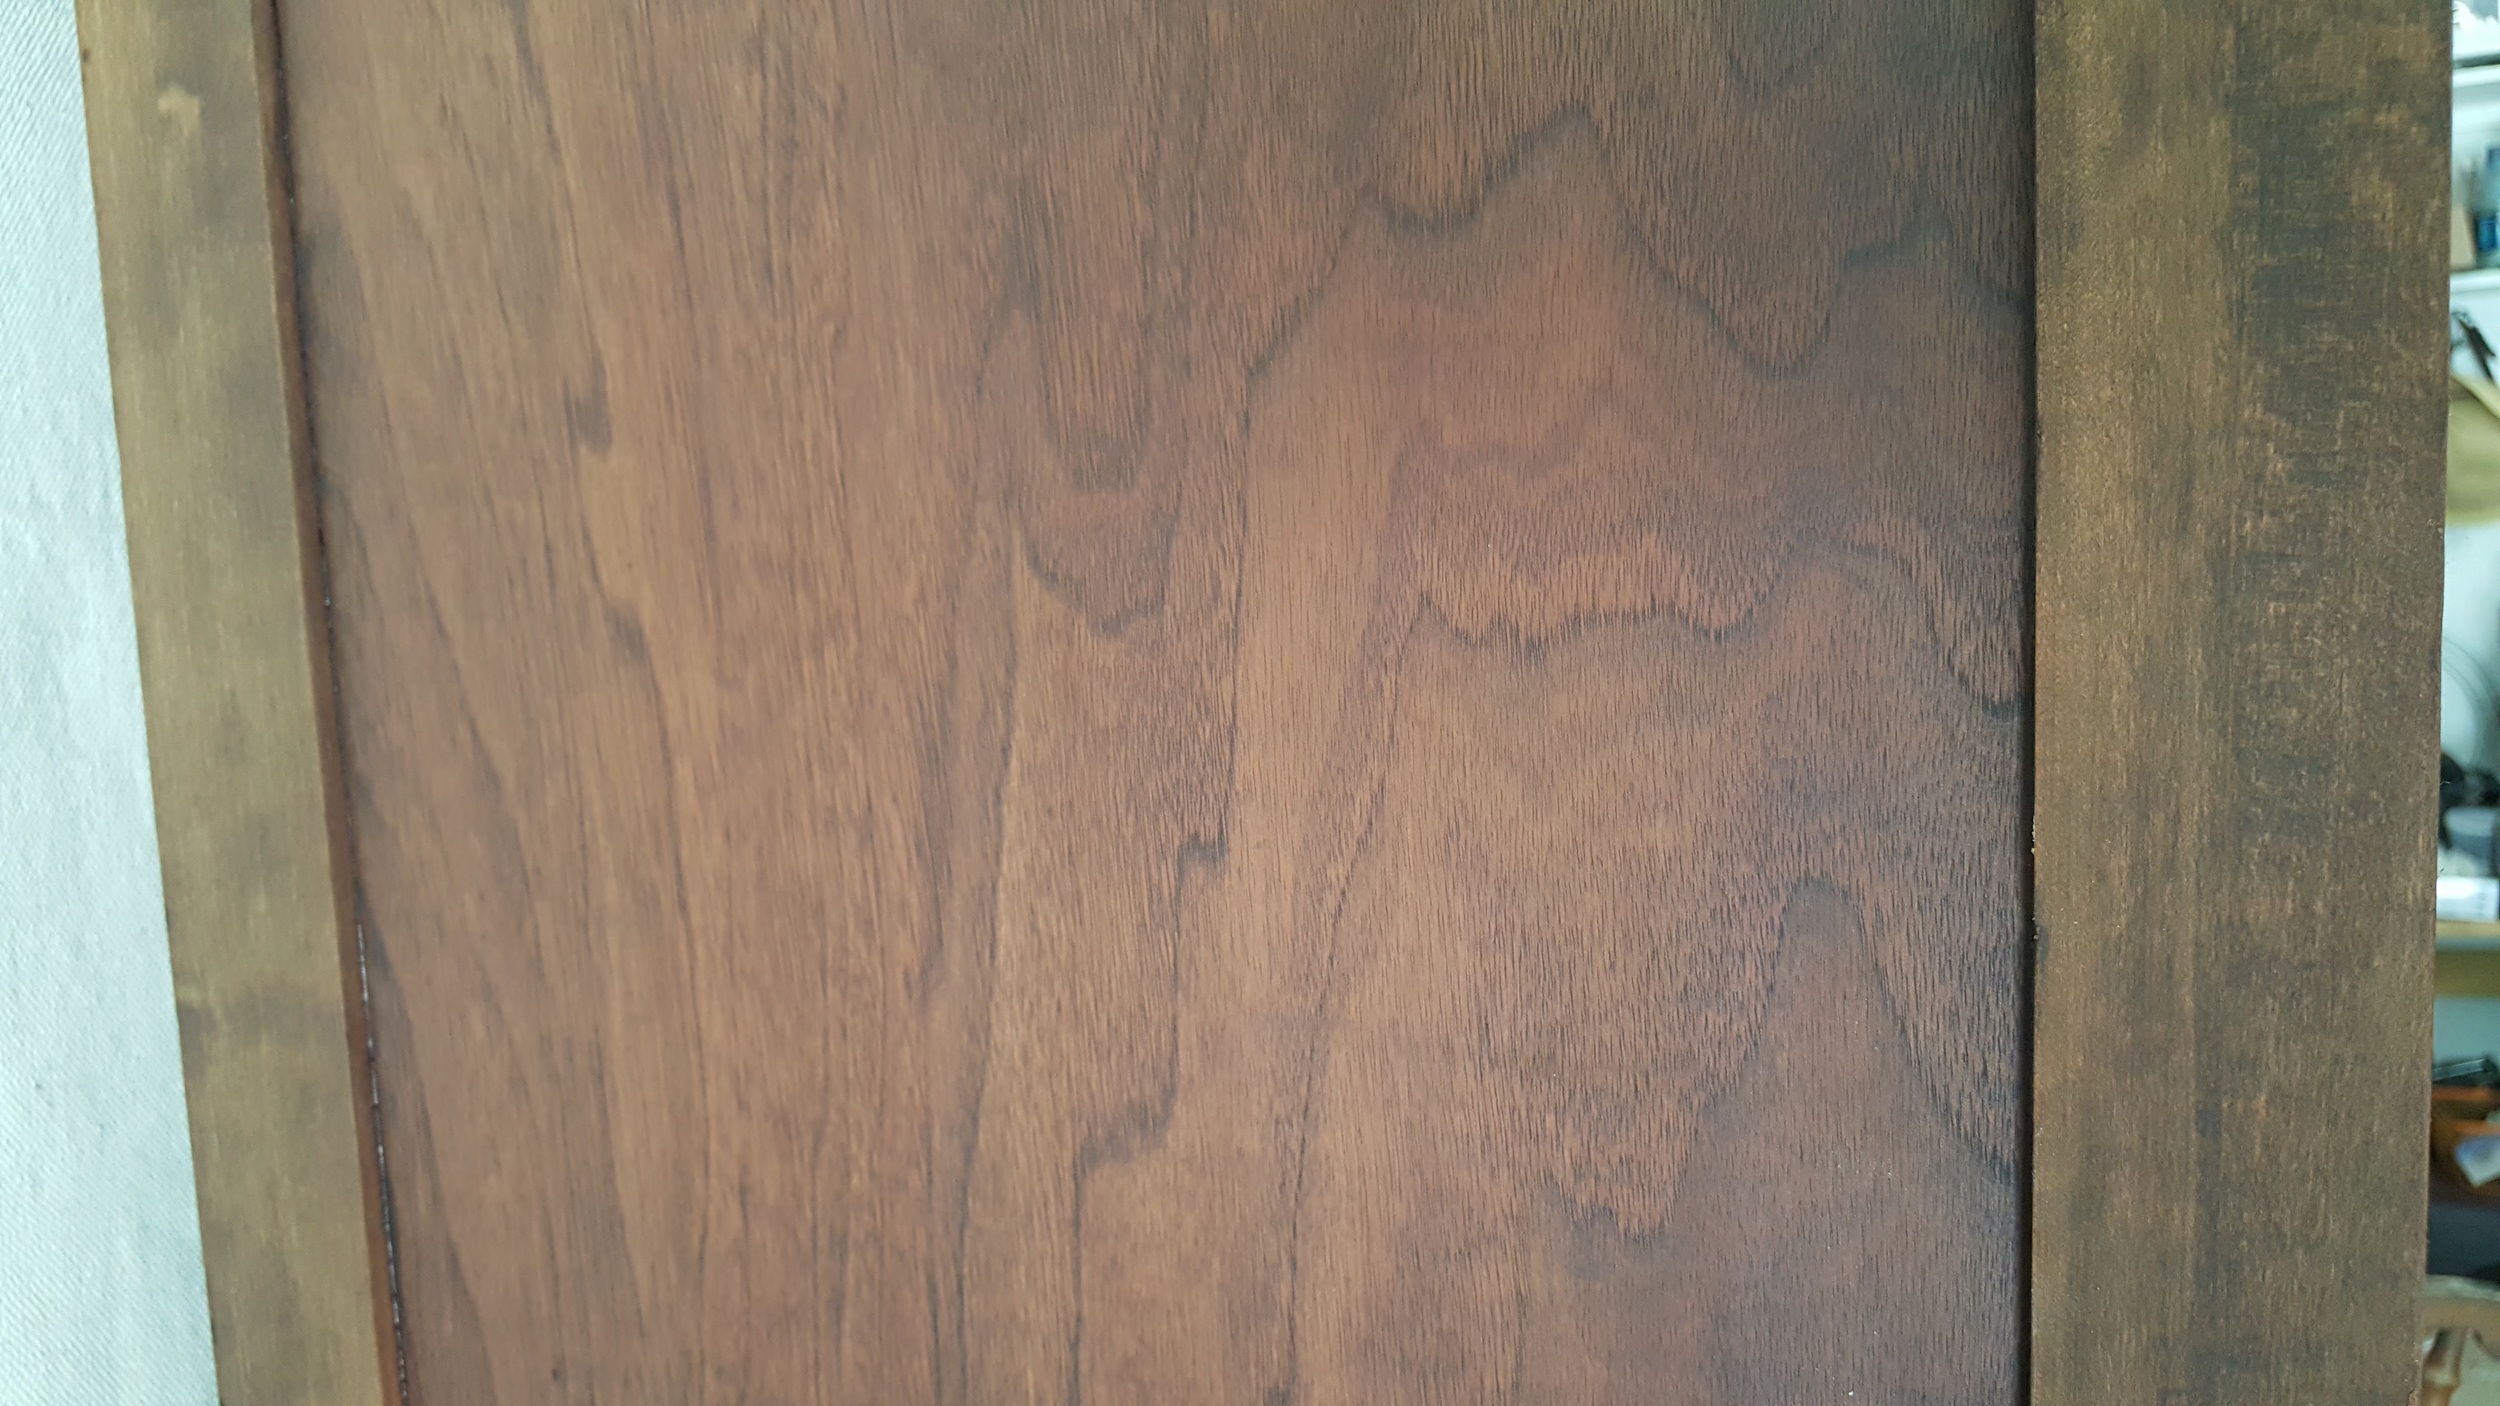
The finished piece has been stripped with Citri-strip, sanded by hand with a 120 grit sandpaper along the base because of the carved details and sanded using my new Porter Cable electric palm sander (The Robinator is awesome!) on the top. Then it was stained twice with light sanding in between coats using 220 grit paper and Minwax Red Mahogany stain. Finally, two protectant coats of Minwax Polyurethane in clear satin were applied (first coat with a good bristle brush, final coat with sponge brush) with a light 220 grit sanding after first coat dried for 24 hours.
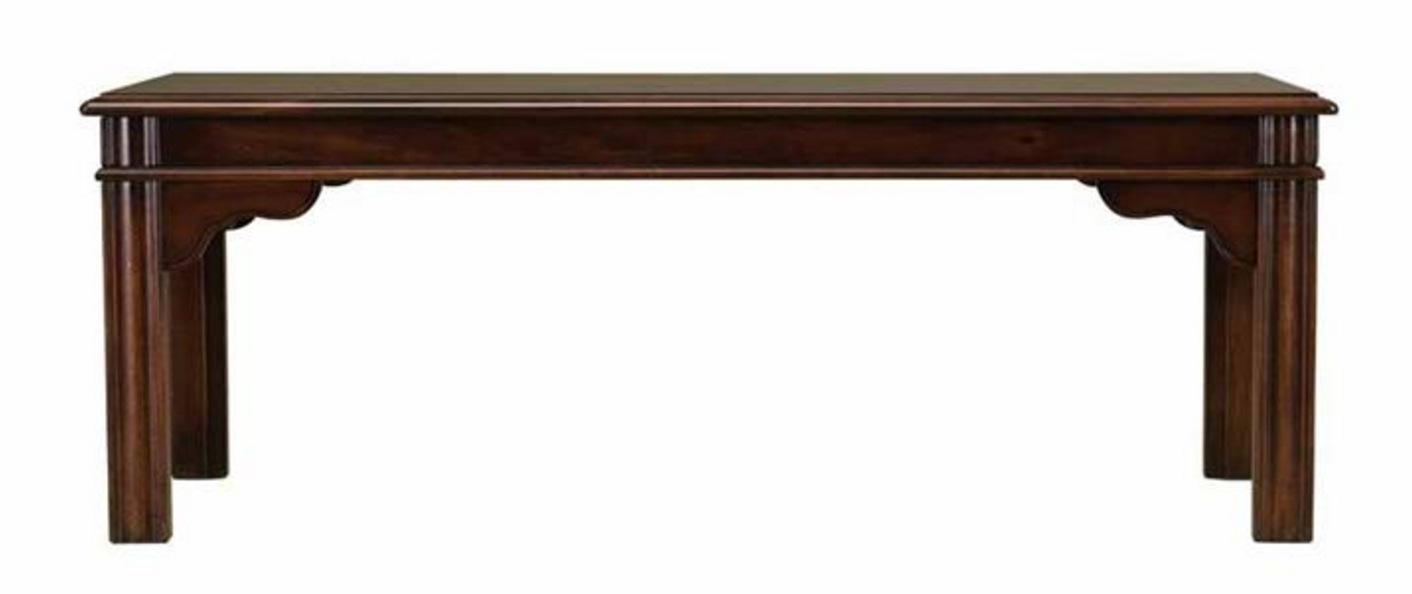
I cannot express how completely I love this piece. The closest online comparison of it that you can currently buy by Drexel is this cocktail table for $1,929 and it's in cherry, not rare mahogany as this one is. Drexel Cocktail Table
They call them cocktail tables now and that cracks me up. LOL! I guess people are more fond of cocktails than coffee these days. LOL!
This piece already has a home, unfortunately, as someone I love claimed it when they realized I wasn't going to keep it. They have excellent taste and recognized the quality of it immediately too. I have been doing a soft discouragement campaign using the techniques of saying nonchalantly, "You know you don't have to buy it. It might not match your stuff now cuz it came out so dark. Don't feel obligated to follow through just cause you said you were going to." But that hasn't worked. *sigh* LOL!
I am having SO.MUCH.FUN doing these pieces I'm finding! GO ME!!!!!!!!!!!!! GOTTA KEEP BUSY! Isn't it gorgeous???????
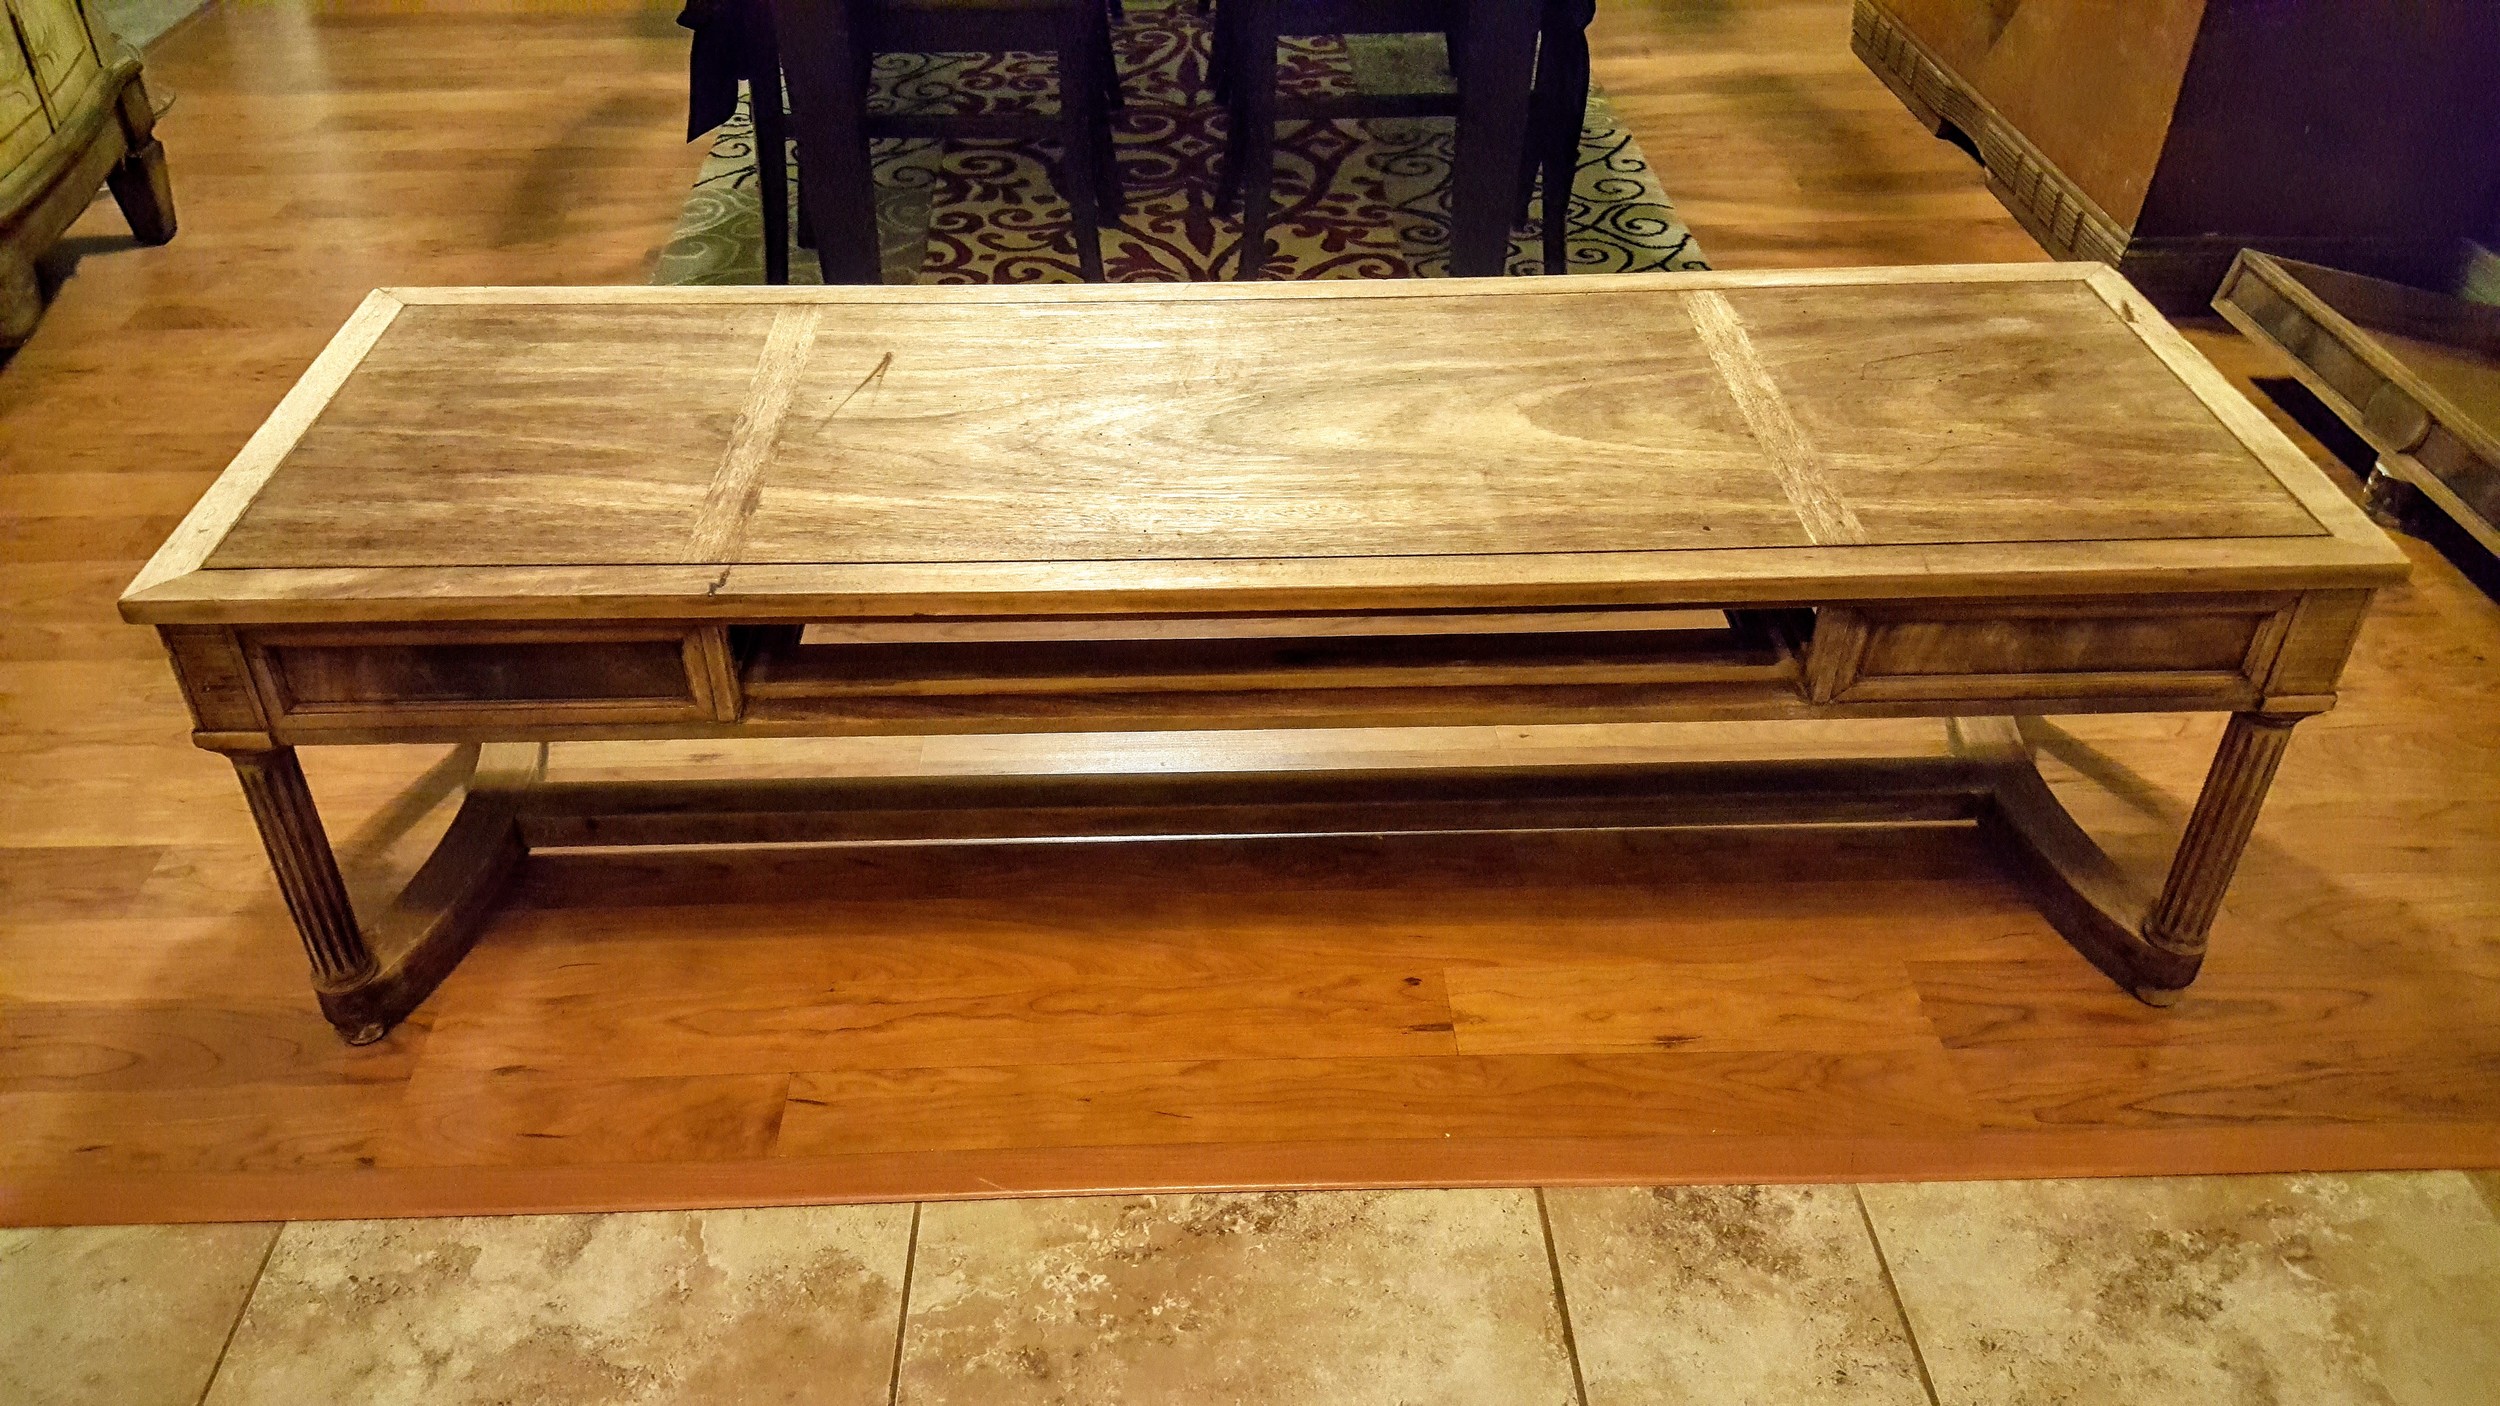
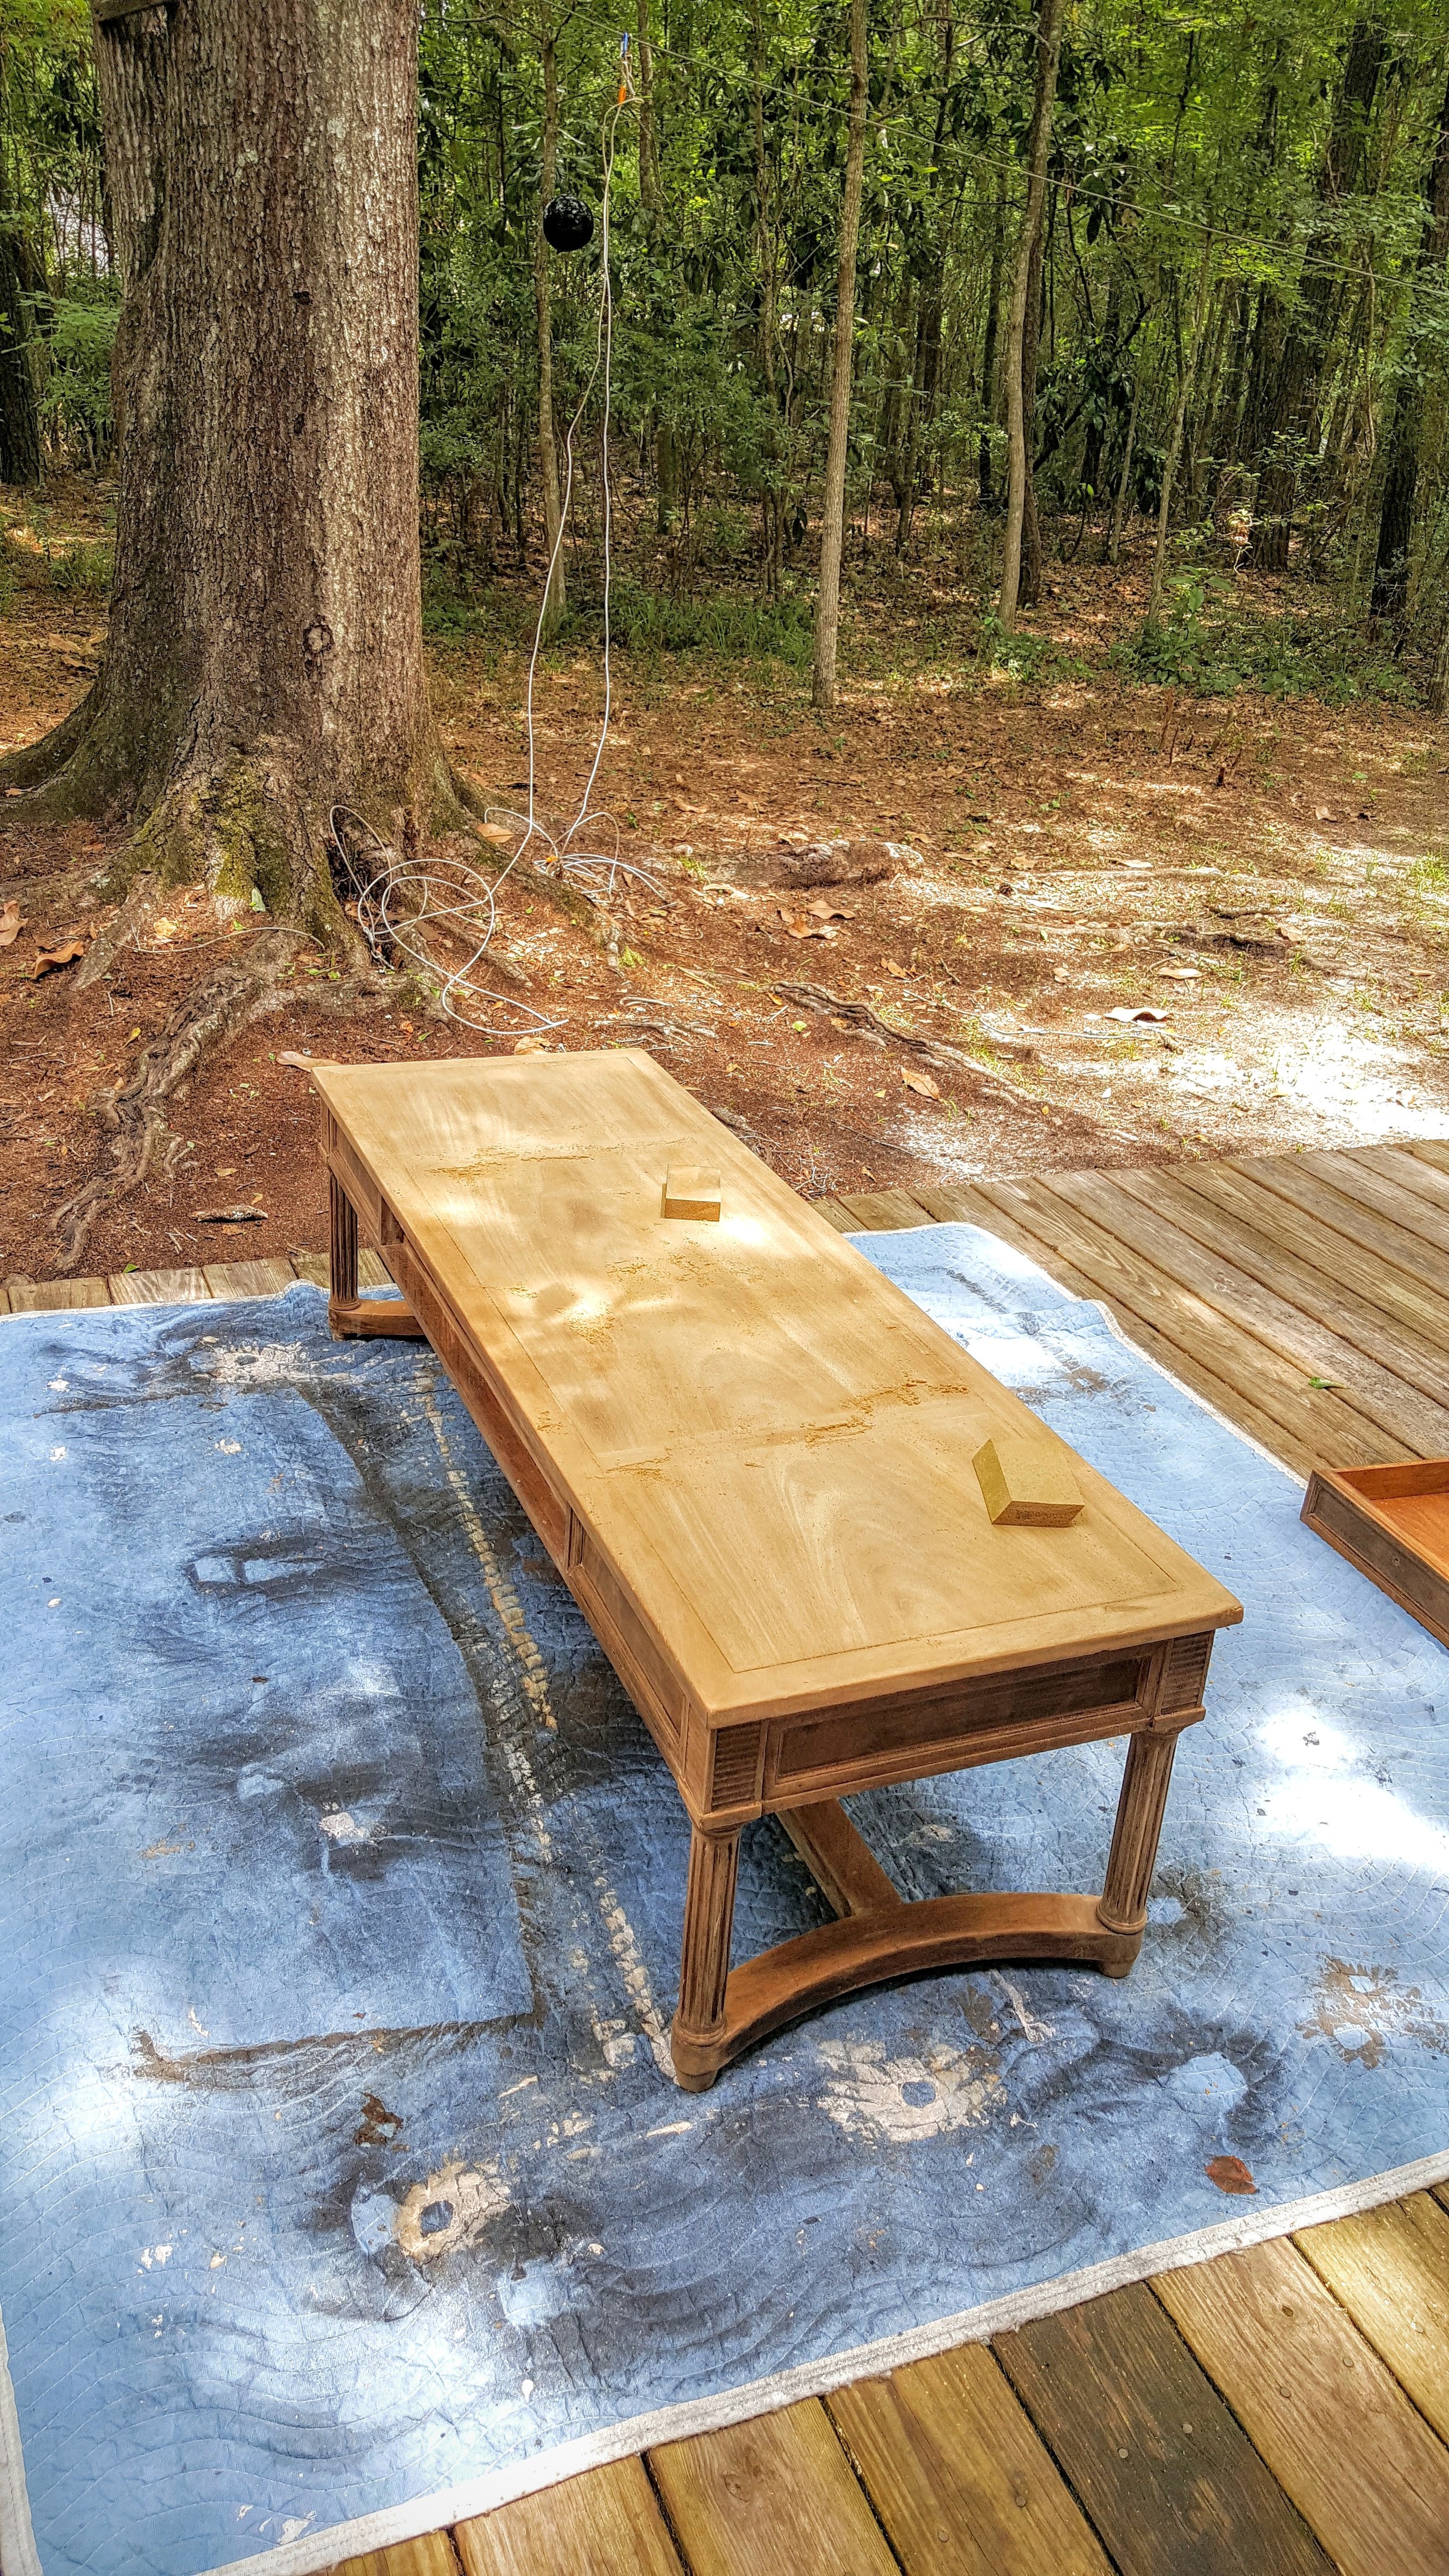
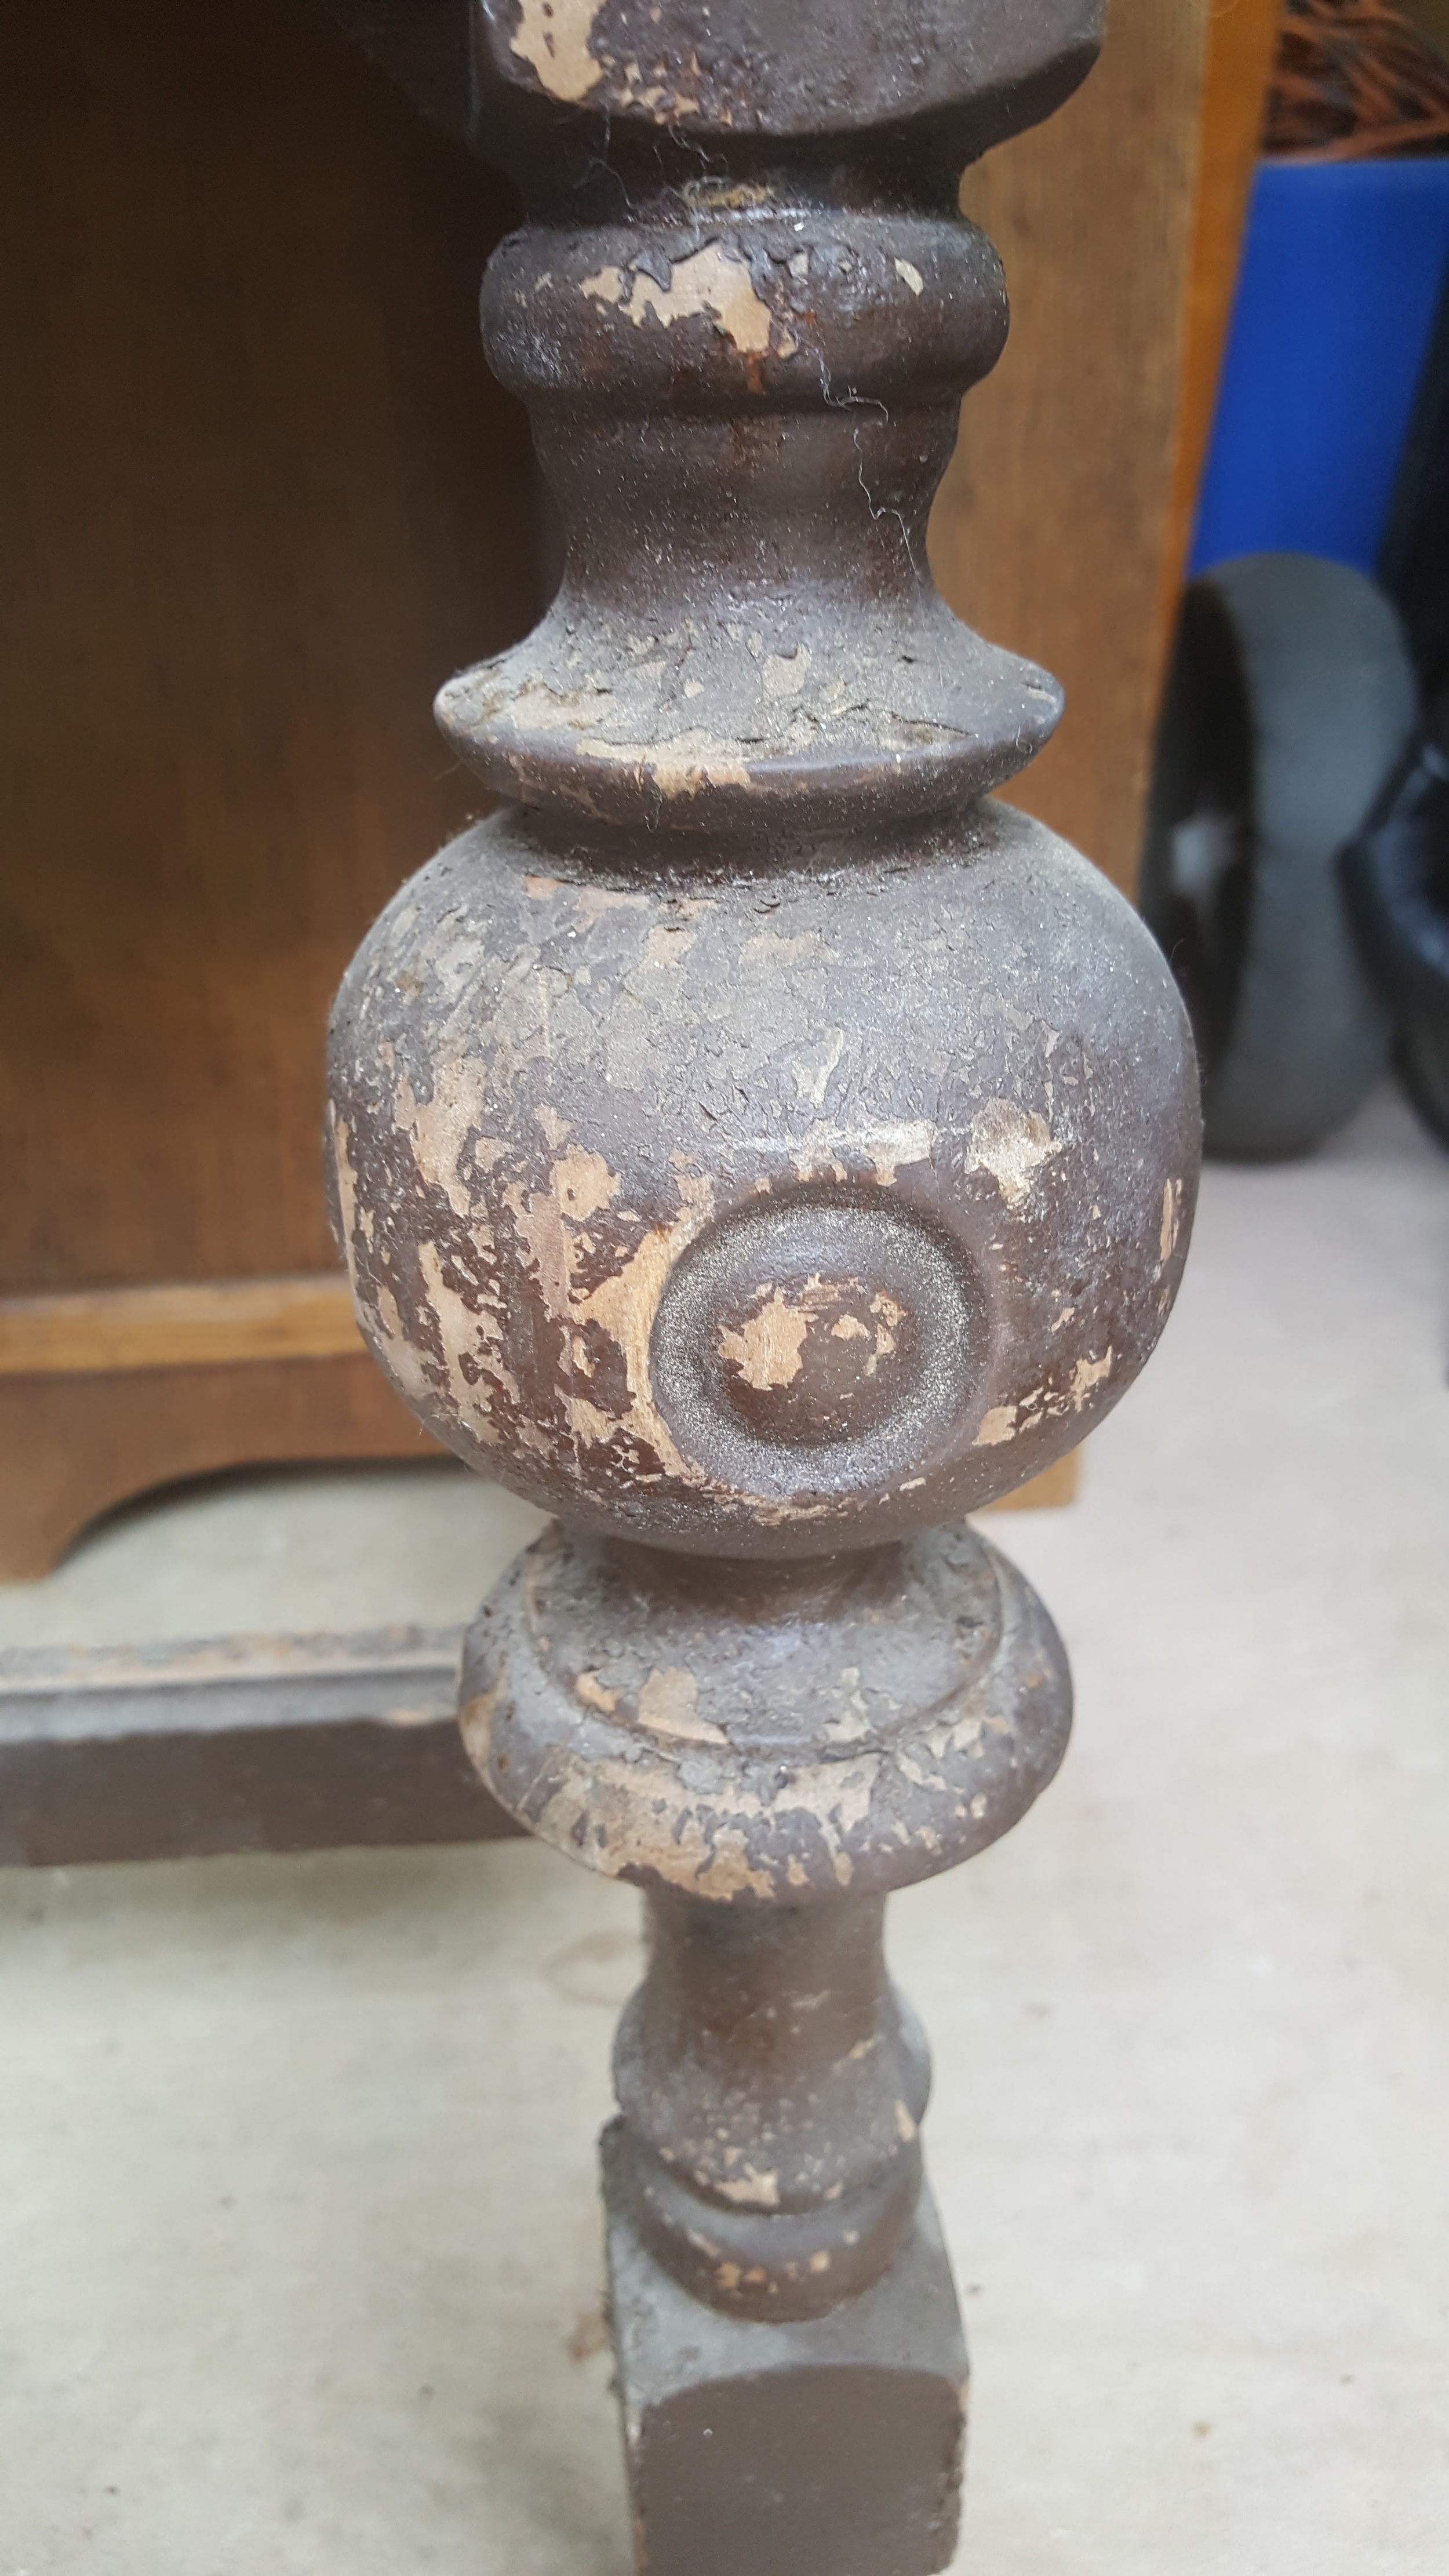
So...I ran into this piece and recognized that it was solid, CARVED, real wood. It was heavy and seriously...there are no screws. LOL! Like...it seems to have been put together by elves. So I scooped it up.
Then, I got it home and did some research on it. When I found out it was solid mahogany, I was like...WHOA. See...mahogany is super rare now. Something about them using it all up and not replenishing it properly. That's why it is so expensive when you find it. So then...I got scared. REAL.SCARED.
I didn't want to screw it up.
So I read everything there was about refinishing real mahogany because there was no way in hell I was putting paint on real mahogany.
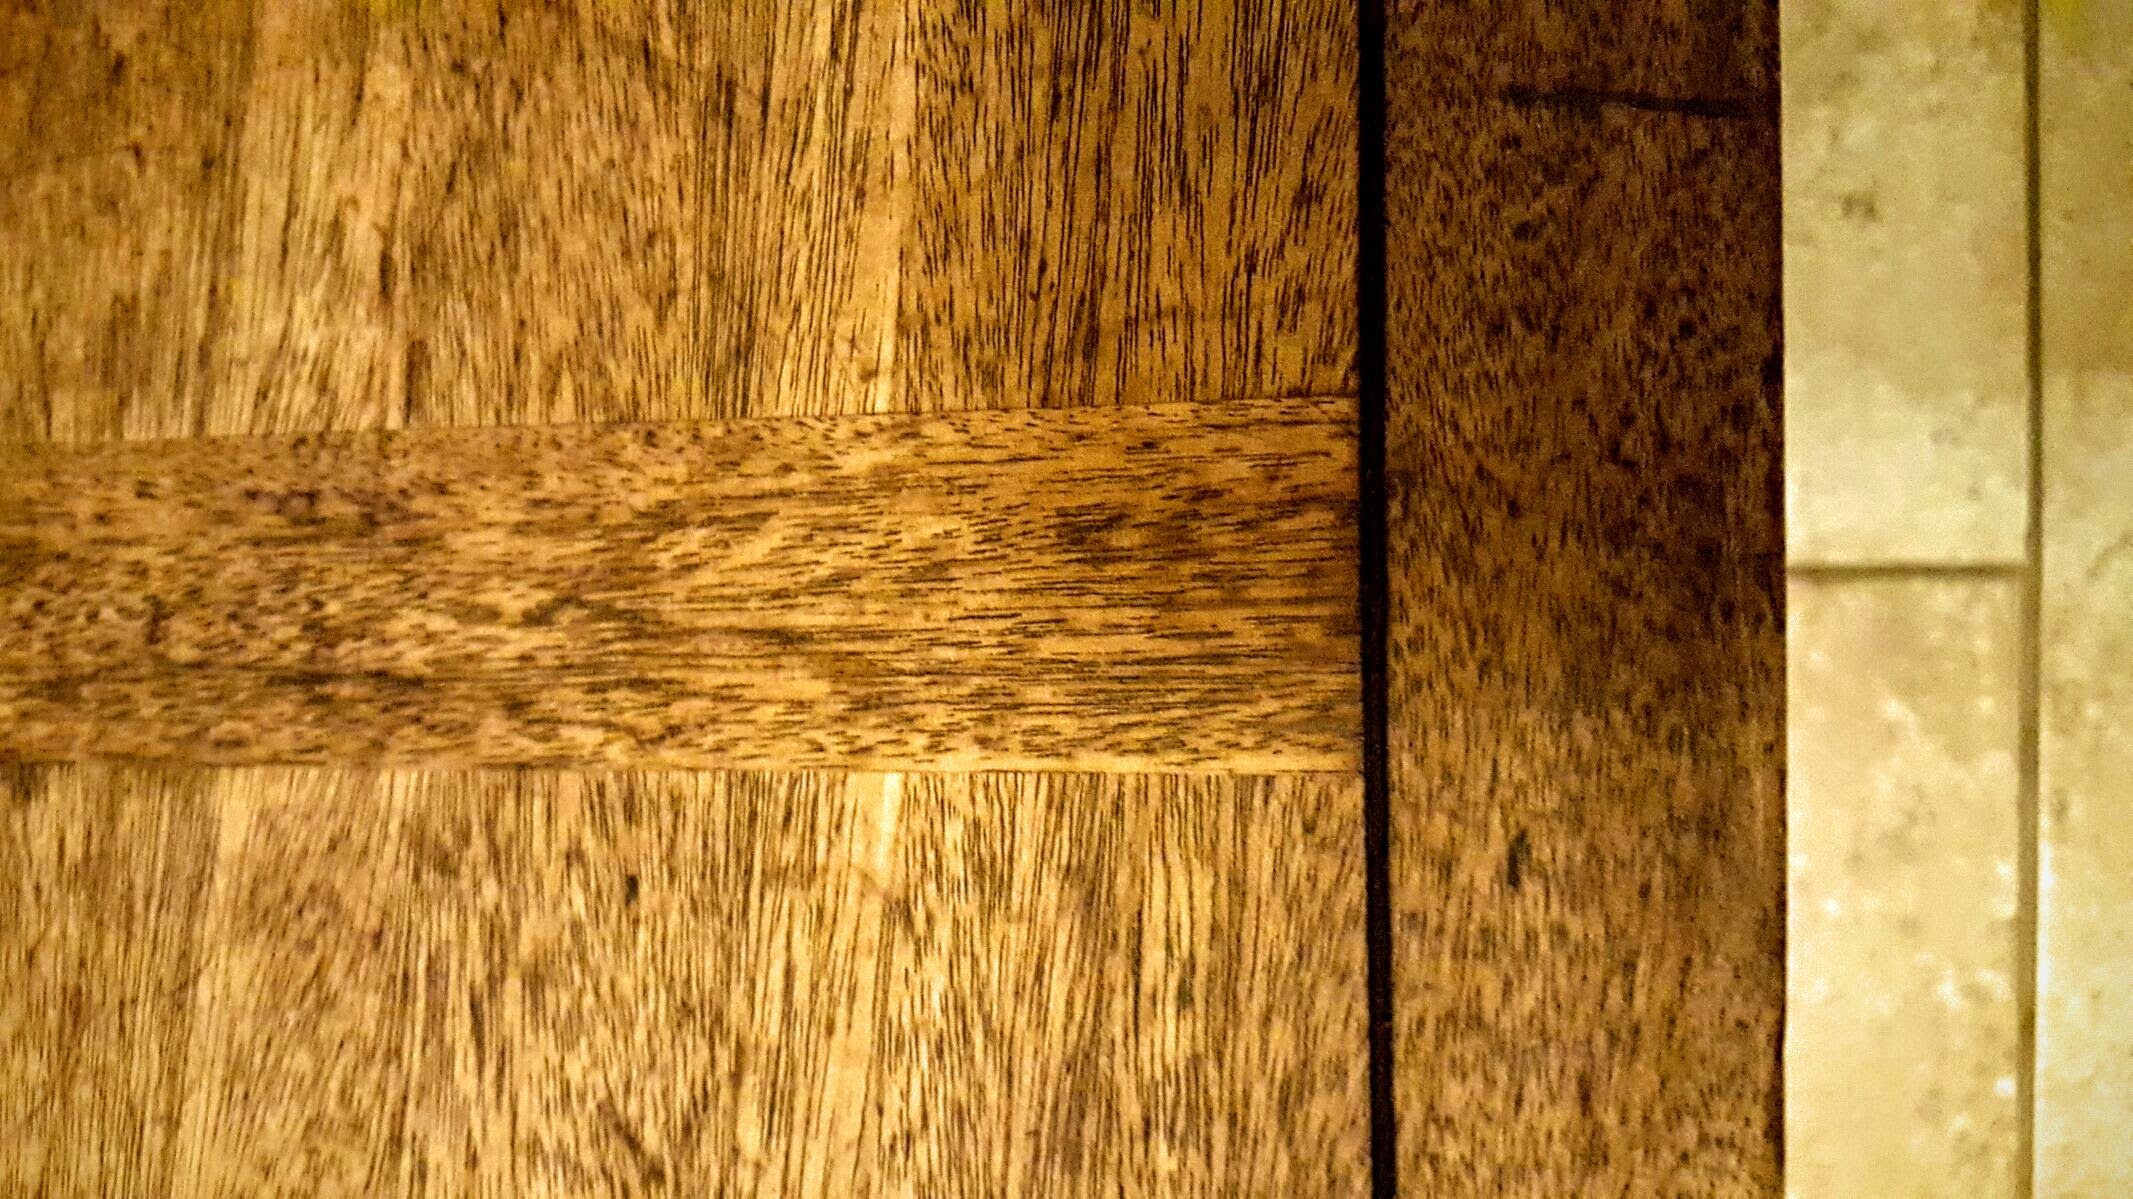
First...I stripped it with Citri-strip. Then...I let it dry for almost a whole week. Next, I sanded it and then...I tried to repair some of the deeper scratches. Right now I've put one coat of stain on it and I'm letting it dry completely. I'll pick back up tomorrow with another sanding to fix the scratches even more.
This one is a slow and steady job so it might take a while to complete it. I'll let you know when it's done. I'm just super happy about the find. Real wood is expensive as all get out. Real MAHOGANY? YAAAAAAAAAAASSSSSSSSS!!!!!!!!!