Annie Sloan

How to fix chipped wood or veneer.

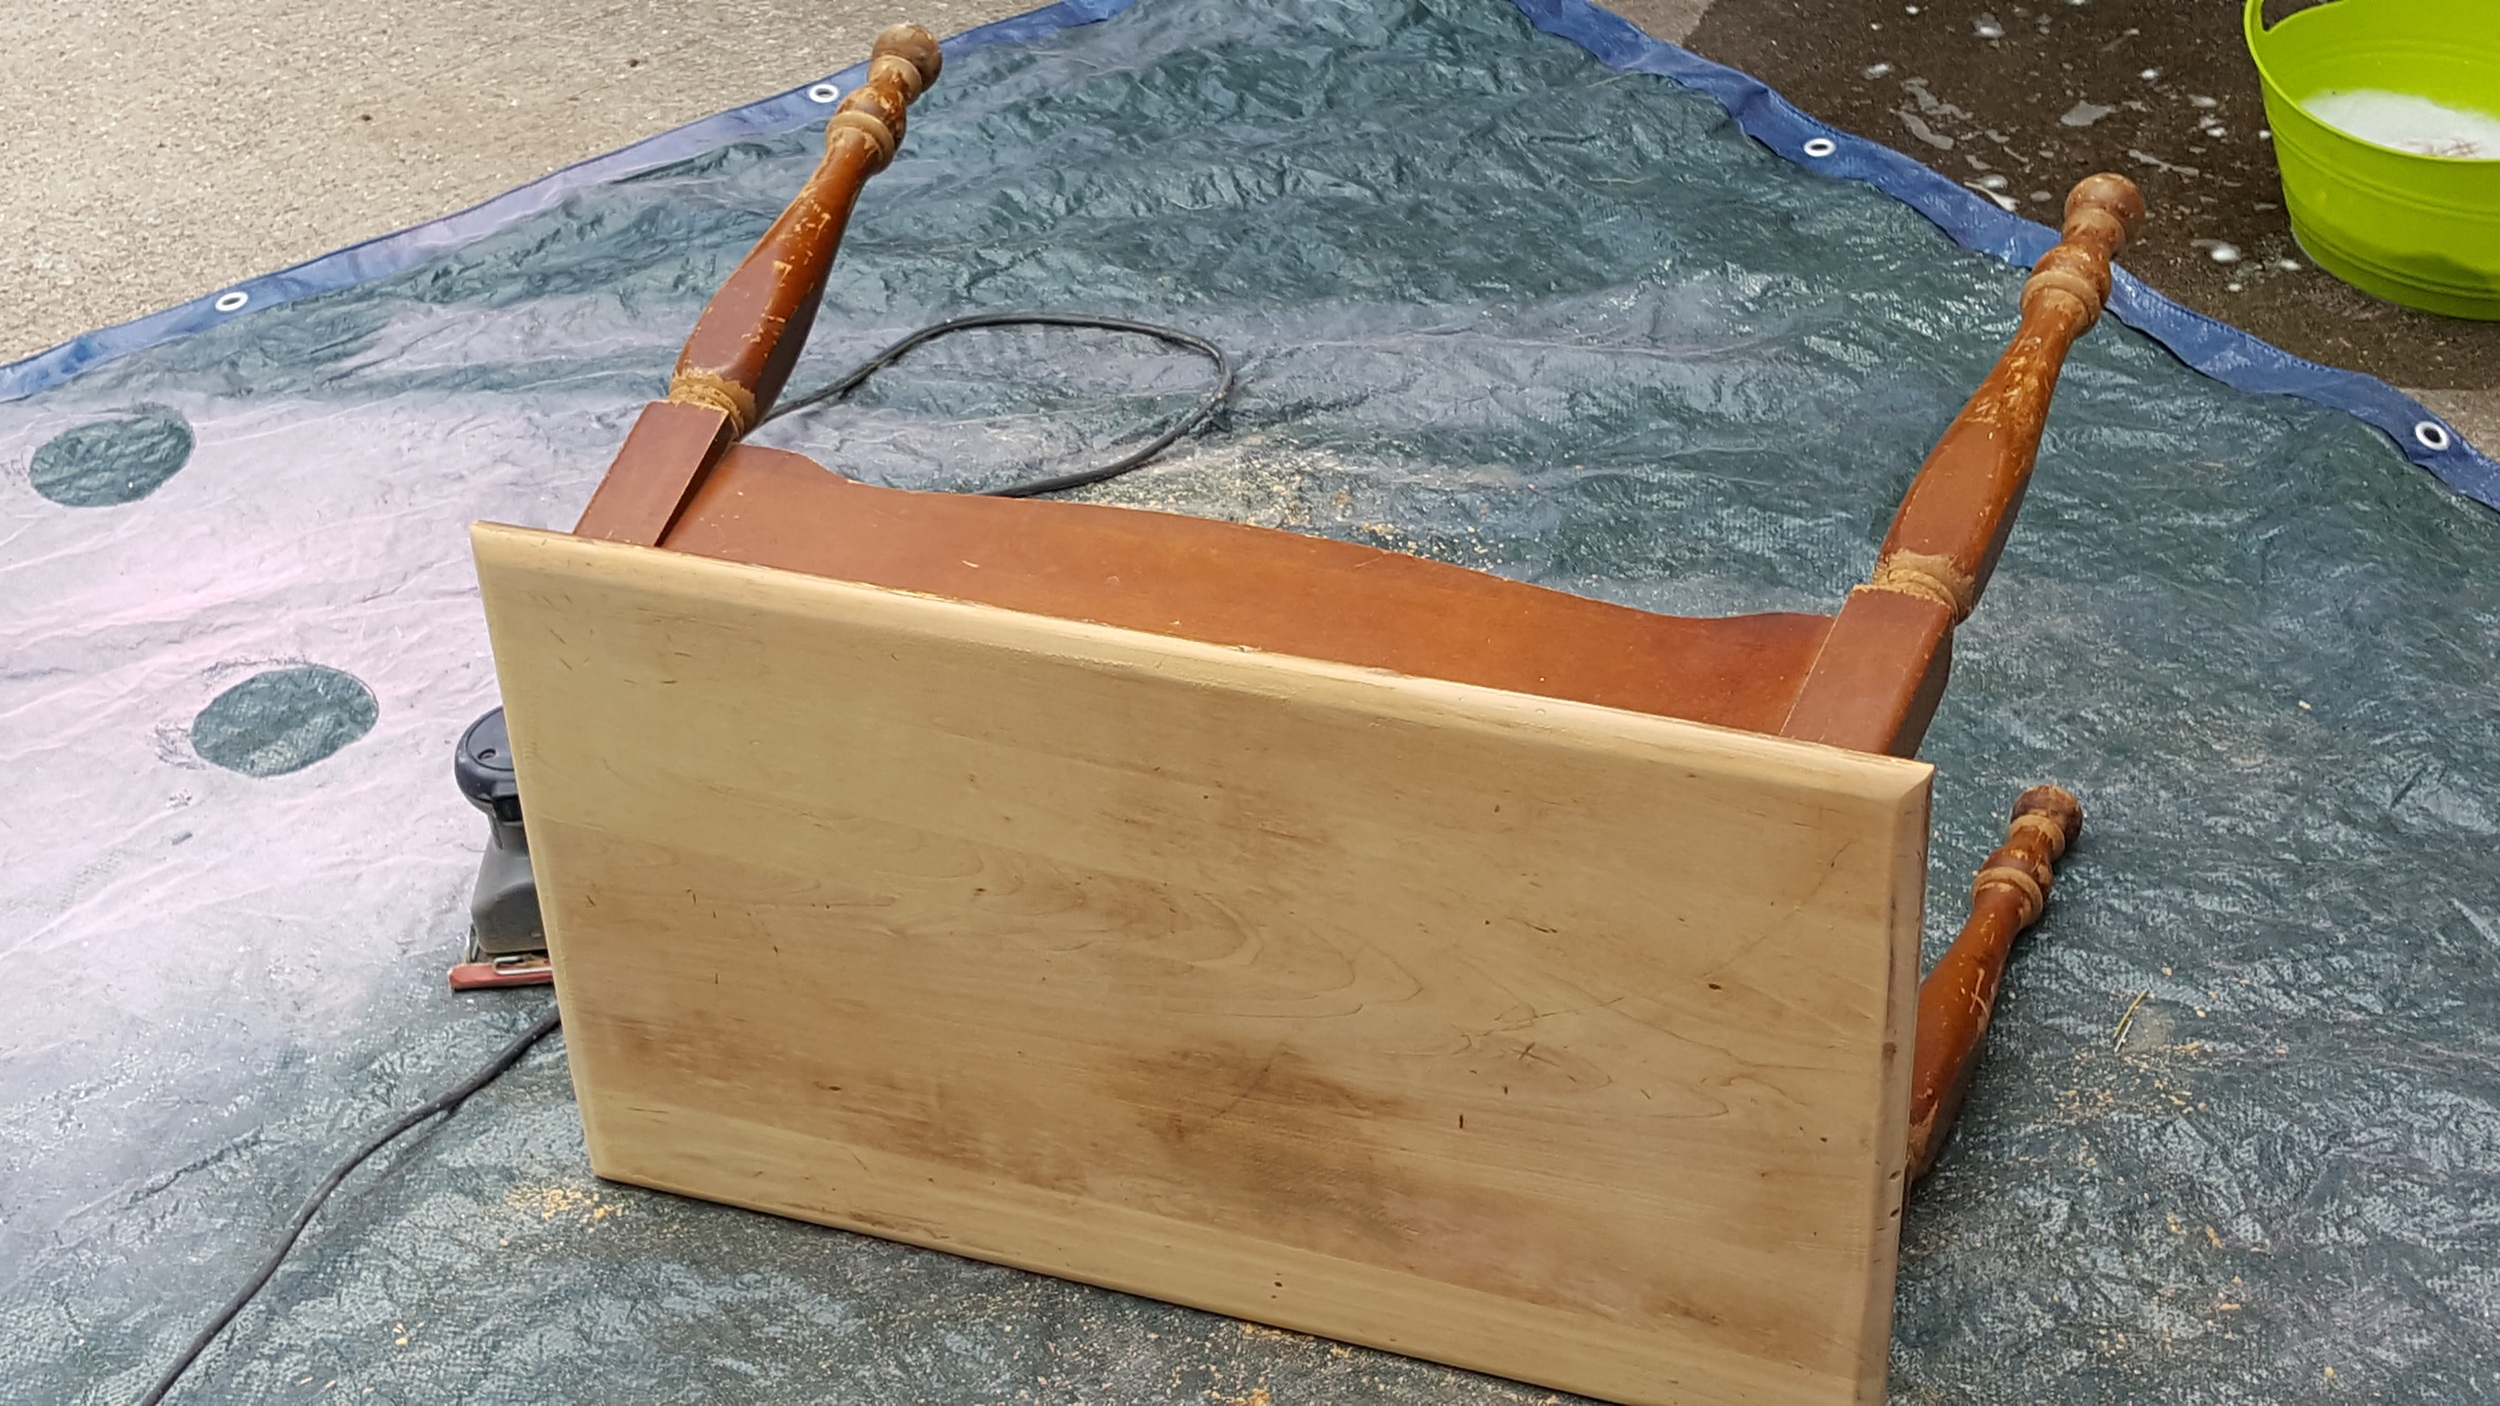
If you have nice pieces at your home with chips or broken veneer, you'll be surprised at how easy these things are to fix.  I've always wanted a porch rocker from Cracker Barrel but have never pulled the trigger.  I was at a consignment store and saw one and well...I had to have it. Solid wood?  Check.  And you know how I feel about solid wood.  HOOOOOOOOOTY HOOOOOOO!

I got a really good deal on it because one of the rockers had a chipped end and needed some fixing so hey...I can fix stuff.  LOL!

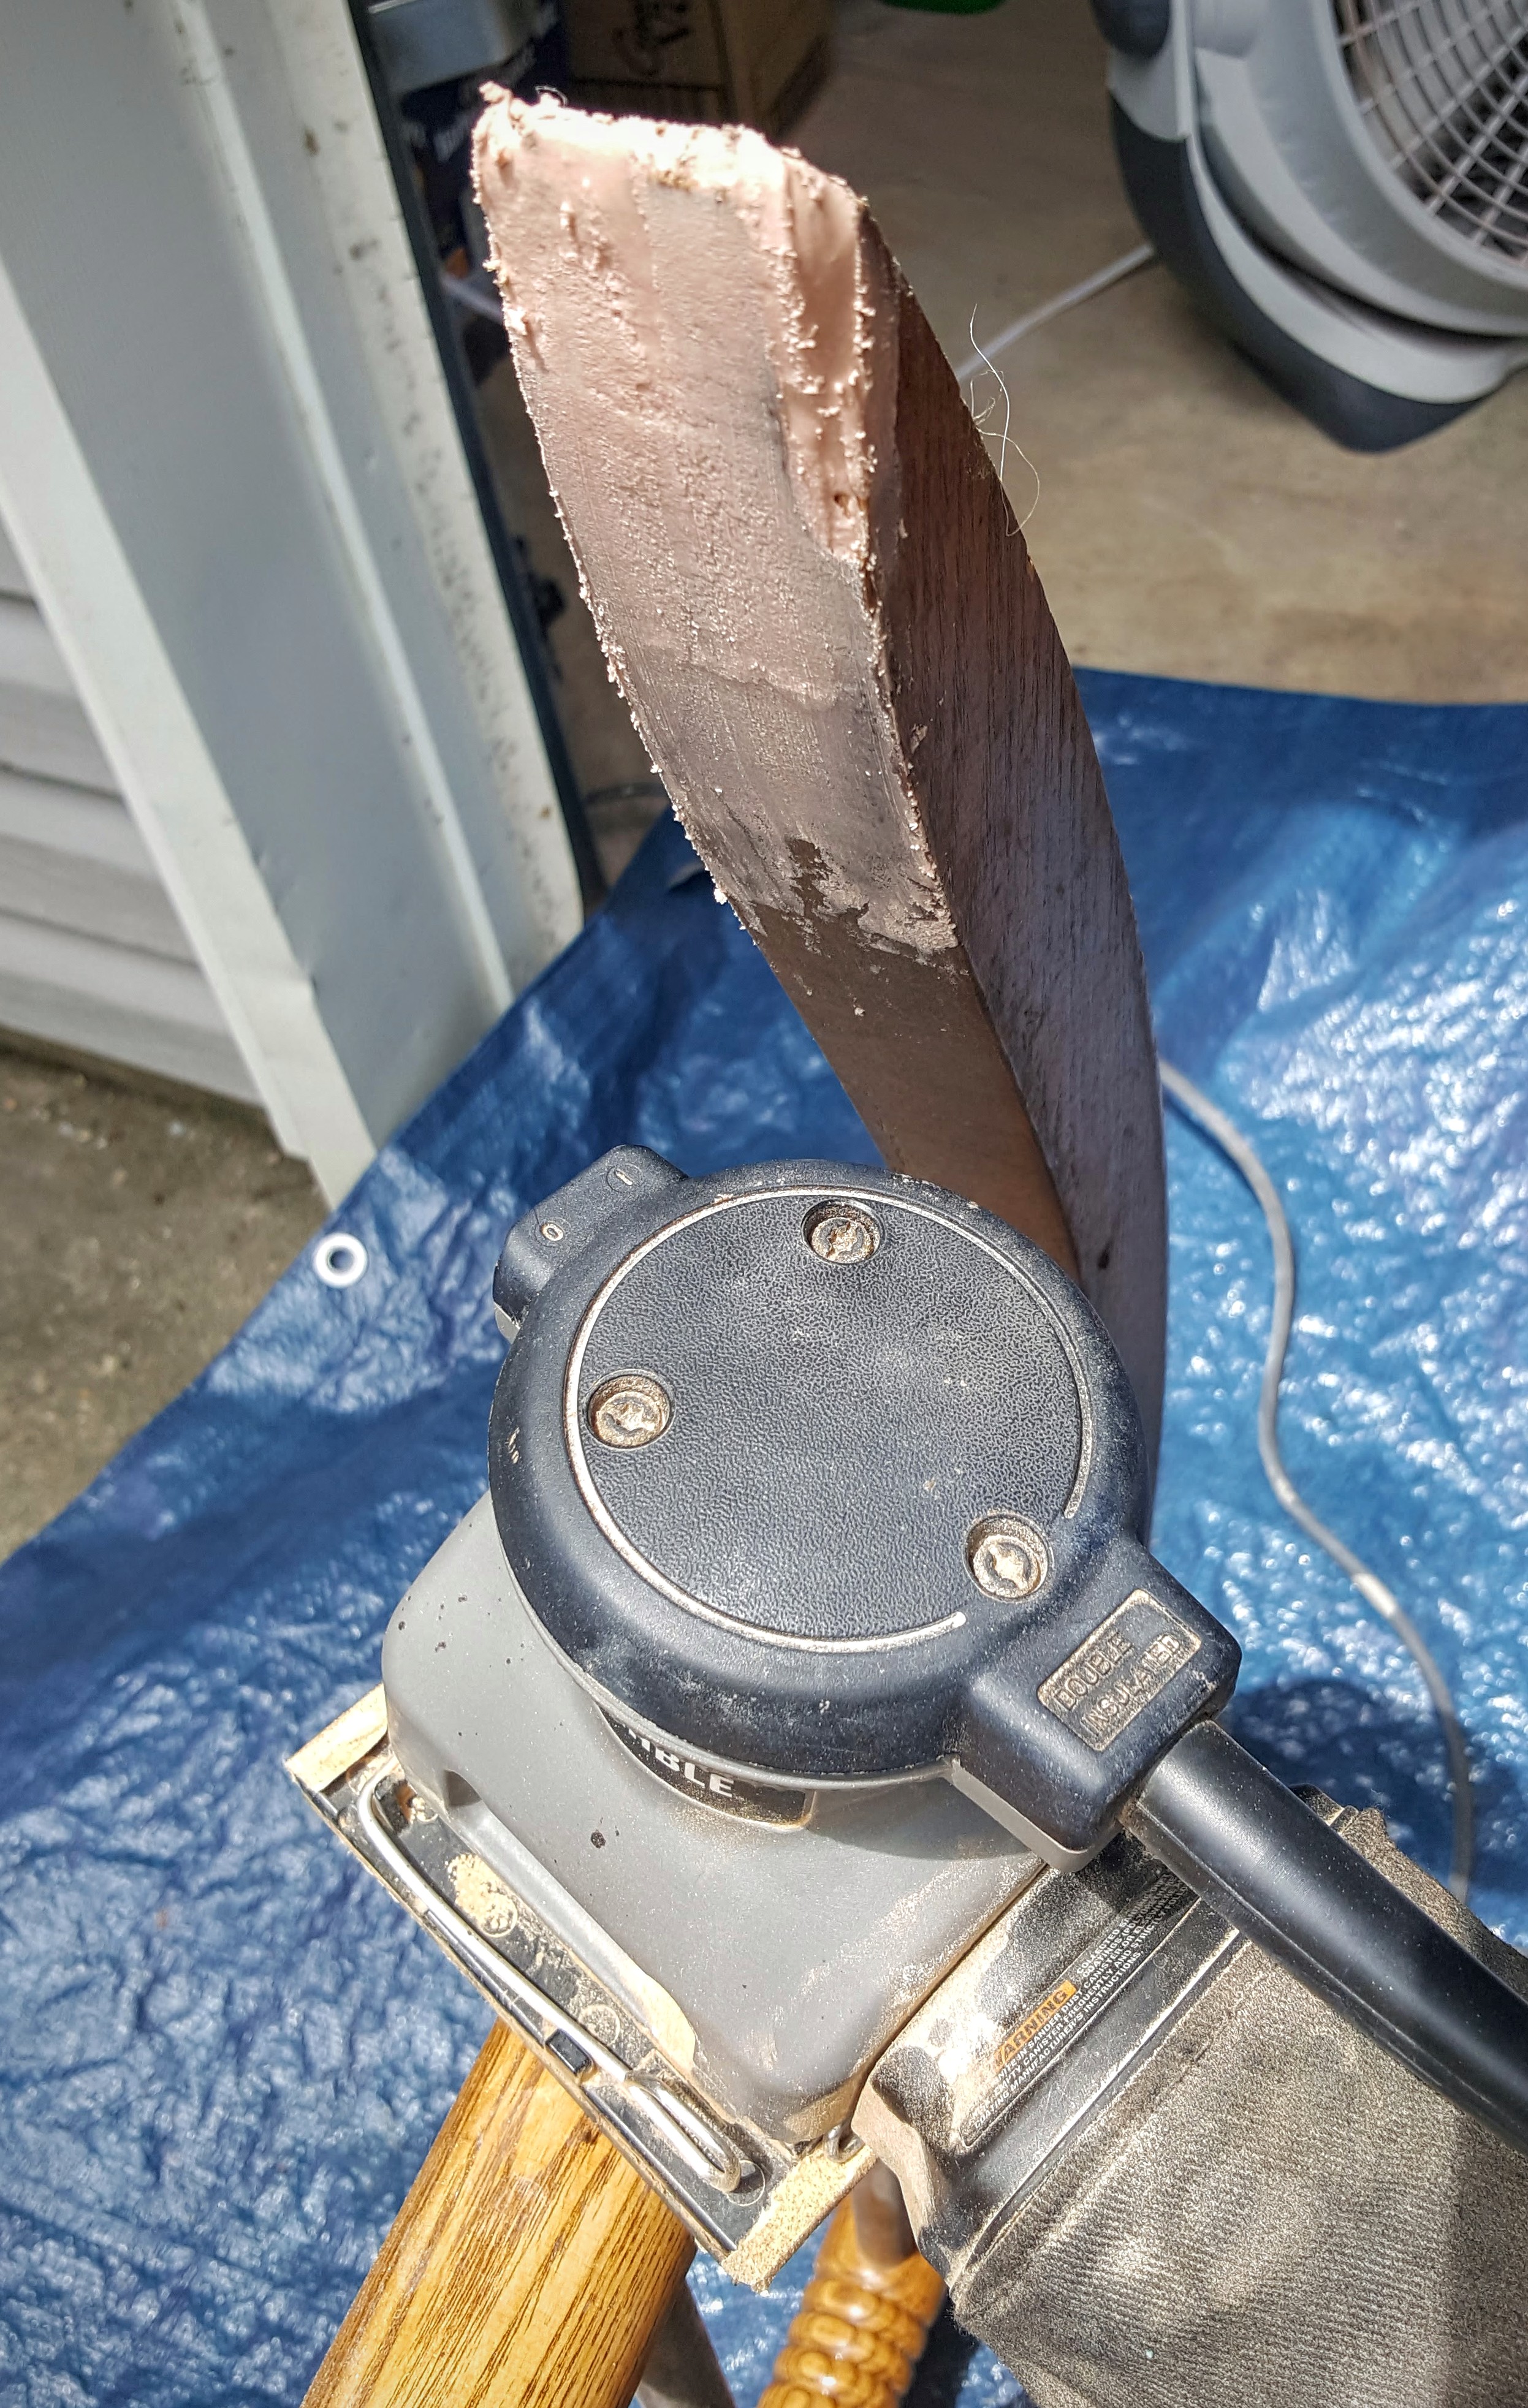
This stuff is pretty cool in that it brought me back to my childhood when I mixed it up.  It smelled exactly like the stuff my daddy used to use to fix our boat and, I guess that's exactly what it was.  Lightweight Body Filler.  Has that ever happened to you?  A smell takes you back?  It is a weird and cool experience huh?

If you're using this, you'll need one thing for sure, Bondo spreaders.  These are the only things which the hardened body filler won't stick to permanently.  Whatever you mix it with and on/in will be ruined forever so yeah...whip out a paper plate or bowl and a plastic spoon.

After mixing it up, glob it on whatever you're fixing pretty good and then use the spreader to smooth it evenly.  It will dry pretty quickly so please make sure you work fast.  Once it's dry...SAND IT SMOOTH.

Then...well...paint it and make it purdy.  You like purdy don'tcha?  Yeah...you do.  I painted the rocker in Annie Sloan English Yellow with a bit of a stenciled detail in Annie Sloan Pure White.  Yes.  It makes me happy.  :)

Now that I have a rocker...maybe I'll take up knitting.  LOL!  

Refinished and Painted Vintage Windsor Wood Arm Chair

This might be my favorite piece yet.  It is so solid and fun now that it has been restored to awesomesauceness.  Yup.  That's a word.  Look it up.  Didn't find it?  Oh...my bad.  :)

This lil dude was busted and disgusted.  The bottom was broken and there was a ton of just...GRIMEY GRIME on the arms.  Dried on grimey grime.  Just gross.  But...as we've covered before...solid wood can be sanded and cleaned up so well so I repaired it with wood glue, contact cement and wood filler and then got out my palm sander to remove all the grime off it.

Then I painted it but it was just regular and I wanted it to be fun.  This will probably end up in the kids' guest room once I find the perfect size desk so, of course, I wanted it to be neat and indestructible too.  LOL!  I used some of my stencils and did a rustic French numbering stencil on the seat using chalkboard paint but it looked too "new" and I didn't like it.  To combat this I mixed one part paint to two parts water in a wide mouth jug and shook it up really well and then applied to the seat wiping it off almost immediately with blue shop towels for a white washed look.

The feet on it were rusted and non-removable so I taped the legs up and hit them with some gold paint.  To finish it, I sprayed it down well with Minwax polycrylic three times.  Should be good to go.

And now it's so cute...I might not want a kid sitting in it.  Indestructible or not.  So there.  LOL!  


Solid Oak Round End Table Refinished in Annie Sloan Country Grey with Stained Top

I'm totally beginning to have a thing for round coffee tables and end tables.  Not plain ones mind you...but some with a bit of oomph.  What is oomph you ask?  Hell if I know...I just know it when I see it.  

When I found this table it had a busted leg.  Totally ew.  Turns out, broken wood pegs are relatively simple to fix though.  You take a drill and drill through the broken peg until the hole is completely cleaned out.  Then?  Add some wood glue and bang in a new wood peg.  You can get a pack of like 10 of them for under $2.  Crazy huh?  When I think of all the things I've encountered with a busted wooden peg and it could have been fixed for like TWENTY CENTS???????  

LAWD... SHAME! SHAME! SHAME!

So...this was pretty basic.  Like...seriously.  When you use Annie Sloan chalk paint you don't have to sand it so I only sanded the top because I wanted to stain it and to stain something...ya gotta remove the current finish so the wood can absorb the Minwax Dark Walnut stain.  There was just no way I was painting over that gorgeous inlaid top.  It was just so neat to me that it was laid in quarters like that.  The beading along the side was a detail I wanted to make pop so after painting the base in Annie Sloan Country Grey (my favorite color it seems)  and under the top, I rubbed dark wax under the top.  As a protectant, I really like General Finishes High Performance Top Coat in satin.  I think I did two coats on the top.  Anything vertical I've learned to use a polyacrylic spray so that's what I did there.  The piece came out so lovely and man is this thing SOLID!  It won't move unless you actually move it.  A simple bump won't sent it sprawling into the wall to make a knick in your paint.  WHOOOOOHOOOOOOOOO!

You'll find that round end tables are pretty versatile for the space you're looking to fill too.  Squares and rectangles are pretty...um...finite.  I guess that's a good way to put it.  If not...pick some words, put them together and VIOLA!  Hopefully you know what I'm trying to say.  LOL!

Refinished Nightstand Between Twin Beds in Kids' Guest Room

20160713_142026 (1).jpg

When looking for pieces to refinish, do yourself a favor and choose REAL WOOD pieces only.  Don't get cute and get stuck with some particle board you won't be able to do anything with except paint.  Nothing wrong with painting, of course, but the great thing about real wood is that if you screw up...you can start over.  No problem.  If you don't like it...you can start over.  No problem.  

This piece had something I hate.  A non-working "drawer."  Like...there was a drawer pull on it and a fake line to simulate a drawer but it was just a side.  I was looking for a nightstand to put between the kids' guest bedroom.  It has twin beds and not enough room for two end tables so I needed to be pretty specific with size.  Also...I didn't want it to be too tall.  Initially, I was going to use a bookcase but struggled with lamp placement.  Since it's a guest room, something with a drawer isn't necessary and I've since put a low basket with a liner under it to hold books.  

Still working on the room for now, of course.  I'm planning to do a light colored wall behind the beds and decorate it with stars.  Why?  I like stars.  Duh.  LOL!  Funny because my nephew is currently visiting and he has his own ideas of design and implemented them accordingly.  *sigh*  He's quite proud of his handiwork.  What say you?  Think he has a future in interior decor?

The piece was scratched up like crazy so I removed the hardware on the faux dresser and covered the holes and the lines with wood filler that can be painted.  Then...I sanded the top really well to get as many of the scratches off the top as possible.  

I wanted a "front" so I used contact cement to add a pair of latex appliques to it.  I didn't decide this until I'd already put a coat of paint on it.  Next time, I'll know to make the decision BEFORE I've started.  Will make it a lot easier.  I added a bit of gold Rub N' Buff to the appliques so that they would stand out a bit.  I did the same to the bottom ring on the legs.

I put three coats of General Finishes High Performance top coat on the top to make it virtually indestructible and a dark wax along the base and legs for more of a shiny patina.  

I paid $5 for this table so yeah...even if one of the nephews Hulk smashes another one on top of it...I'm good.  LOL!

Plant Stand Makeover in Annie Sloan Provence and Dark Wax

This was tragic in the beginning. TRA-GIC!

I thought it was going to be a simple job of stripping and then painting but noooooooooooooo!  It had been painted and then covered with contact paper and then?  PAINTED AGAIN!  I didn't get anywhere with an entire can of Citristrip because of the stupid contact paper.  Once I got the top coats of paint off, then I had to pull off the contact paper and THEN I had to strip that paint off.  Seriously...I almost gave up on this thing thinking that a plant stand just really isn't worth all this trouble so I left it alone for a few days and worked on something else.  Then I thought about how gorgeous my trailing begonia would look on it so I stripped it, sanded it and painted it.  Then?  I got jiggy with it and used my stencils to put a few designs on it.  After that, I used 100 grit sandpaper to distress all the edges of the wood and went over it with dark wax.   

And now?  Me happy!  Had I known about all of the layers of paint and the contact paper in the middle?  Yeah...Idda passed.  I never want to do that again.  

Isn't it purdy?