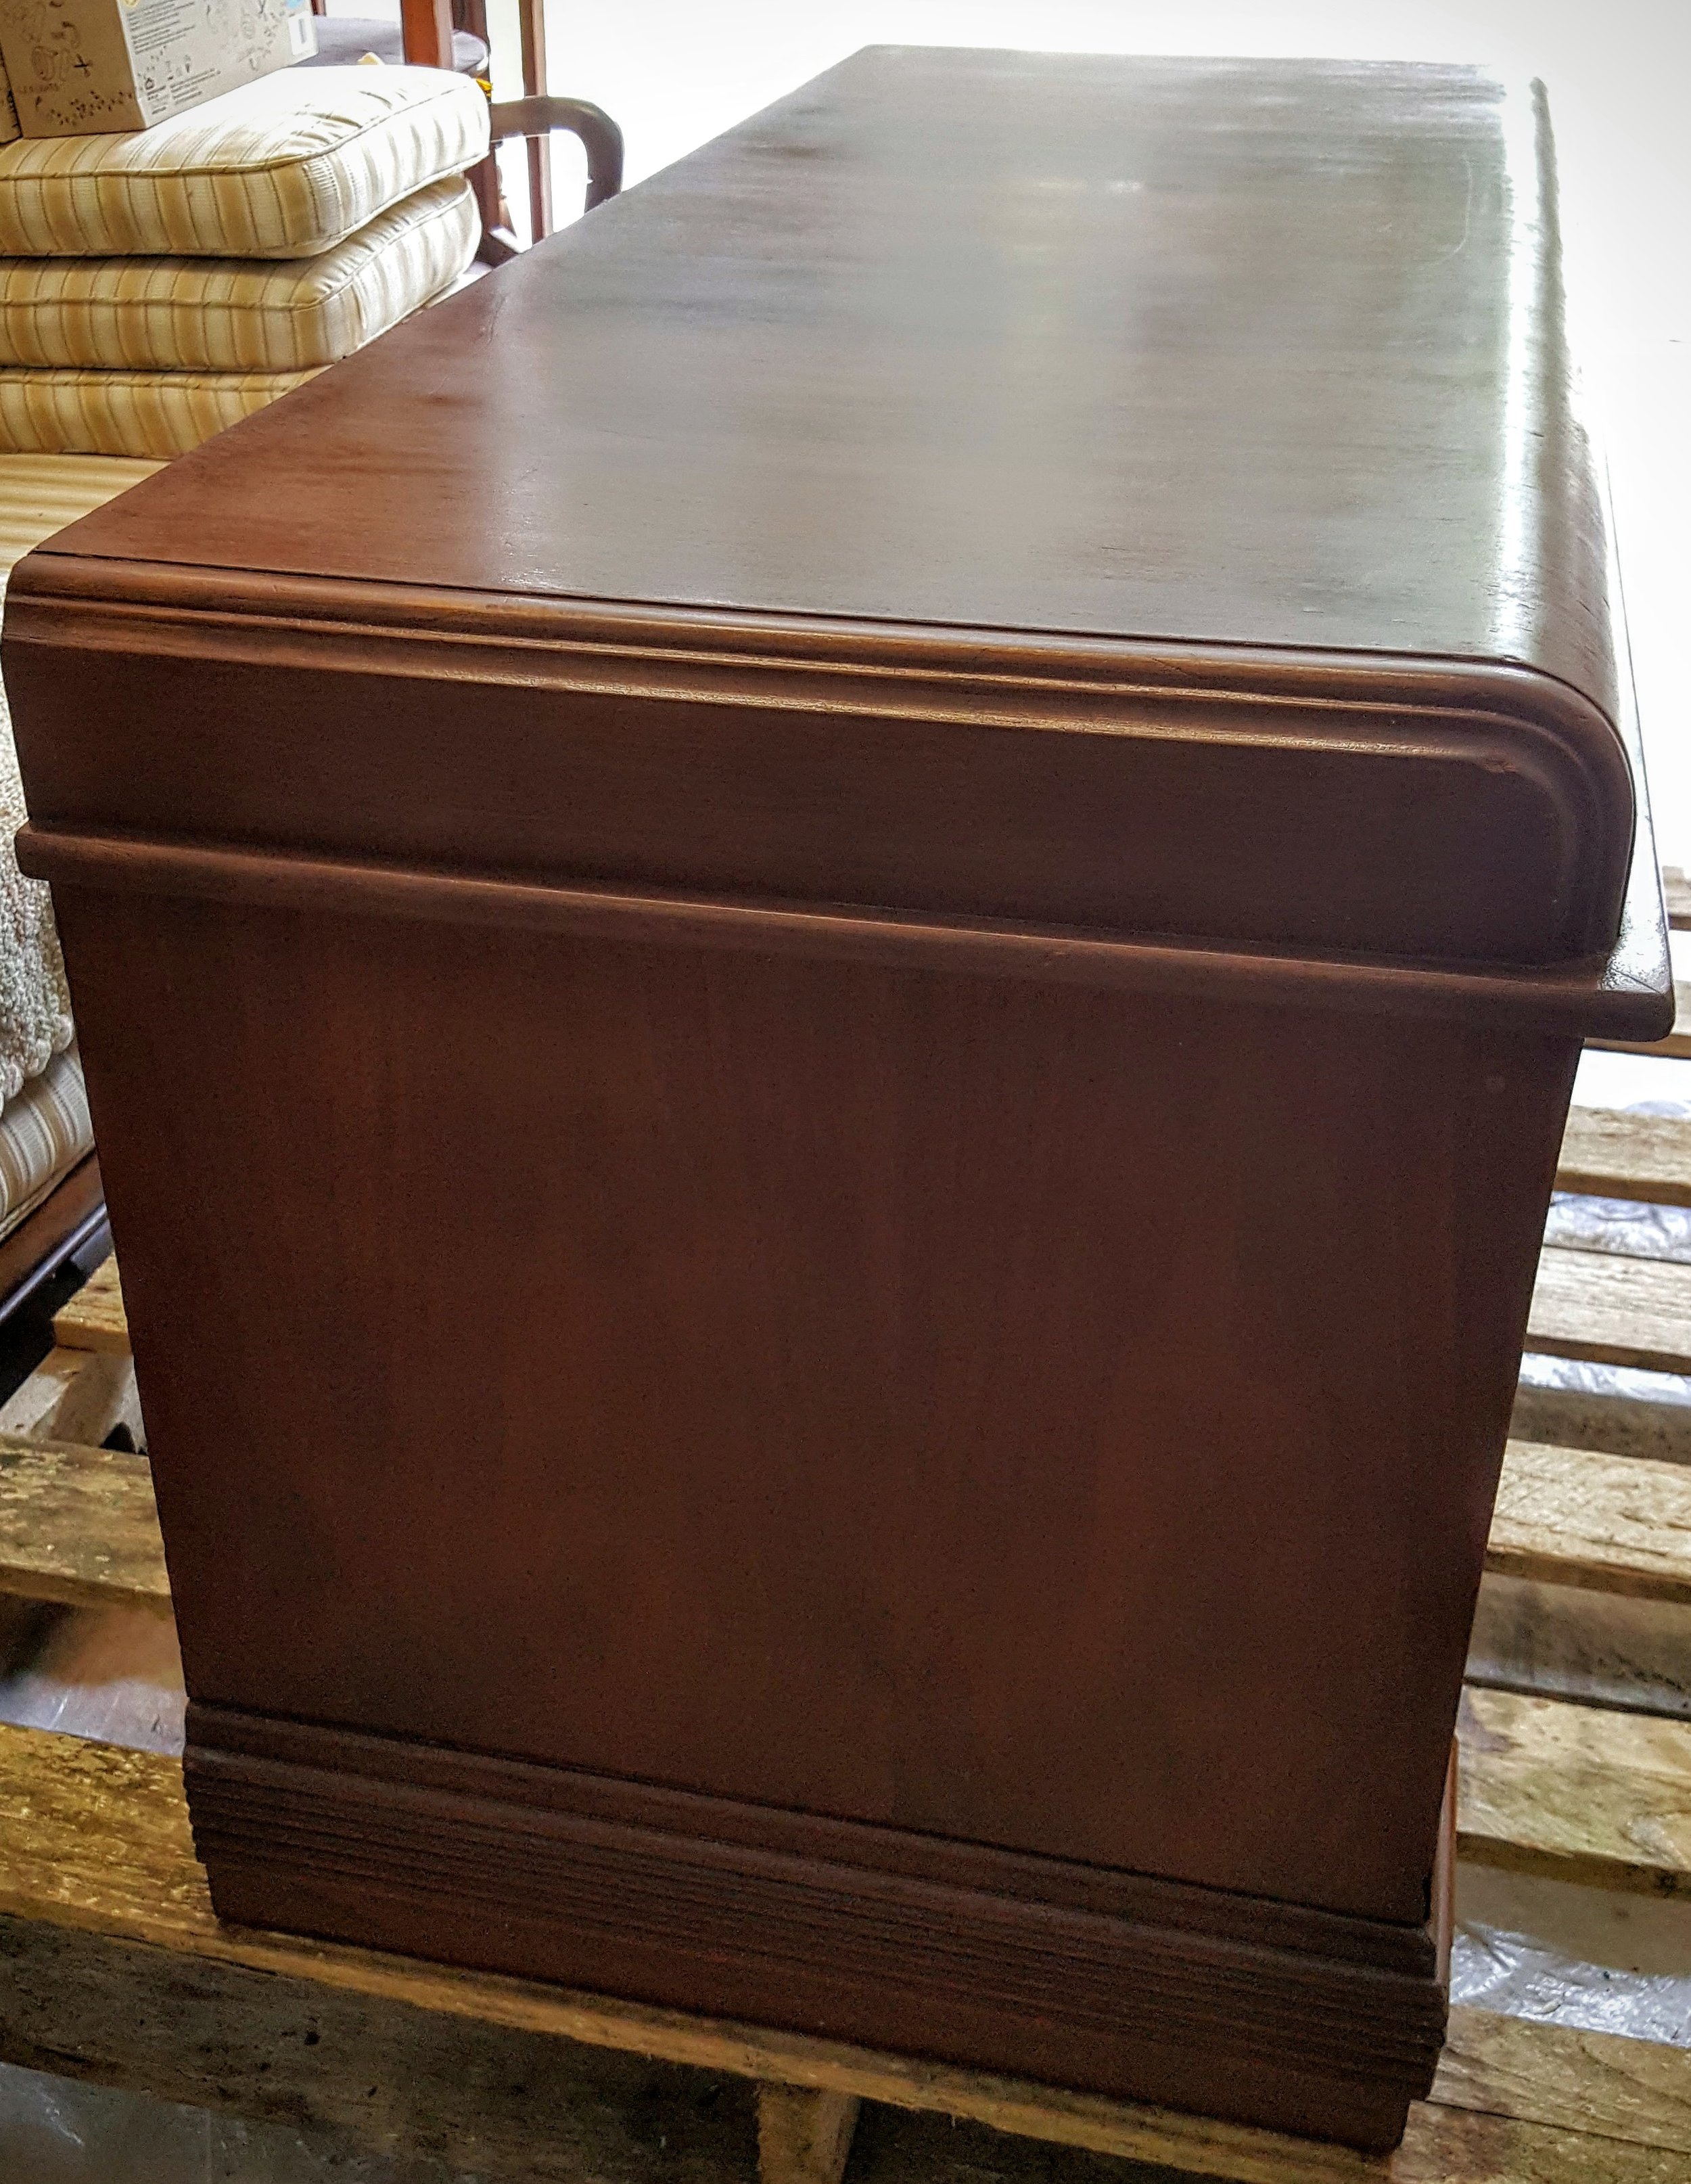
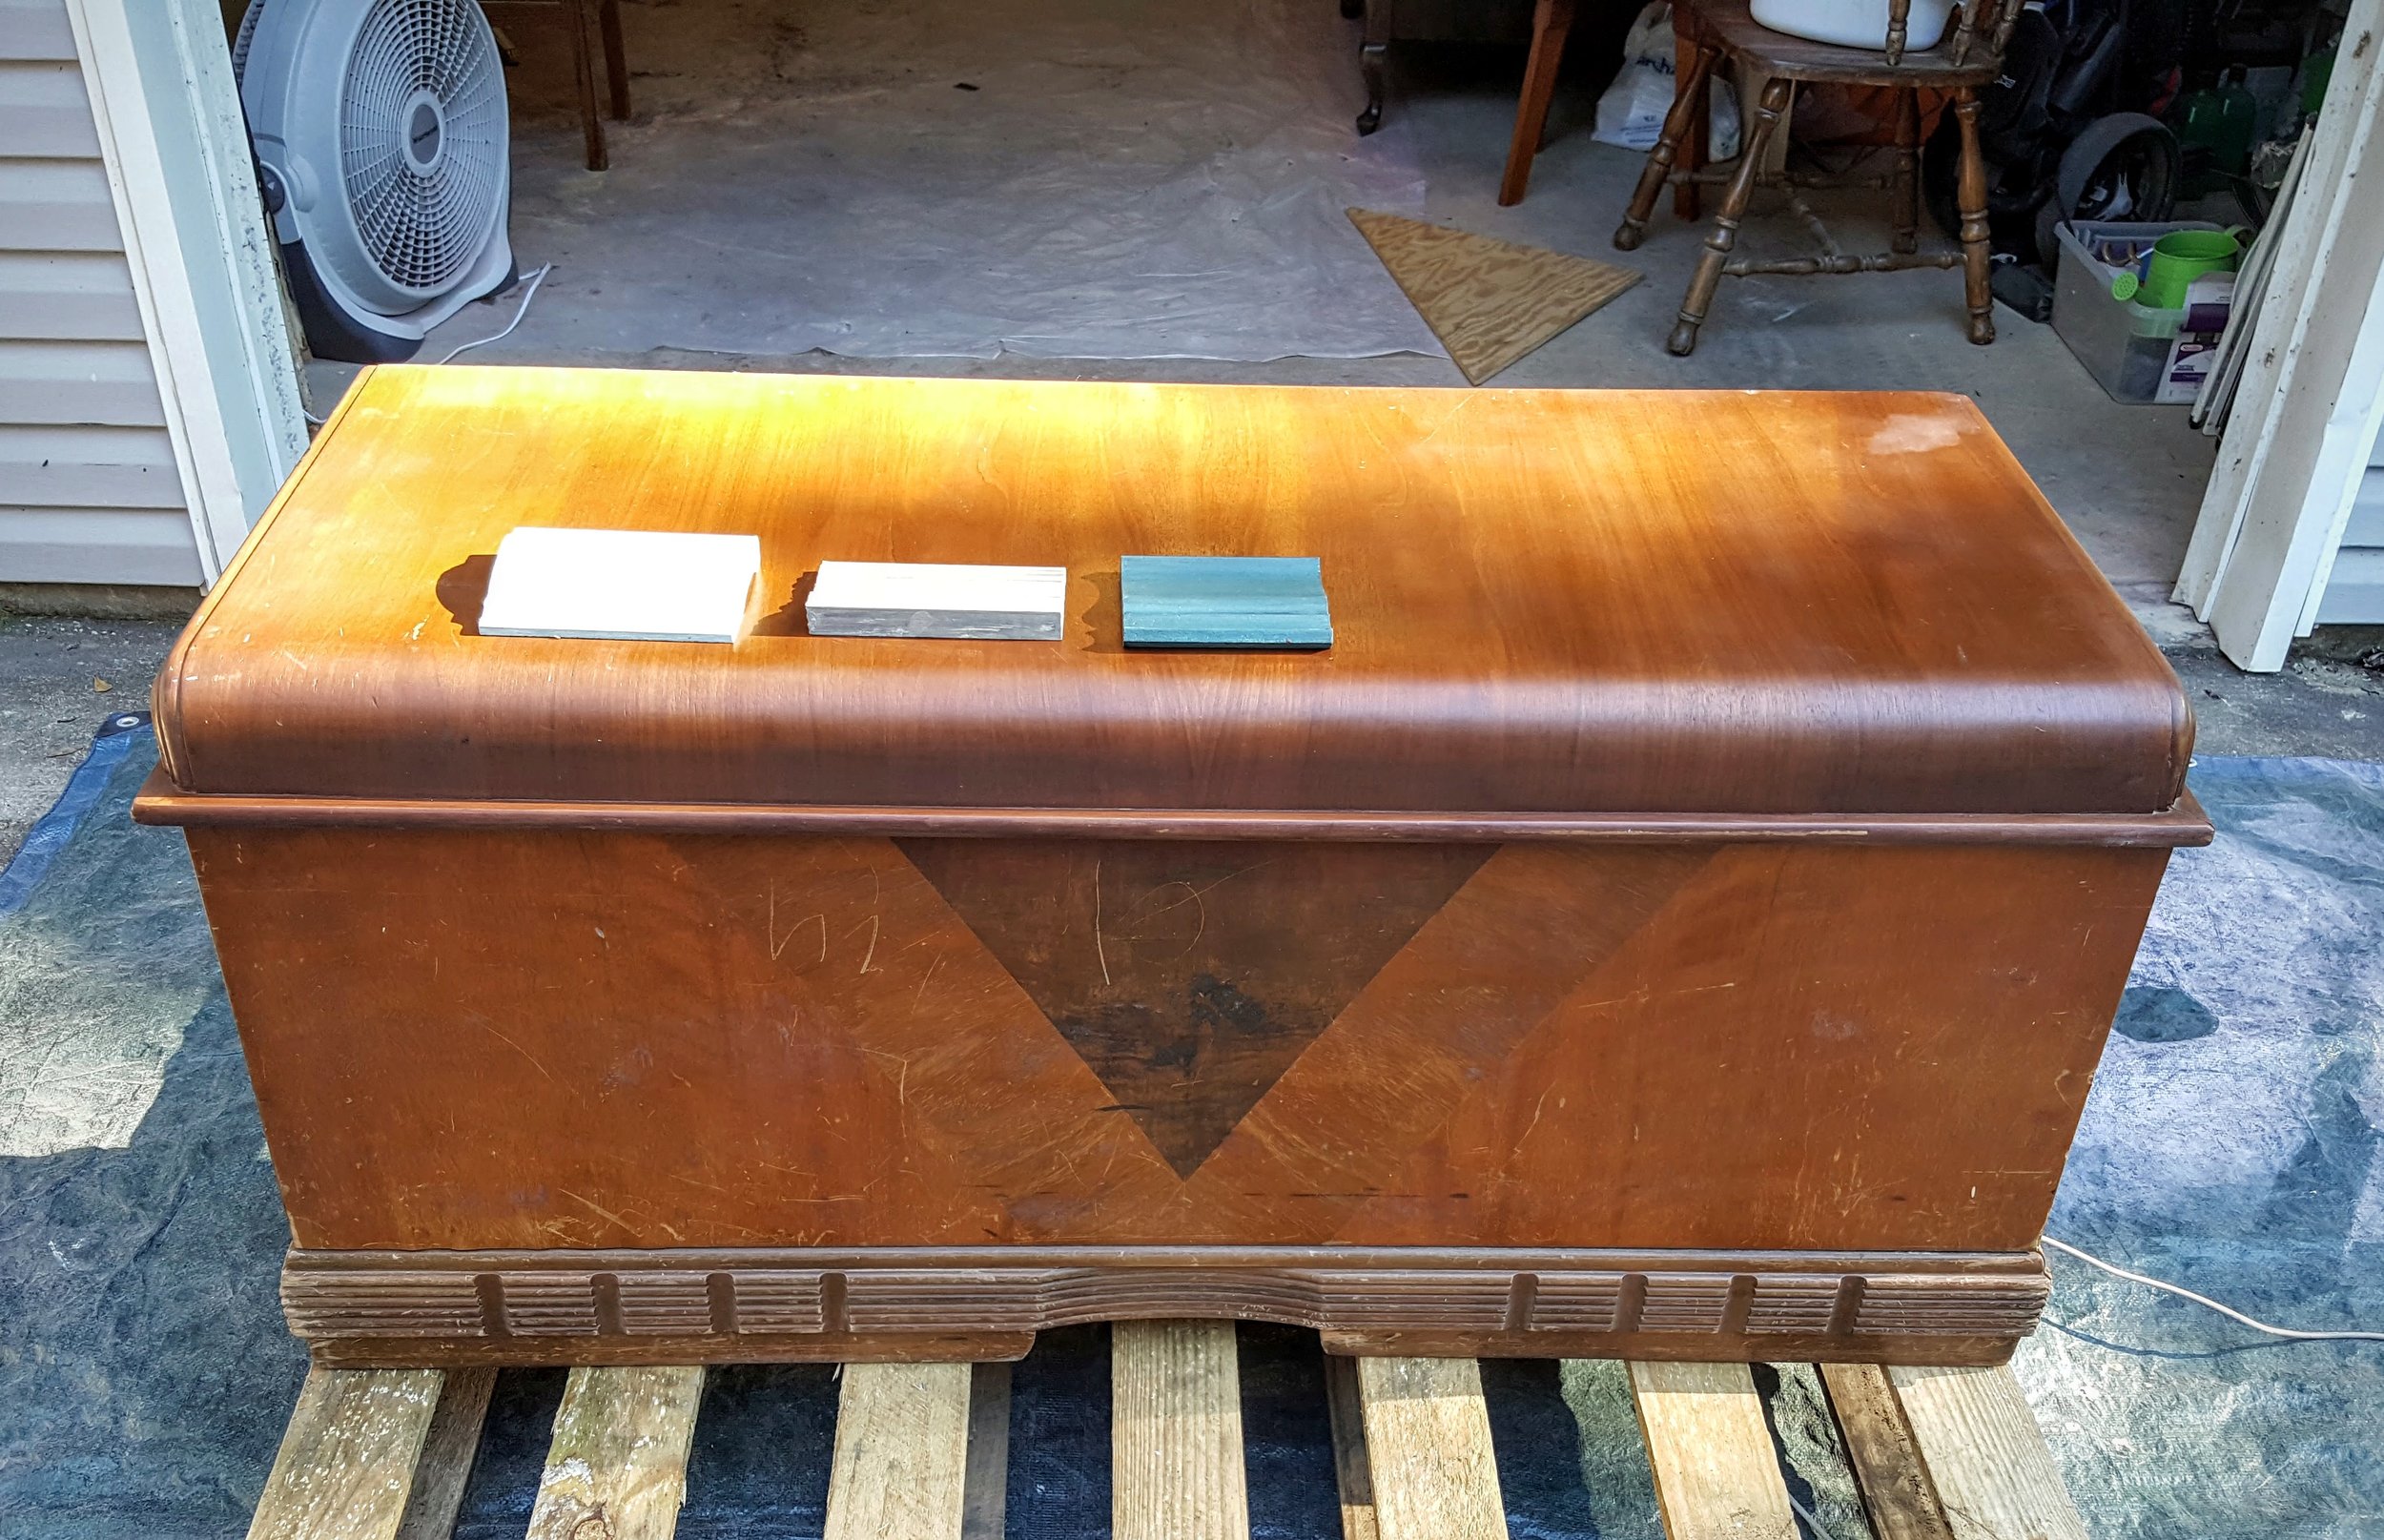
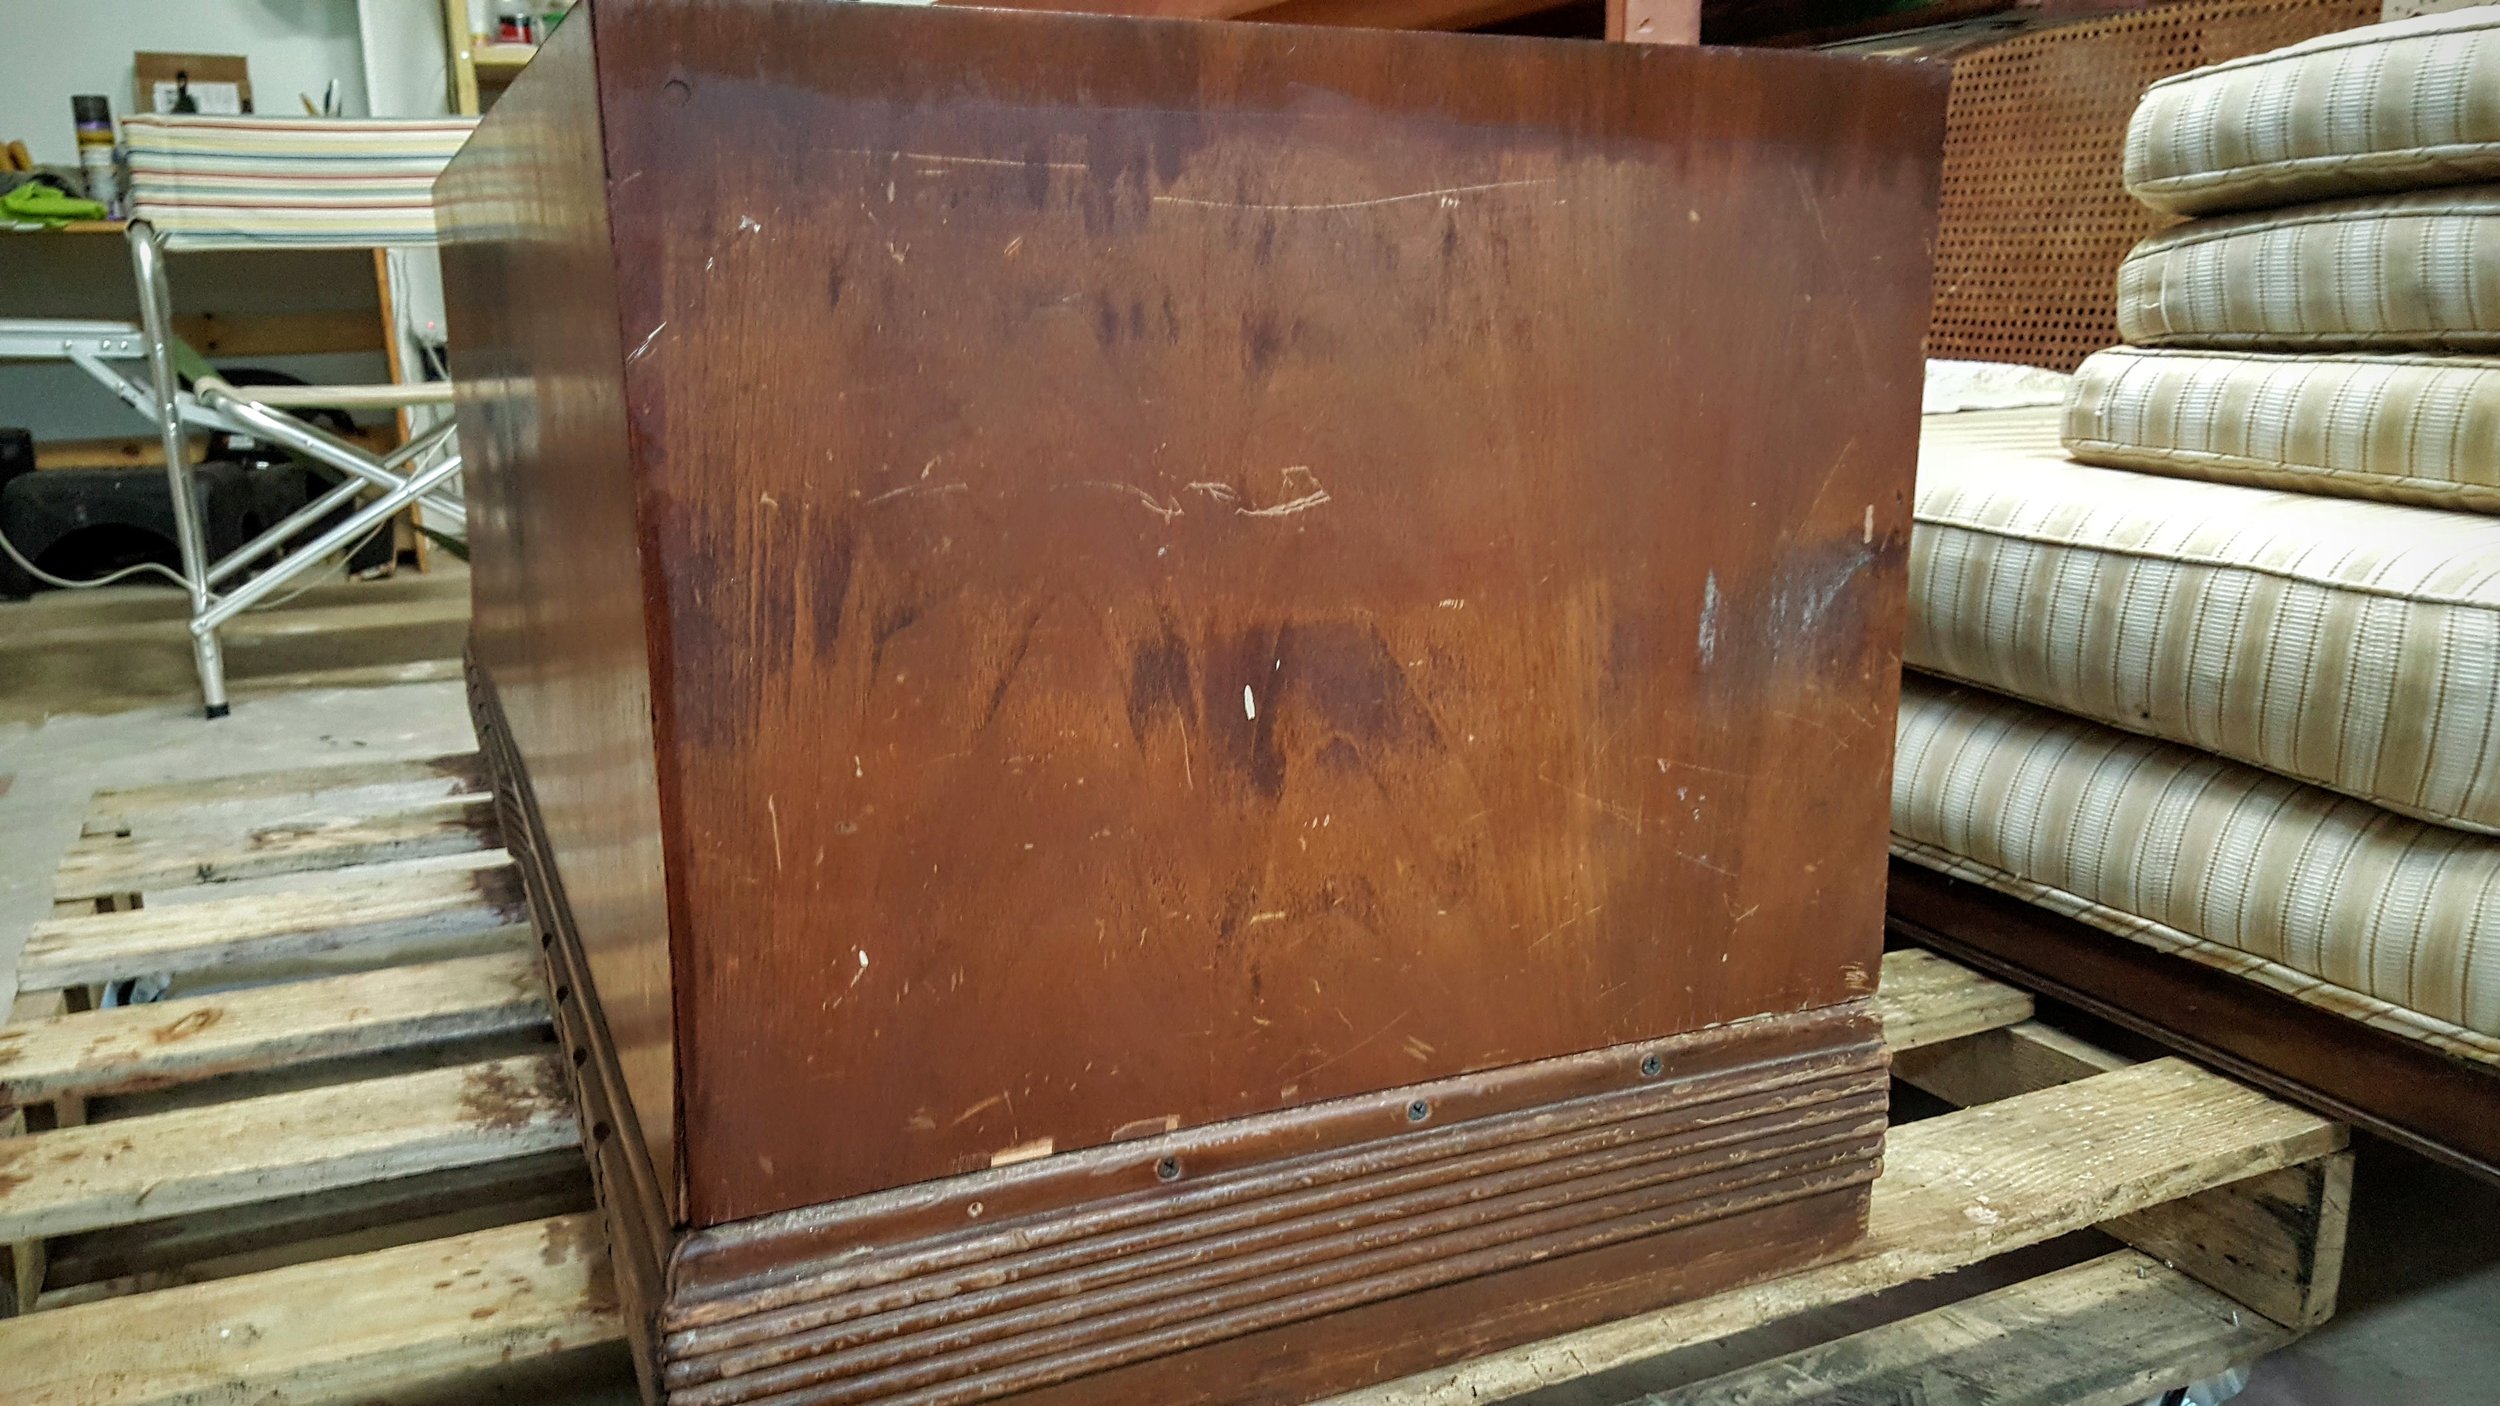
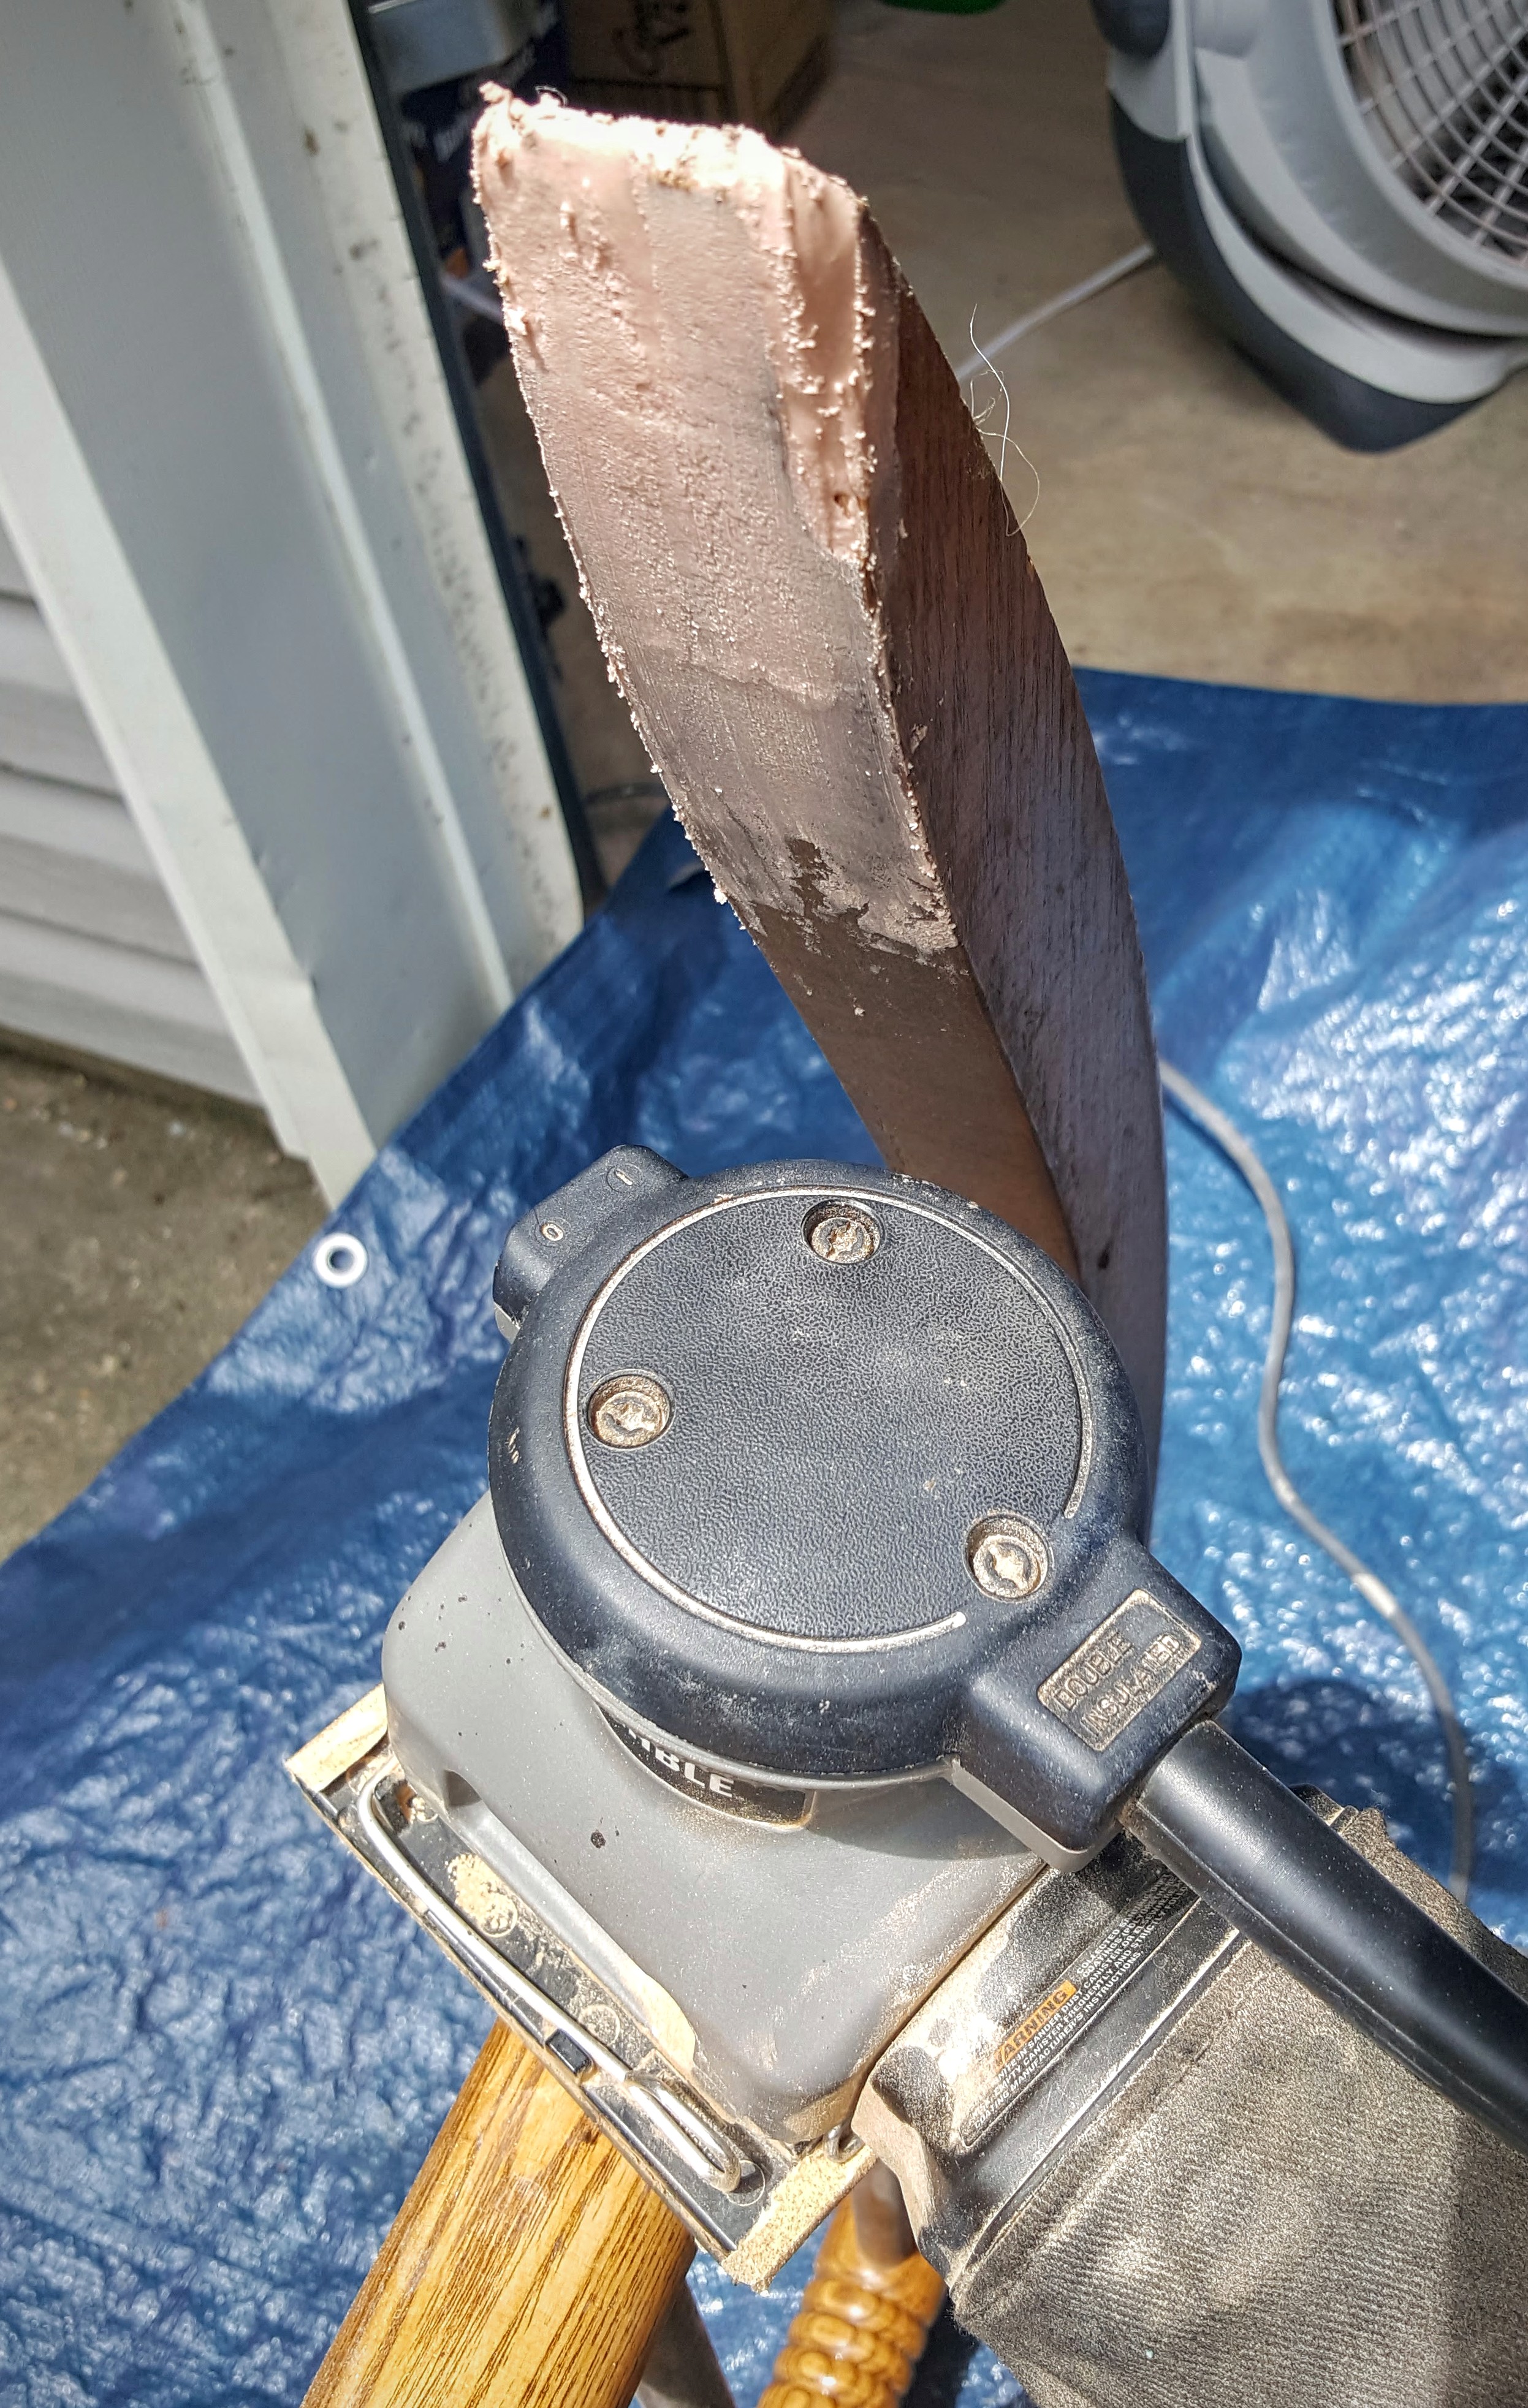
Cavalier Cedar Chest - FINISHED!

Remember that cedar chest I bought and bragged about HERE?  

Well, I finally got around to it.  I was scared because it's so awesome and I didn't want to screw it up.  I found out about these AMAZING products and, with some 0000 steel wool and a whole lot of elbow grease after the repairs were done, it looks amazing.  
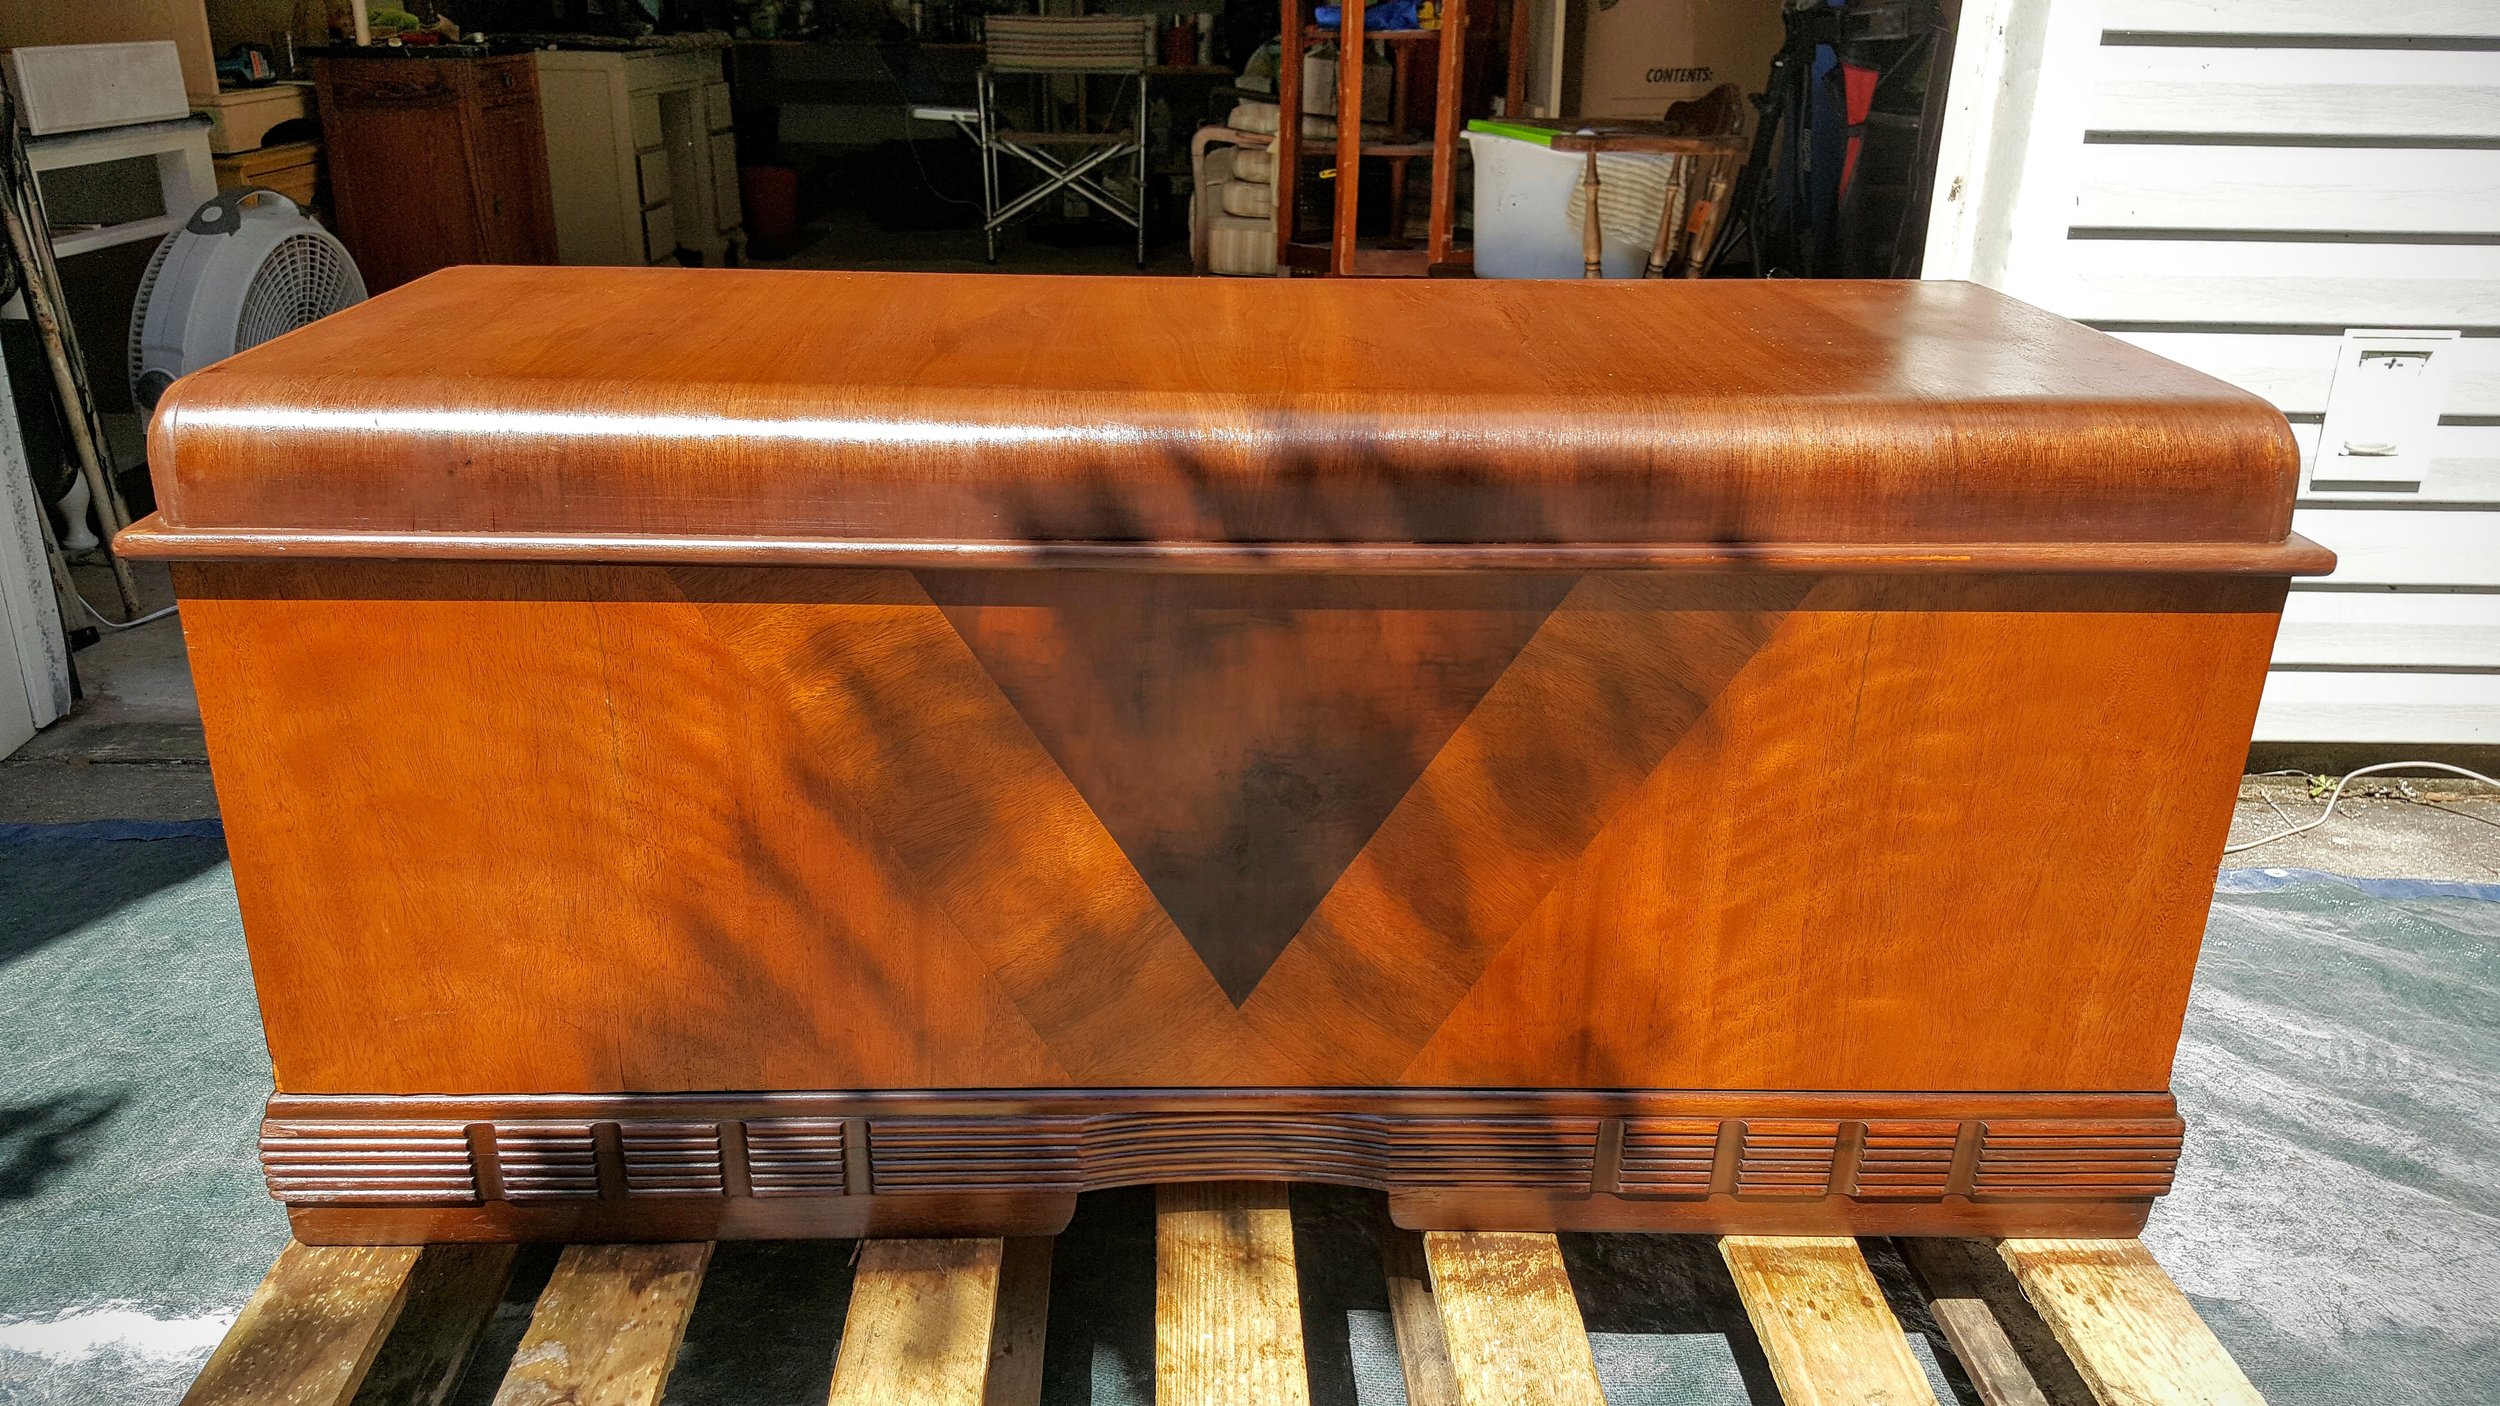
I tell you what...of all the crap I know how to do and do pretty well, this has got to be my favorite thing to do.  It is just so soothing to put on an audiobook and have at it!

Speaking of audiobooks, have you added the Overdrive app to your phone yet and synced it with your library card?  I'm telling you...it's the best thing ever.  That and Hoopla.  LOVE.THEM!

Oh yeah...the products I used?  

1.  Howard Restore-A-Finish, Cherry:  I applied this with the steel wool.  I just REALLY got into it and it worked so well! 

2.  Howard Wax-N-Feed:  This product is my new favorite thing in the EN.TIRE.WORLD!  All of my stuff will be waxed and fed by this stuff from now on at least once a year!  This stuff is amazing!   

My new FAVORITE thing! OXO Good Grips Soft-Handled Garlic Press

If you're like me, you buy something and use it until it breaks and then you replace it.  You're not out and about thinking to yourself...hey...I need another garlic press even though nothing is wrong with my current garlic press.  It's just not done.

My garlic press broke.  I've probably had it for 20+ years so it had a good, long, life.  So it broke and I went out looking for a new one.

You never think you can improve on things like garlic presses ya know?  They are all pretty basic.  Um...WRONG!  

I got this one:  OXO Good Grips Soft-Handled Garlic Press  

You press the garlic, flip the handle over and it pushes out the skin.  *BLINK*  No...really...*BLINK*  Now...those of you who have garlic presses which do this...I bow down to thee because my life has changed.  I just pressed a while bulb of garlic, three cloves at a time easy peasy.  This is seriously my new favorite thing.

I'm a simple, simple girl.

Does your garlic press clean the skin out for you too?  WHY DIDN'T YOU TELL ME?????????????

Create a Mirror Gallery with $30 Worth of Vintage Mirrors

I've wanted to do a mirror gallery for a while now.  I considered doing it along the stairs but didn't have all the mirrors I needed when I was ready to do the gallery along the stairs so I used the typical pictures in frames there.

But I still wanted a mirror gallery and decided it would be awesome in my woman cave, which is coming along quite nicely and is the perfect place to read and surf when the other human in our home watches all things sports related.  LOL!

So I've been buying cool and interesting mirrors whenever I saw them.  This entire lot cost me about $30.  

Some needed more fixing than most but most just needed to be painted, details highlighted and then distressed using Annie Sloan Dark Wax.  The large one had a big chunk out of it and it was almost broken in two at the top so I had to glue it and then use some Lightweight Filler to fix the big missing chunk.  I used antique gold paint and dark wax and made the "new chunk" look like the rest of the frame.  GO ME!  That was really cool.  I find that I'm really enjoying fixing stuff that other people wouldn't even try to fix.  Tomorrow I'm fixing a broken leg spindle on a cane seat chair...but hey...another post.  

MOVING ON!

I put some Mod Podge in matte over the paper to give it a more finished look since the paper was faded.  I considered replacing the paper with something else but I liked how it was faded in some spots.

I decided to paint two of the mirrors white which made no sense to anyone but me.  Hell...didn't even make sense to me at the time but I wanted to do it so yeah...that's what I did.

Then...I played around with placement on the floor until I had it like I liked it.  

When I was ready to hang them, I measured from end to end and put the measuring tape down in front of the sofa at the measurement.  Then...I hung the big one first and next...the bottom right one.  I filled out the far right column first and then the middle and worked the rest in.  I only made one change from the layout that Dr. Punkin approved.  Don't tell her I said that though.  She'll get the big head.

So yeah...for $30, I got a pretty cool mirror gallery.  This room is coming along nicely.  Just need to frame some art that I plan on hanging in here and decide on window treatments.  I want another chair or two but only if I can find the exact chairs I want.  I'm crazy about these chairs:

That chair is SO.SICK!  I need two of them.  PLEEEEEEEEEEEEEASE UNIVERSE LET ME ROLL UP ON TWO THAT I CAN REUPHOLSTER TO PERFECTION!

Okay, okay...oh...wait...that's it.  LOL!  

Yall like my mirrors?  Do the white ones throw you off?

How to fix chipped wood or veneer.

If you have nice pieces at your home with chips or broken veneer, you'll be surprised at how easy these things are to fix.  I've always wanted a porch rocker from Cracker Barrel but have never pulled the trigger.  I was at a consignment store and saw one and well...I had to have it. Solid wood?  Check.  And you know how I feel about solid wood.  HOOOOOOOOOTY HOOOOOOO!

I got a really good deal on it because one of the rockers had a chipped end and needed some fixing so hey...I can fix stuff.  LOL!

This stuff is pretty cool in that it brought me back to my childhood when I mixed it up.  It smelled exactly like the stuff my daddy used to use to fix our boat and, I guess that's exactly what it was.  Lightweight Body Filler.  Has that ever happened to you?  A smell takes you back?  It is a weird and cool experience huh?

If you're using this, you'll need one thing for sure, Bondo spreaders.  These are the only things which the hardened body filler won't stick to permanently.  Whatever you mix it with and on/in will be ruined forever so yeah...whip out a paper plate or bowl and a plastic spoon.

After mixing it up, glob it on whatever you're fixing pretty good and then use the spreader to smooth it evenly.  It will dry pretty quickly so please make sure you work fast.  Once it's dry...SAND IT SMOOTH.

Then...well...paint it and make it purdy.  You like purdy don'tcha?  Yeah...you do.  I painted the rocker in Annie Sloan English Yellow with a bit of a stenciled detail in Annie Sloan Pure White.  Yes.  It makes me happy.  :)

Now that I have a rocker...maybe I'll take up knitting.  LOL!  

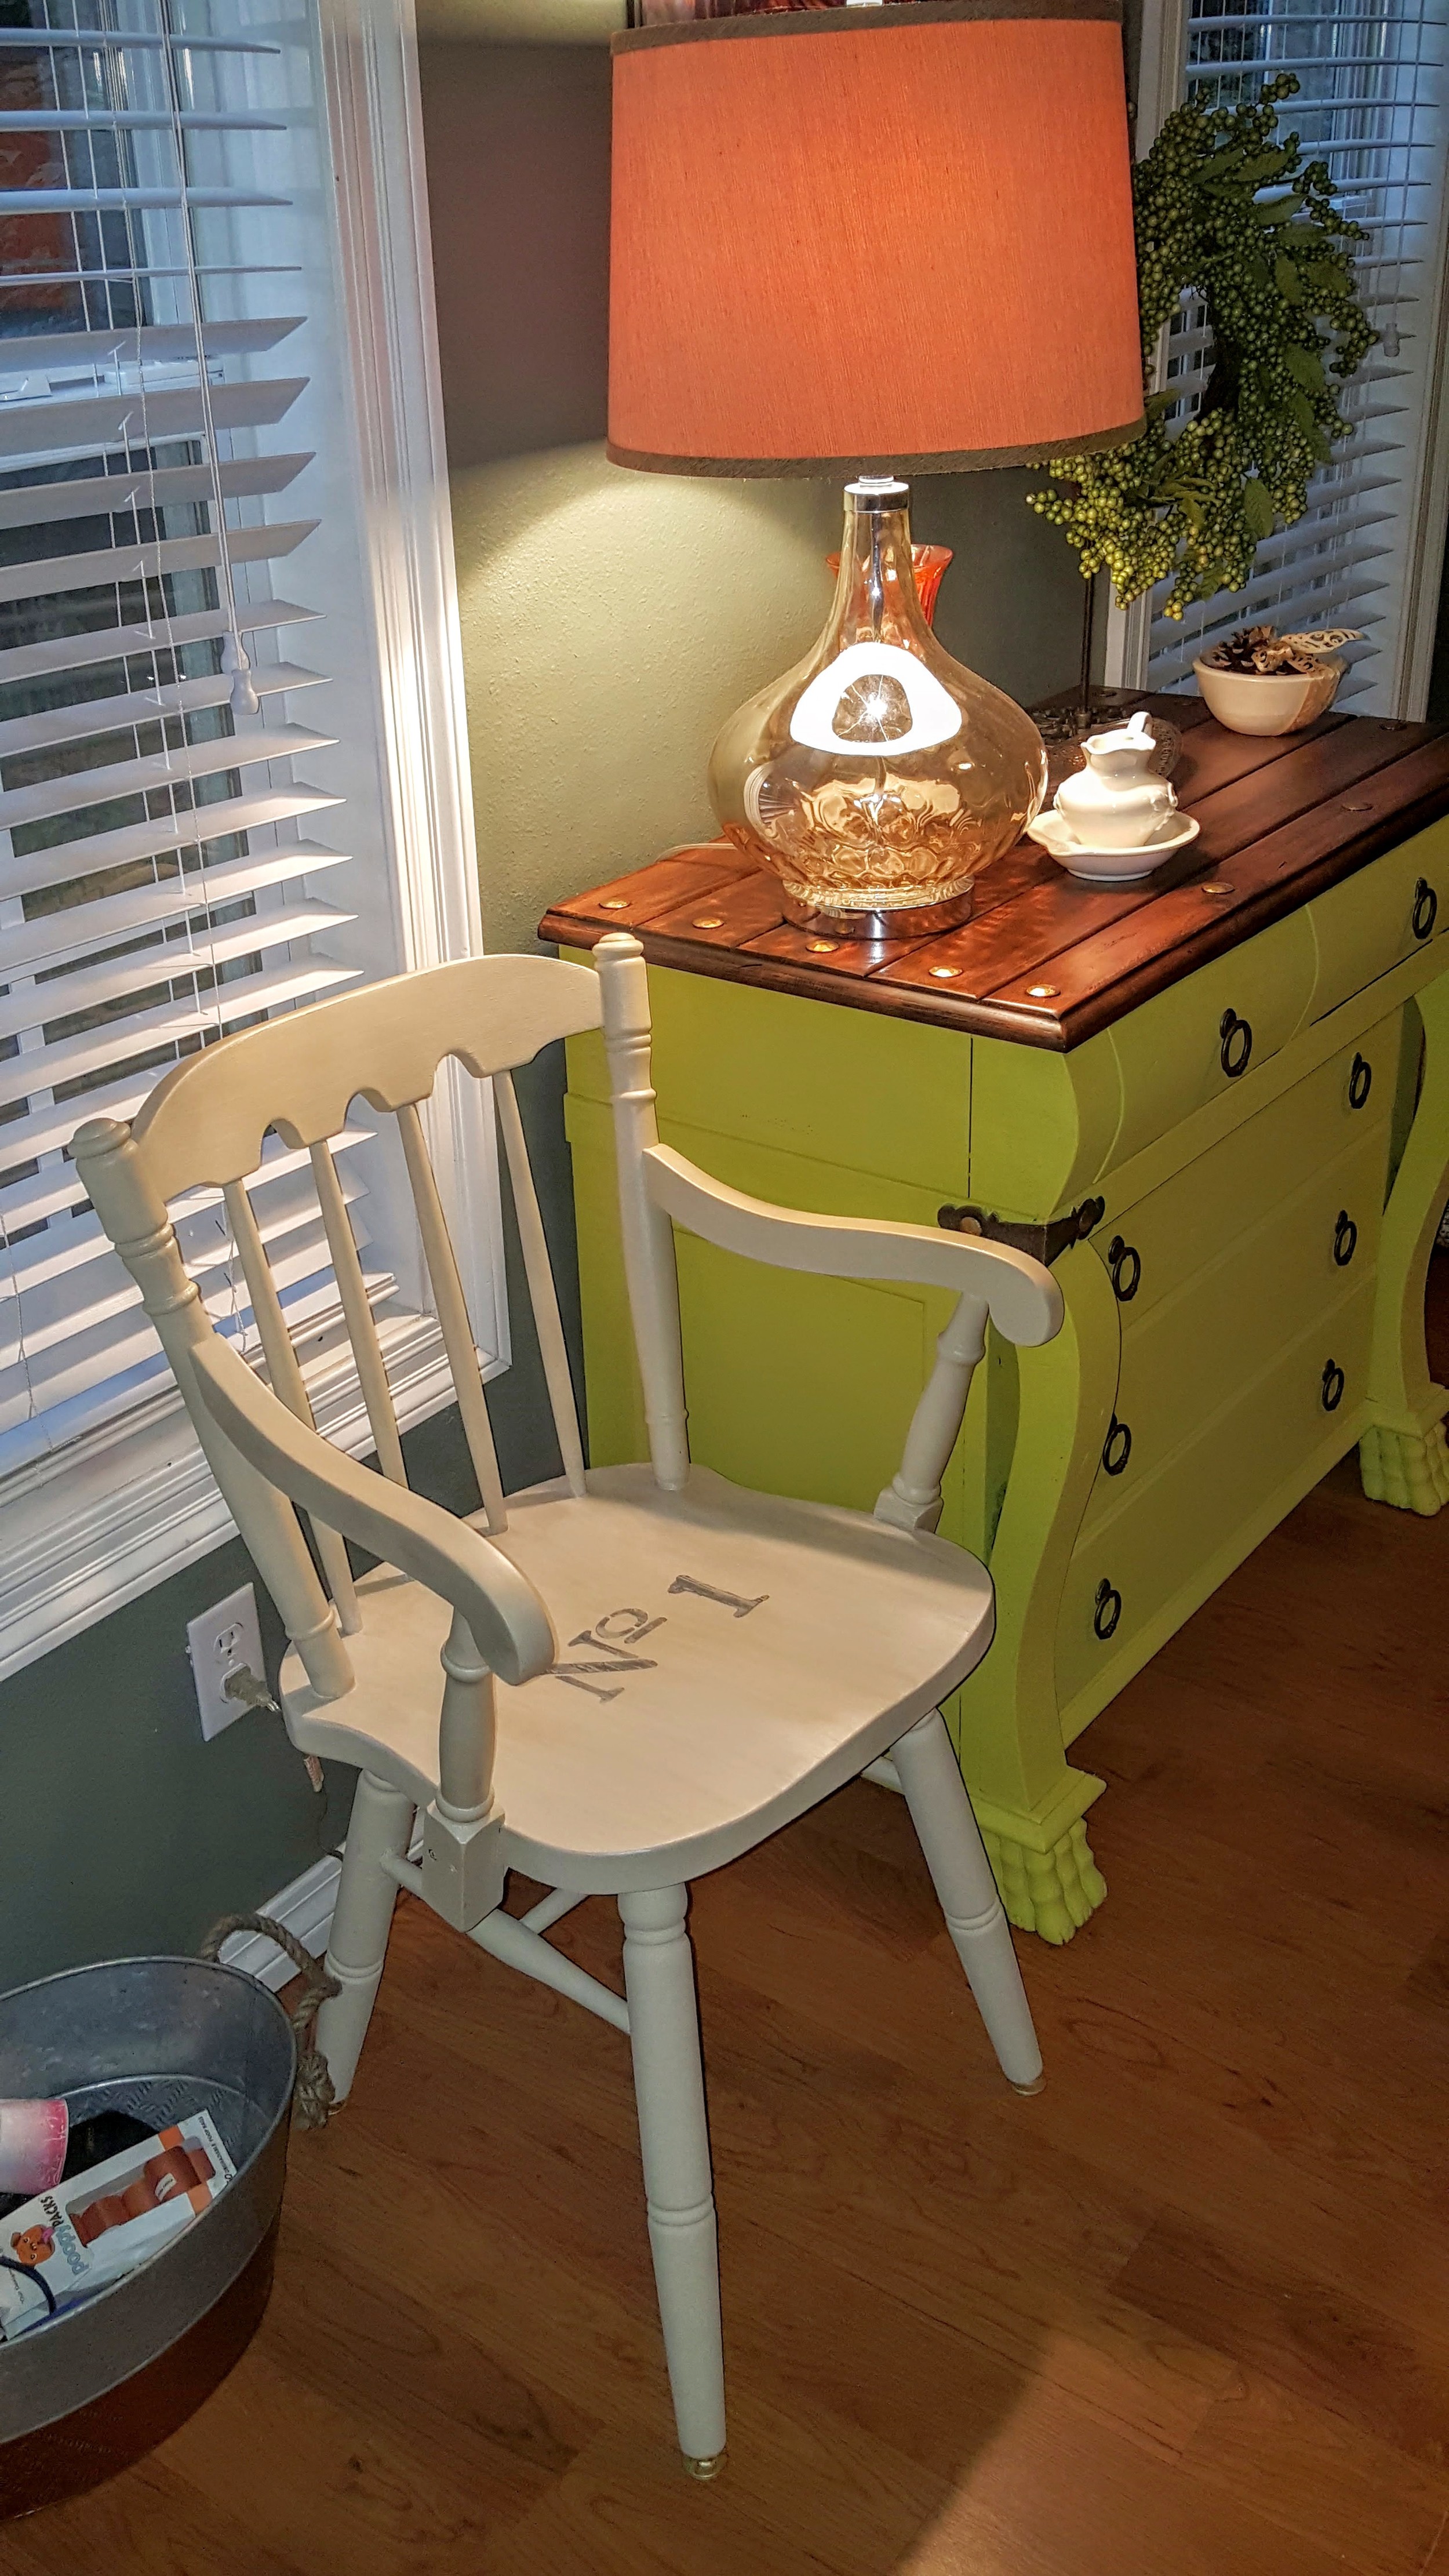
Refinished and Painted Vintage Windsor Wood Arm Chair

This might be my favorite piece yet.  It is so solid and fun now that it has been restored to awesomesauceness.  Yup.  That's a word.  Look it up.  Didn't find it?  Oh...my bad.  :)

This lil dude was busted and disgusted.  The bottom was broken and there was a ton of just...GRIMEY GRIME on the arms.  Dried on grimey grime.  Just gross.  But...as we've covered before...solid wood can be sanded and cleaned up so well so I repaired it with wood glue, contact cement and wood filler and then got out my palm sander to remove all the grime off it.

Then I painted it but it was just regular and I wanted it to be fun.  This will probably end up in the kids' guest room once I find the perfect size desk so, of course, I wanted it to be neat and indestructible too.  LOL!  I used some of my stencils and did a rustic French numbering stencil on the seat using chalkboard paint but it looked too "new" and I didn't like it.  To combat this I mixed one part paint to two parts water in a wide mouth jug and shook it up really well and then applied to the seat wiping it off almost immediately with blue shop towels for a white washed look.

The feet on it were rusted and non-removable so I taped the legs up and hit them with some gold paint.  To finish it, I sprayed it down well with Minwax polycrylic three times.  Should be good to go.

And now it's so cute...I might not want a kid sitting in it.  Indestructible or not.  So there.  LOL!  


Solid Oak Round End Table Refinished in Annie Sloan Country Grey with Stained Top

I'm totally beginning to have a thing for round coffee tables and end tables.  Not plain ones mind you...but some with a bit of oomph.  What is oomph you ask?  Hell if I know...I just know it when I see it.  

When I found this table it had a busted leg.  Totally ew.  Turns out, broken wood pegs are relatively simple to fix though.  You take a drill and drill through the broken peg until the hole is completely cleaned out.  Then?  Add some wood glue and bang in a new wood peg.  You can get a pack of like 10 of them for under $2.  Crazy huh?  When I think of all the things I've encountered with a busted wooden peg and it could have been fixed for like TWENTY CENTS???????  

LAWD... SHAME! SHAME! SHAME!

So...this was pretty basic.  Like...seriously.  When you use Annie Sloan chalk paint you don't have to sand it so I only sanded the top because I wanted to stain it and to stain something...ya gotta remove the current finish so the wood can absorb the Minwax Dark Walnut stain.  There was just no way I was painting over that gorgeous inlaid top.  It was just so neat to me that it was laid in quarters like that.  The beading along the side was a detail I wanted to make pop so after painting the base in Annie Sloan Country Grey (my favorite color it seems)  and under the top, I rubbed dark wax under the top.  As a protectant, I really like General Finishes High Performance Top Coat in satin.  I think I did two coats on the top.  Anything vertical I've learned to use a polyacrylic spray so that's what I did there.  The piece came out so lovely and man is this thing SOLID!  It won't move unless you actually move it.  A simple bump won't sent it sprawling into the wall to make a knick in your paint.  WHOOOOOHOOOOOOOOO!

You'll find that round end tables are pretty versatile for the space you're looking to fill too.  Squares and rectangles are pretty...um...finite.  I guess that's a good way to put it.  If not...pick some words, put them together and VIOLA!  Hopefully you know what I'm trying to say.  LOL!

Refinished Nightstand Between Twin Beds in Kids' Guest Room

20160713_142026 (1).jpg

When looking for pieces to refinish, do yourself a favor and choose REAL WOOD pieces only.  Don't get cute and get stuck with some particle board you won't be able to do anything with except paint.  Nothing wrong with painting, of course, but the great thing about real wood is that if you screw up...you can start over.  No problem.  If you don't like it...you can start over.  No problem.  

This piece had something I hate.  A non-working "drawer."  Like...there was a drawer pull on it and a fake line to simulate a drawer but it was just a side.  I was looking for a nightstand to put between the kids' guest bedroom.  It has twin beds and not enough room for two end tables so I needed to be pretty specific with size.  Also...I didn't want it to be too tall.  Initially, I was going to use a bookcase but struggled with lamp placement.  Since it's a guest room, something with a drawer isn't necessary and I've since put a low basket with a liner under it to hold books.  

Still working on the room for now, of course.  I'm planning to do a light colored wall behind the beds and decorate it with stars.  Why?  I like stars.  Duh.  LOL!  Funny because my nephew is currently visiting and he has his own ideas of design and implemented them accordingly.  *sigh*  He's quite proud of his handiwork.  What say you?  Think he has a future in interior decor?

The piece was scratched up like crazy so I removed the hardware on the faux dresser and covered the holes and the lines with wood filler that can be painted.  Then...I sanded the top really well to get as many of the scratches off the top as possible.  

I wanted a "front" so I used contact cement to add a pair of latex appliques to it.  I didn't decide this until I'd already put a coat of paint on it.  Next time, I'll know to make the decision BEFORE I've started.  Will make it a lot easier.  I added a bit of gold Rub N' Buff to the appliques so that they would stand out a bit.  I did the same to the bottom ring on the legs.

I put three coats of General Finishes High Performance top coat on the top to make it virtually indestructible and a dark wax along the base and legs for more of a shiny patina.  

I paid $5 for this table so yeah...even if one of the nephews Hulk smashes another one on top of it...I'm good.  LOL!

Plant Stand Makeover in Annie Sloan Provence and Dark Wax

This was tragic in the beginning. TRA-GIC!

I thought it was going to be a simple job of stripping and then painting but noooooooooooooo!  It had been painted and then covered with contact paper and then?  PAINTED AGAIN!  I didn't get anywhere with an entire can of Citristrip because of the stupid contact paper.  Once I got the top coats of paint off, then I had to pull off the contact paper and THEN I had to strip that paint off.  Seriously...I almost gave up on this thing thinking that a plant stand just really isn't worth all this trouble so I left it alone for a few days and worked on something else.  Then I thought about how gorgeous my trailing begonia would look on it so I stripped it, sanded it and painted it.  Then?  I got jiggy with it and used my stencils to put a few designs on it.  After that, I used 100 grit sandpaper to distress all the edges of the wood and went over it with dark wax.   

And now?  Me happy!  Had I known about all of the layers of paint and the contact paper in the middle?  Yeah...Idda passed.  I never want to do that again.  

Isn't it purdy?

Vintage French Provincial Nightstand in Pink and Berry!

First time I saw this...it was scary.

And now...it's all lovely and ish.  Perfect for a Princess' bedroom.  Isn't it gorg?

Antique China Hutch in Annie Sloan Graphite and French Linen

When I found this piece...it looked tragic.  It was covered in brown paint with faux wood grain contact paper on the shelves.  I bought it because I liked the details and well...I was also looking for a nice piece to use Annie Sloan Graphite on.  It is such a rich color that I figured it could be used to make anything look elegant.

When I got it home...I was curious as to what kind of wood it was made out of so I decided to strip it.  You don't need to strip paint to use Annie Sloan paint mind you...I just wanted to see it in  it's original state.  So I did it...and was shocked to find that the beautiful wood underneath the horrible paint was none other than rare mahogany.

Wow.

I honestly sat there and stared at it for a long time and then I moved around a bit just so I could make SURE I was doing the right thing by painting it.  Then...I decided that hey...no matter what...I could always strip the paint off again if I wanted to right?  RIGHT.

So I took the hardware and door off.  Then I collapsed the shelves and got to painting.  Since it was such a dark piece anyway...I knew I'd have to do a light color inside of it.  The hardware was pretty nice but I wanted it to seriously pop so I used a bit of Antique Gold Rub-N-Buff to make the color really stand out.

I put two coats of paint on it and then let it dry for a full day.  Next, I used General Finishes top coat for protection and now I'm sitting here debating whether I should wax it too.

This piece is so lovely to me that yeah...it might already be SOLD too.  :)

Spray Painted Vintage Temple-Stuart China Cabinet

MATERIALS USED:

Goo Gone Pro-Power

Porter Cable Palm Sander

Sandpaper

Rust-Oleum Comfort Grip Spray Paint Handle

Rust-Oleum 2x Red Primer (3 cans)

Rust-Oleum 2x Colonial Red Gloss Spray Paint (5 cans)

Rust-Oleum Hammered Black Metal Spray Paint (I've used one can for three projects so far on hardware.)

General Finishes Pitch Black Glaze

Minwax Polycrylic Spray

The before and after of this piece makes me super giddy.  I knew I wanted to go with a bold color from jump and I also knew that I wanted it to look smooth like a showroom piece at Ethan Allen so I decided to spray paint it!  

Steps to get a super smooth finish?

1.  Vacuum and wipe down with a bit of dish liquid in a bucket of water.  Don't wet it, mind you...but wipe it clean with a well-wrung towel.  Use Goo Gone to remove anything sticky, hard or icky. Then...let it dry completely. 

2.  Take it apart.  No...seriously...remove all screws, put hardware by type in Ziploc bags so you don't lose them and keep them together so you can get them ready to be painted too if you're using them.  Take the back off carefully using a hammer, pliers and a flat tool.  Either paint or add a piece of fabric using a spray adhesive as I did.  

3.  Use paint cans and spray paint tops to sit pieces on and sand.  Wipe down with damp cloth and then prime after it dries.  (I used a spray primer for red paint.)

4.  One coat of primer on all pieces if you're using the same kind of 2x primer I used.

5.  Let dry COMPLETELY.  I didn't paint until the next day.

6.  Spray paint using the spray paint handle so your finger doesn't get in the way or get tired from depressing that lil' thingy.  You should have a good rhythm and method since you spray painted the primer on.  Hold the can back far enough where you can do light sprays without paint runs.  Just spray evenly and lightly.  Follow the directions and apply your second coat when the can says to.  LOL!  

7.  Remove rust with a rust remover, clean, dry and spray paint hardware.  Let dry completely.

8.  If you're going to add a glaze, as I did, do it the next day after the paint has dried completely and you've corrected any mistakes or paint drips.  (Sand, wipe clean, repaint.) Glaze one section at a time so your glaze doesn't dry on you making it too dark in some areas.  If you love the super shiny, super bright pop of color...don't glaze.  For example...if I were to do a dresser or end table for a little girl's room in a pretty pink or raspberry I wouldn't glaze it.  The color would just be so happy to me as is.  LOL!

9.  Let dry completely and add a coat of polycrylic to any part where you'd sit stuff on like shelves and the top of the bottom piece.  This is just an added layer of protection.  I actually used the spray polyurethane for the first time on this piece and I adore the satin finish it gave.  

10.  Put it back together.  Add the hardware.  Sit back and admire your handiwork with a smug smile knowing that BAAAAAAAAAABY!  YOU DID THAT!

Luxe Therapy Scalp Soother

Luxe Hair Scalp Soother

A friend brought this to me from Essence Festival and I opened it while talking and then used it while still talking...

Then I stopped.

OH.MY.GOODNESS!!!!!!!!!

BEST FEELING EVER!!!!!!!!!!!!!!!!!!!!!  WHERE HAS THIS BEEN ALL MY LIFE?  WHO KNEW ABOUT THIS AND DIDN'T TELL ME?  WHO?  WHAT?  WHEN?  WHERE?  WHY???????  I NEED MULTIPLES BECAUSE MY SCALP ITCHES SO BADLY I WANT TO SCRATCH IT SO HARD IT BLEEDS!

WHEW!  YES.PLEASE!

Anyway...you should consider it.  Seriously it's the best thing ever.

Game of Thrones Finale Recap - The Damn Ginas

This preacher/sparrow whatever he is needs to go.  He's doing the most.  He just carved Loras' head like that in front of people?  DAMN GINA! That's that bull. Margaery you should have known you couldn't trust him.

This jacket Cersei is rocking is killing the game.  I want two of them.  "I choose violence."  That is one of the best lines from the season.  I'm not a fan of Cersei but I want her to wreak havoc on that religious goon.  That dude gives me the heebie geebies.

So you send old boy to get Cersei WITHOUT AN ARMY?????????  She already told yall she chooses violence!  She ain't playing bruh!  Not with the mountain by her side and them dang children of the corn running around with knives and ish!

Now...yall know I love the kids but seriously...these kids have me side-eyeing all kids.  Stuff like this makes me turn my head and even then the sounds are just gross. They messed Pycelle up!  DAMN GINA!

Wait...where did that kid jab that dude?  

YALL BETTER LISTEN TO MARGAERY!!!!!!!

Dear HBO...your HBO Now app sucks.  Seriously.  Rewinding is a crazy chore.  

Oooooooooh!  That green fire stuff Tyrion used that time!  DAAAAAAAAAYUM GINA!  THEY GOT BLOWED THE HECK UP!

Bye Margaery.

CERSEI.IS.EVERY.SINGLE.THING.RIGHT.NOW.

But wait...why is she wasting the wine though?  That's not called for.  This faux-nun chick is a goner.  This outfit Cersei is rocking is so amazing and she is telling it all!

Oh mercy on Unella's soul.  "Shame.  Shame.  Shame." DAMN GINA!

The little king is next.  I  hope his mother is gentle with him.  

Well...and then there's that.  Yet another DAMN GINA!

Jamie wants to be a good guy soooooooooo badly but all his dirt can't get him over the hump.  I can't stand the Frey's ever since the Red Wedding.  That level of treachery is just...NO.  Jamie just put him on notice.

Cersei has lost all of her babies now huh?  

HEY SAM!  I love Sam.  I liked when he snatched his sword off that wall too.  That baby is super cute.  SUPER.CUTE.  Dude couldn't get his butt up an inch?

And here is my reason.  Jon Snow.  I love him so.  That red chick though?  No.  That time she took off that necklace I was like...DAAAAAAYYYYYUUUUUMMMMM GINA...I need one of those!

Uh oh.  Gigs up!  Now they know she burned Princess Shireen at the stake.  Alive.  Davos is gonna kill her azz one day fo' sho' behind that.

I like Jon and Sansa together again but I don't forget how Sansa used to be when she was a girl in King's Landing.  She wasn't 'bout that family life and was steadily trying to come up and screwed her family big time.  That said...I don't trust her.  Wait until Arya shows up.  Arya will know her for true.

White raven.  Winter is here.

These Dorne women?  The Sand Snakes?  NO.JOKE.  Matter of fact...most of what I love about Game of Thrones is how the women are warriors too.  They don't play.  I like that.  But I also like Lady What's-Her-Face smacking them around with Elder talk too.  LOL!

Ooooh!  Hey Varys.  Gotta wonder what the what when he shows up.

HEY DANY!  HEY BOO!  Dany my blonde boo.  I can't believe she doesn't burn in the desert sun as pale as her skin is.  Now look...ya boy better listen and do as Dany says.  She doesn't answer to you boo!  You ain't going and that's final!

Awwwwwww...I love how Tyrion is so good for her and now?  He's the Hand of the Queen!!!!!!!!!!!

But is Tyrion about to cry though?  Yall know he's my favorite right?  RIGHT.  He brings me ALL.THE.JOY.ALL.THE.TIME.  In the books he is the most perfect of snarky smartazzes.  LOVE.HIM!

Frey is about to die.  Right?  What the hell???????? They fed him his sons in a pie?  ARYA!!!!!!!!!!!!!  DAMN GINA!  ARYA FOR THE REVENGE WIN!!!!!  YOU KILLED MY BROTHER AND MY MOTHER AND I FED YOU YOUR SONS AND SLIT YOUR THROAT!!!!!!  YEAH BOY!  You killed her people after you gave them bread and salt and they thought they were protected guests and baaaaaby!  She baked a focaccia outta your sons!  DAMN GINA!  I will never be able to have focaccia again without thinking of Arya Stark! 

THE NORTH REMEMBERS!!!!!

Littlefinger BEEN wanting Sansa but how creepy is it that he was once in love with her mother?  I mean come on man...Sansa is about to come into her own WITHOUT.A.MAN who gave her to Ramsay.

Uncle Benjie...how you gonna leave Bran in the woods with just a young lady and a tree with blood eye slits?  

Jon is NOT Ned's bastard son.  He is Ned's nephew and wait...wait...HALF A TARGARYEN?????  SO...IS DANY HIS AUNT???????????????????????????  LAWD.TO.DAY!  WAIT!  LEMME CHECK THIS OUT FURTHER!  WHERE IS A FAMILY TREE?  THIS MEANS JON CAN TALK TO DRAGONS AND STUFF TOO HUH?????????  AND WAIT!  WAIT!  HE'S AN HEIR TO THE THRONE! DAMN GINA!

GASP.SWOON.FAINT.DAMN.GINA!!!!!!!!!

We finally have the proof of it all.  If only Katelyn had known that too. 

Sansa doesn't like this Jon being King of the North thing much.  Told ya.  She ain't 'bout that family life.  She wants to be the prize/leader/top dawg.  That lil girl...Lady Mormant?  She deserves the Iron Throne.  Tomorrow.  She too fierce for words.  LOL!  And she has a crush on Jon.  LOL!

Cersei is on the throne.  That's all she's ever wanted.  And she got it.  (Queue Hillary in a pants suit.)

I want a dragon.  Not three.  I don't want to be greedy.  Just one. Those ships and dragons look so menacing!  I guess they got over that whole crossing water horses can't drink thingy huh?

Wait...that's it?  No scary all-White people with zombies?  A tree didn't gobble up Bran?  Melisandre didn't burn down Westeros?  That's it?  No more until there is more?

Well shit.

Carry on.


1940s Double Glass Door Bookcase

This piece was seriously rusted and busted when I found it.  Poor thing was all creaky and hadn't been looked after in forever.  Folks are always looking for bookcases and having one with glass doors is pretty cool because you don't have to dust the inside as often as you're used to.  

So...I went to work.

We blew it off with the leaf blower and then wiped it down inside and out with a mild dish soap in a gallon of water making sure to wring the towel out super well so the wood wouldn't be "wet" if you know what I mean. Once it was wiped down I just looked at it for a few days trying to come up with a design for it that kept it as um...stoic as possible.  Just seemed this piece didn't want to be "happy."  LOL!  It's pretty serious about that life.  THUGS RISE UP!

The back of it was pretty busted so I removed it and added a piece of fabric to it using spray adhesive.  Then I took the doors off and soaked the hardware in some rust remover solution.  Next I sanded the whole thing down (did the doors by hand), stained the top, shelves and bottom with Minwax Dark Walnut stain using a brush on the top (it was pretty bad with water rings and whatnot) and a rag inside so I could get all the corners and whatnot pretty well.  

I painted it in Benjamin Moore's Chelsea Gray (love this color) because it coordinated really well with the Waverly fabric I used for the back and followed that with General Finishes Pitch Black glaze wiping it off quickly on the sides but letting it set in a bit longer along the details of the top front and doors.  Once I put it all back together, I finished the top, bottom and shelves with a polyurethane to protect the surfaces.  I kinda like the thought of the painted parts getting a bit more weathered looking.

I like it.  It makes me happy to look at.  And isn't that really all that matters?  That you're happy with what you're doing?  That you're content in the knowledge that you can set your mind to do something and then you can make it happen exactly as you saw it in your head?  And then...what you saw in your head is actually really pretty?  Yeah...I like it.  There is a bit of odd satisfaction in being able to find something unloved and busted and bringing it back to life in such a way it makes a statement.  Just says a lot about so much.  Yup.

Holla.

Upcycled Maple Child's Dresser

This dresser had seen more than a few seriously good years in a child's room if the condition of it was any indication.  LOL!  There were stickers, water glass marks, scuff marks, and anything you can think of that a kid would do to a fine piece of solid maple furniture.  I used Goo Gone to remove the stickers, stripped the top.  Sanded the entire piece, dry wiped drawers interior and exterior (not the fronts) with stain, primed and painted the body and spray painted the hardware.  Final touches included weathering it a bit with sandpaper and two coats of polyurethane as a sealer.

Now?  It's ready for a new child!  LOL!  And since it's such a solid piece, should the new child tear it up...you can always redo again and again and again.  THAT'S why real wood furniture is so expensive these days because you can always make it better.  :)

An Elder gave me a major compliment today.  He's pretty hardcore and thinks everyone is lazy.  Like...everyone.  Always has.  And guess what he hates?  Lazy people.  Today he said to me, "Now see you?  You've never been lazy.  You're always doing something.  So much stuff out there to do and folks just watch tv."

Awwwwwwwww...so much love.  ROFL! I almost teared up.  

E is headed to COLLEGE!!!!!!!!!

Can you believe he's graduated high school?  I wasn't ready.  *sigh*  So, of course, I harassed the absolute heck outta him.  LOL!  He's just so smart and handsome and we're oh, so proud of him!  This kid is gonna make us super, dooper prouder!!!!!!!

Vintage Drexel Triune Coffee Table COMPLETED!

This piece just might be my favorite so far.  Seriously.  The lines and heft of it are just so perfect that it makes me smile. I know every inch of this table as I've stripped it and started over twice because I love it so.   I just had a vision for it you know and I knew I could make it look like exactly what I wanted it to look like.

The brass hardware is original and took 3 separate scrubbing cleanings to get all of the old grime off it with Brasso, 0000 steal wool and using cheesecloth as a polishing cloth.  The scratches on top have been mostly buffed out and the deeper gouges were filled in with stainable wood filler so the top is smooth to the touch.  I love this piece so much, I would want it to have a custom glass top cut to put on top of it for protection.

The finished piece has been stripped with Citri-strip, sanded by hand with a 120 grit sandpaper along the base because of the carved details and sanded using my new Porter Cable electric palm sander (The Robinator is awesome!) on the top.  Then it was stained twice with light sanding in between coats using 220 grit paper and Minwax Red Mahogany stain.  Finally, two protectant coats of Minwax Polyurethane in clear satin were applied (first coat with a good bristle brush, final coat with sponge brush) with a light 220 grit sanding after first coat dried for 24 hours.

I cannot express how completely I love this piece.  The closest online comparison of it that you can currently buy by Drexel is this cocktail table for $1,929 and it's in cherry, not rare mahogany as this one is. Drexel Cocktail Table  

They call them cocktail tables now and that cracks me up.  LOL!  I guess people are more fond of cocktails than coffee these days.  LOL!

This piece already has a home, unfortunately, as someone I love claimed it when they realized I wasn't going to keep it.  They have excellent taste and recognized the quality of it immediately too.  I have been doing a soft discouragement campaign using the techniques of saying nonchalantly, "You know you don't have to buy it. It might not match your stuff now cuz it came out so dark.  Don't feel obligated to follow through just cause you said you were going to." But that hasn't worked.  *sigh*  LOL!

I am having SO.MUCH.FUN doing these pieces I'm finding!  GO ME!!!!!!!!!!!!! GOTTA KEEP BUSY! Isn't it gorgeous???????

Drexel Triune Coffee Table

So...I ran into this piece and recognized that it was solid, CARVED, real wood.  It was heavy and seriously...there are no screws.  LOL!  Like...it seems to have been put together by elves.  So I scooped it up.

Then, I got it home and did some research on it.  When I found out it was solid mahogany, I was like...WHOA.  See...mahogany is super rare now.  Something about them using it all up and not replenishing it properly.  That's why it is so expensive when you find it.  So then...I got scared.  REAL.SCARED.

I didn't want to screw it up.

So I read everything there was about refinishing real mahogany because there was no way in hell I was putting paint on real mahogany.

First...I stripped it with Citri-strip.  Then...I let it dry for almost a whole week.  Next, I sanded it and then...I tried to repair some of the deeper scratches.  Right now I've put one coat of stain on it and I'm letting it dry completely.    I'll pick back up tomorrow with another sanding to fix the scratches even more.

This one is a slow and steady job so it might take a while to complete it.  I'll let you know when it's done.  I'm just super happy about the find.  Real wood is expensive as all get out.  Real MAHOGANY?  YAAAAAAAAAAASSSSSSSSS!!!!!!!!!


Cavalier Cedar Chest

upload.jpg
upload.jpg
I have always wanted a HEAVY cedar chest and when I saw this one, I had to have it!  I am currently researching how to put it in tip top shape so it might be a minute before I get to it but man...how awesome is it!  So far...I know it is f…

I have always wanted a HEAVY cedar chest and when I saw this one, I had to have it!  I am currently researching how to put it in tip top shape so it might be a minute before I get to it but man...how awesome is it!  So far...I know it is from 1938.  Seriously.  I.CANT.EVEN!!!!!!

Do you have a cedar chest?