

Bought these travertine 4 x 4 tiles from Home Depot for $4 per pack of 9. Having big fun with them making coasters for family, framily and friends!!!!!

UPCYCLED! Coat, Hat and Umbrella Stand for Foyer

I found this stand and it was super rickety. Like...SUPER. But you know how I feel about real wood so I knew it would be alright. I took it apart and cleaned it really well and then put it back together solidly minus the rings. Then...I primed it and spray painted it in antique white. I painted the rings gold.


Wanna know how much I paid for it? $5. LOL! Yup...you read that right. $5.
GO ME!!!!!!!
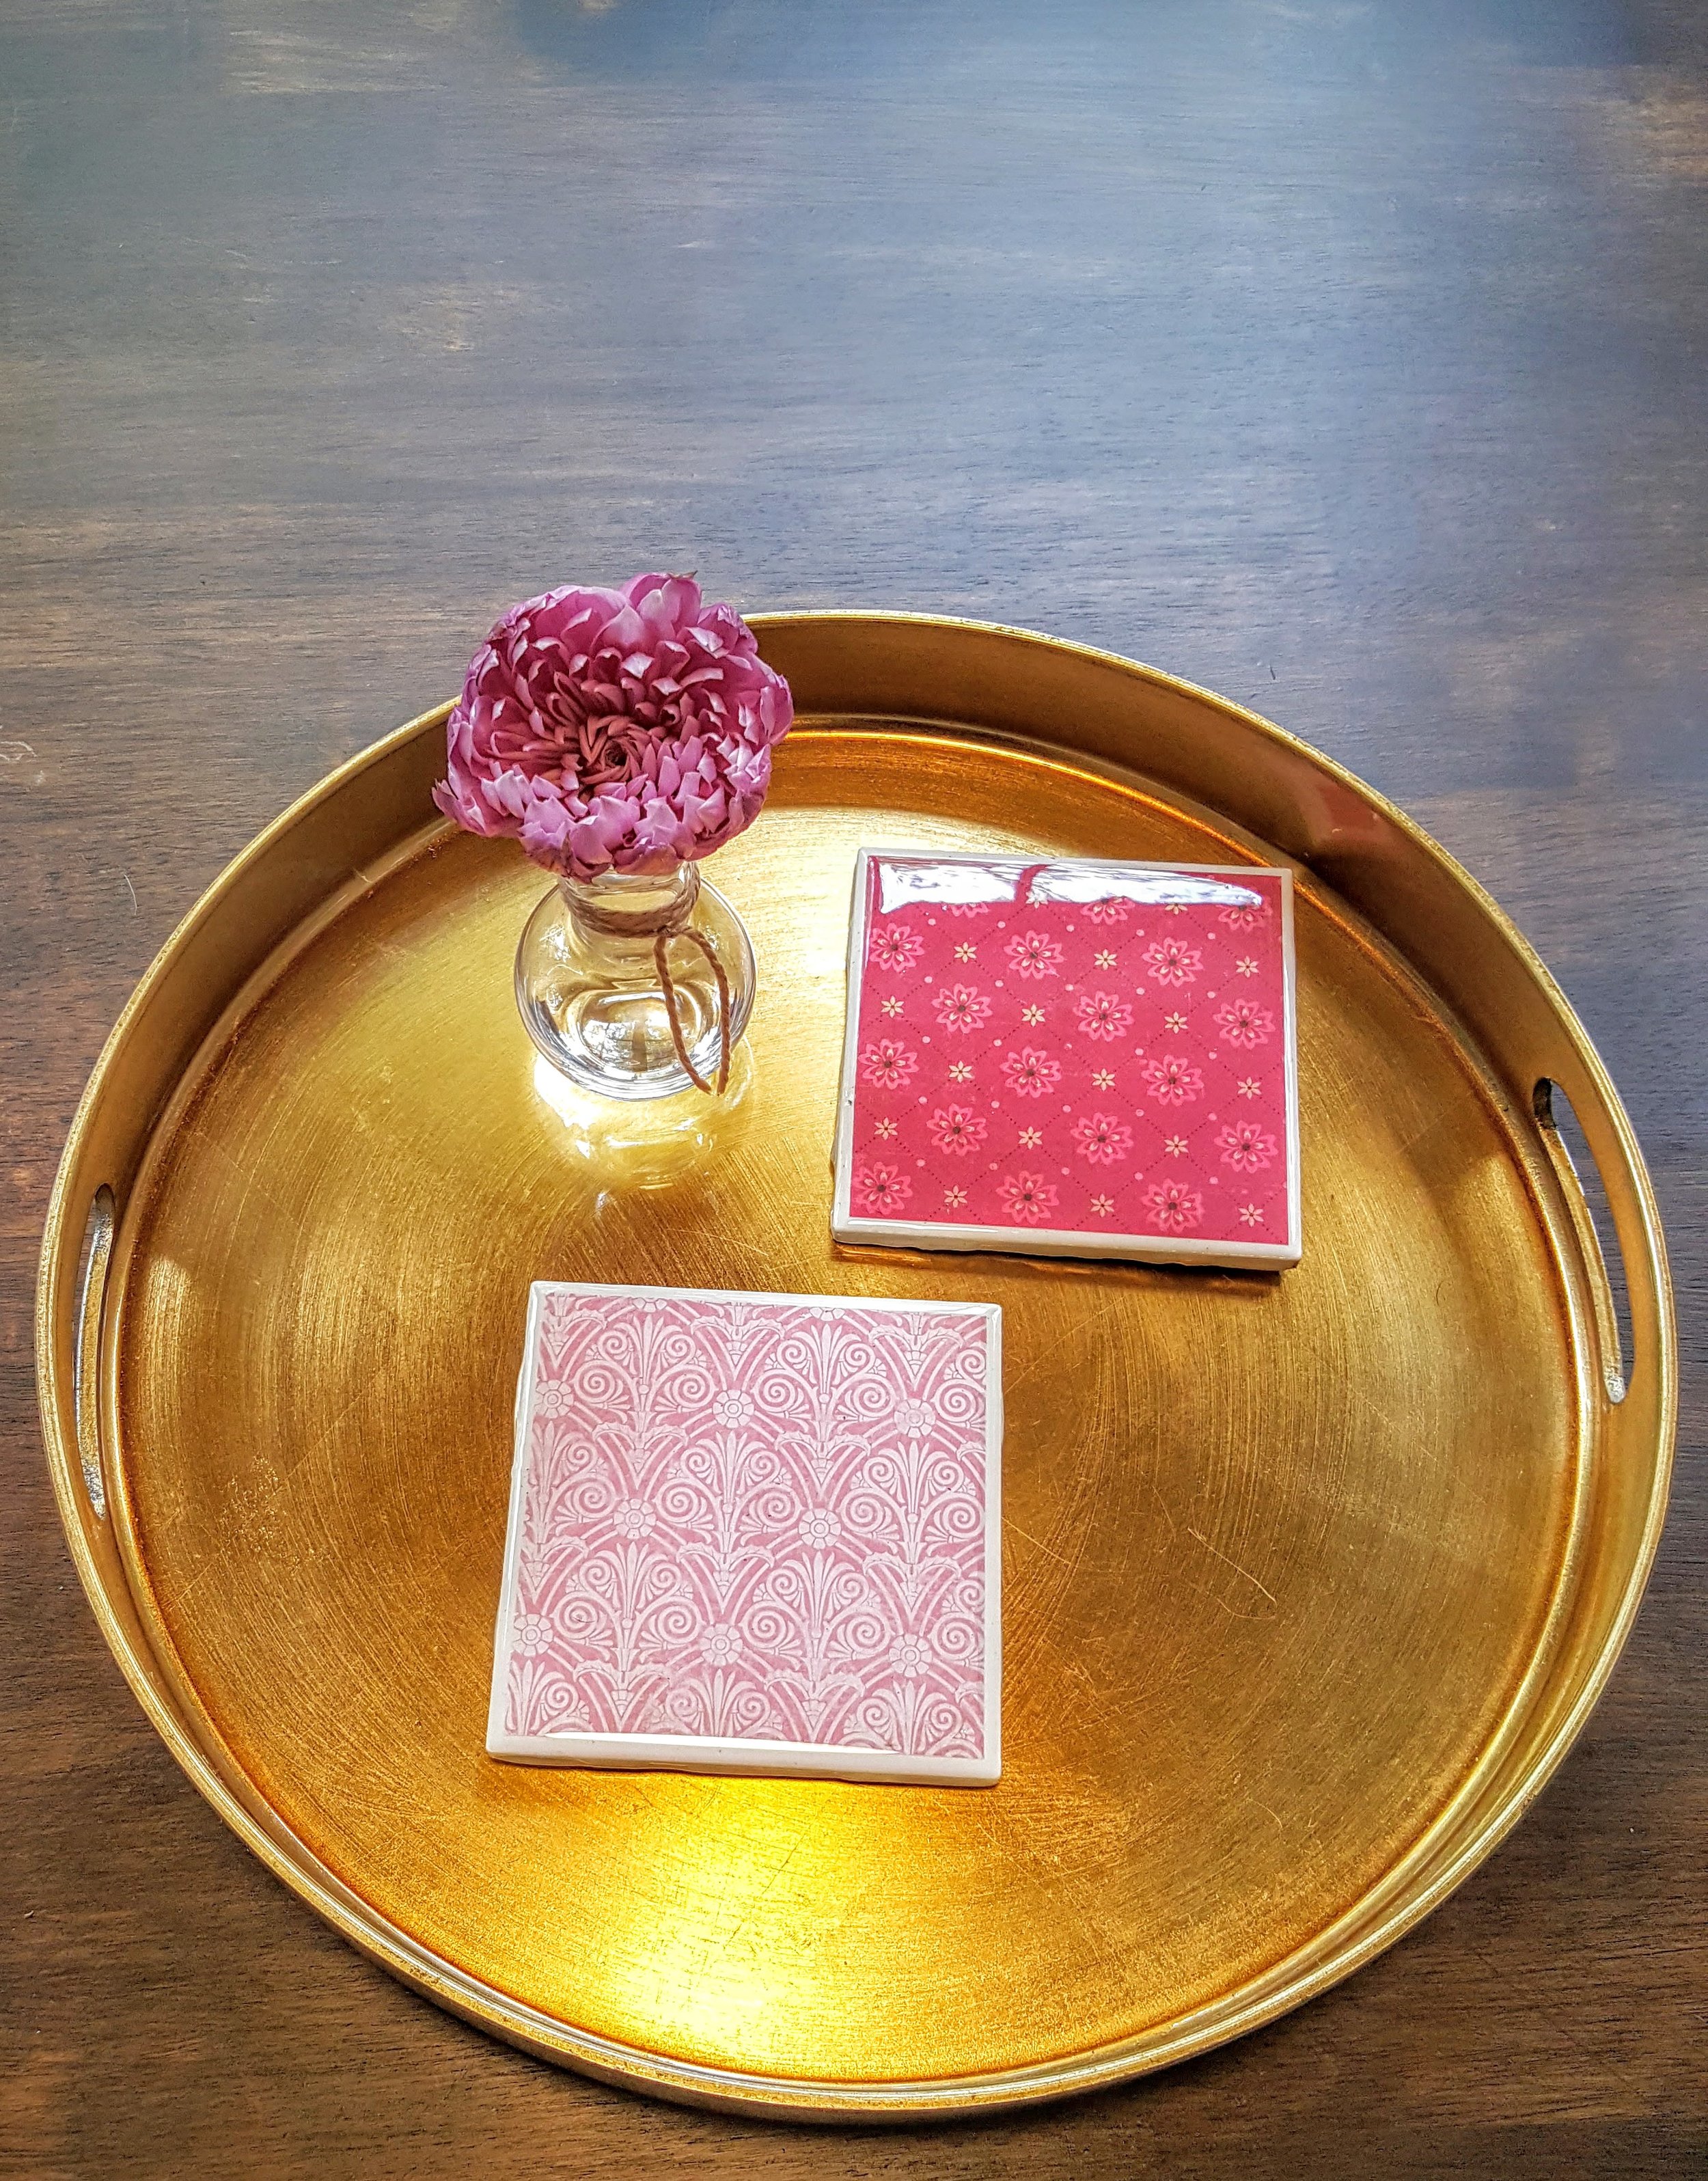
How to Make Lovely Ceramic Coasters!
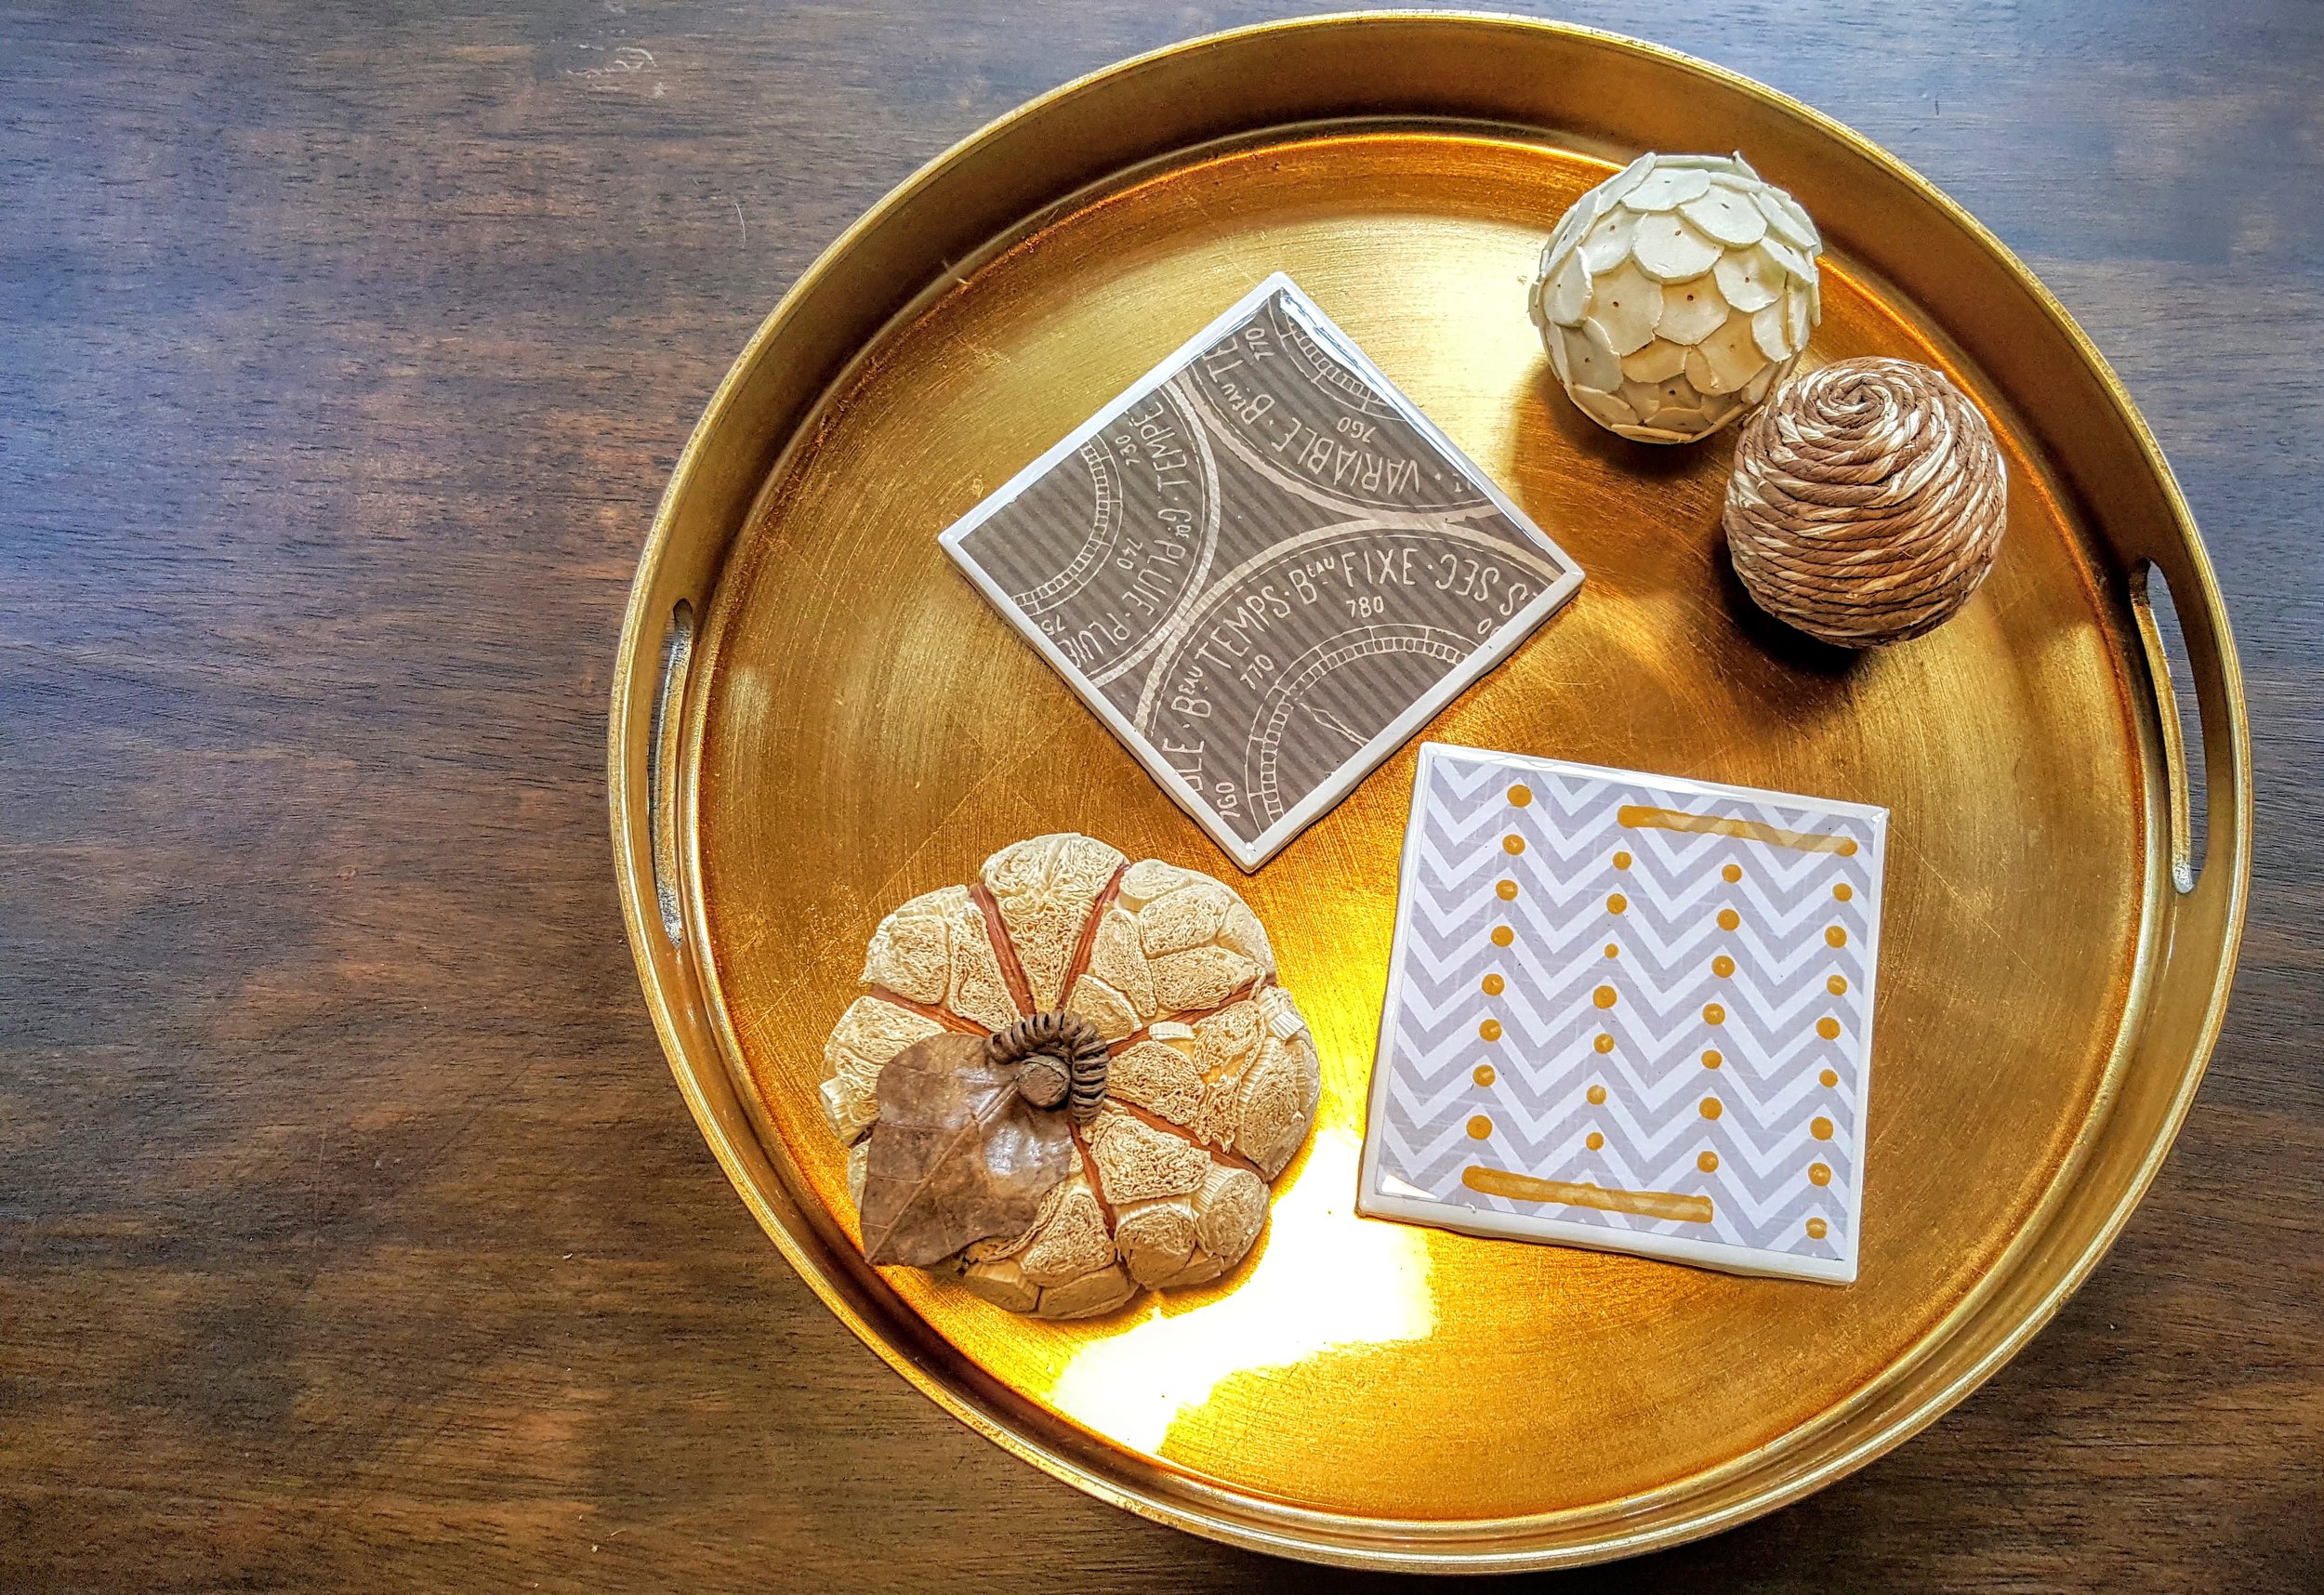
One day last week I was procrastinating. STORY OF MY LIFE! I went to sit down and focus with a drink in my hand. I already had a mug on the only coaster on that table so then I started thinking that I need more coasters. So, of course, I started online shopping for coasters. You know...all the normal places, Pottery Barn, Crate and Barrel, West Elm, etc.
I saw stuff I liked that was more than I wanted to pay and the stuff that I thought was reasonably priced was just BLAH.
BLAH, I SAY! BLAH!
So then I decided to make my own. No...seriously...I picked up my keys and went to get supplies to make my own.

I bought white 4 x 4 tiles for .12 cents each at Lowes, a book of scrapbook paper for $5, some epoxy and some cork squares.
Prep your surface.
1. Cut scrapbook paper 10cm x 10cm.
2. Brush tile with Modge Podge.
3. Put paper on tile.
4. Let dry for 15 minutes. (A few of them, I did a bit of extra with some paint so I had to let those dry longer.)
5. Brush tile with another layer of Modge Podge.
6. Let completely dry overnight.

THE NEXT DAY...
Prep your surface and turn a disposable plastic cup under each tile.

7. Mix epoxy per directions. (Don't mix more than a little less than half a cup of each bottle.)
8. Pour in the center of each tile.
9. Smooth with a spreader. I use Bondo spreaders.
10. Use a foam brush or a folded index card to make sure the sides coated and there is none under the tile.

11. Let dry for 24 hours. (I actually let mine dry longer because I was waiting on the cork adhesive to arrive.)

12. Add cork squares to bottoms.

13. Tie something around 2 or 4 of them to give as gifts! LOL!


So yeah...I think they are gorgeous! Guess what everyone is getting for Christmas this year? LOL! Yup. Just bought two boxes of 100 tiles for $12.00 per box. GO ME! Oh...and I made like 32 more Friday. Crazy pants.
They are on my Etsy site if you decide to not make any but find you need a few extra coasters around your house too. I put one on every nightstand and one per chair on or near every table.
Tips:
1. Line the bottom edges with clear tape that you can pull off when it dries so that the drips don't harden underneath.
2. If you do get hardened drips, you can sand those off.
3. Cut all of your paper first with an exacto knife.
4. Don't let epoxy dry anywhere dust or bugs can light on them. (Yes...it happened. Damn daddy long leg mosquito!)
Make Wood Wall Art Out of Anything Paper With Modge Podge!


Step 1: I wanted it to look old so I beat up a piece of wood I had from a shelf that I built with a hammer.
Step 2: Sand it all over so you don't have splinters.
Step 3: Stain.
Step 4: Paint with Modge Podge.
Step 5: Add paper items.
Step 6. Let dry for 15 minutes.
Step 7: Paint over whole thing with Modge Podge.
Step 8: Cover with a clear satin topcoat for protection.
Step 9: Let dry overnight.
Step 10: Add sawtooth hangers to back.
Me likey. I love how it looks really old.
Have you ever done a Modge Podge project? What was it?
DIY Decorating Around a Flat Screen Television

I've had some stuff I've wanted to frame for a while now but never got around to doing it. And...I had a super blank wall in the room I like to read in. I have a television in there that I use to binge watch programs The Robinator doesn't want to watch like "Parenthood" and listen to music. The room is comfortable and I've been finishing it slowly.
That blank wall is opposite my mirror gallery and behind the television.
Have I mentioned that I hate how televisions take up a wall? Like...there never seems to be anything interesting about the wall the television is in front of. I've seen where interior designers put a lot of art on the wall behind the television and I kind of liked that. Then...I thought about other stuff that I like too and decided to make a mixed media wall.
Our friends, Kenny and Booth, have an amazing home. Not because it's like this grand estate or anything (even though it is), but because everything in it has a story. Anything your eyes light on has a unique history and story. Walking through their home with one of them is like a cultural personalized museum tour and I love that everything has a story behind it. They didn't just roll up to a furniture store and buy a matching living room set. Every piece is unique and personalized to their personalities and the way they live their life. They have fascinating art and bits of all sorts of amazing things to look at. It's like a sensory party that you never want to leave. I could sit in their great room for hours and hours perfectly content.
And that's what I want. I want spaces and things with personal and unique stories. This room is the first one that I'm doing that way just to see how well it fairs and I am loving it so far. I can't wait until I decide on window treatments because that will mean that I am finally finished with it as I've said they will be the last things I do in each room.

Michael's was having a 50% off sale on their wall frames so I picked up some of them for the vintage musical programs and art that I had. I made a tray at an Annie Sloan paint techniques class I attended, did a canvas using stencils and added two wood pieces that I did myself.
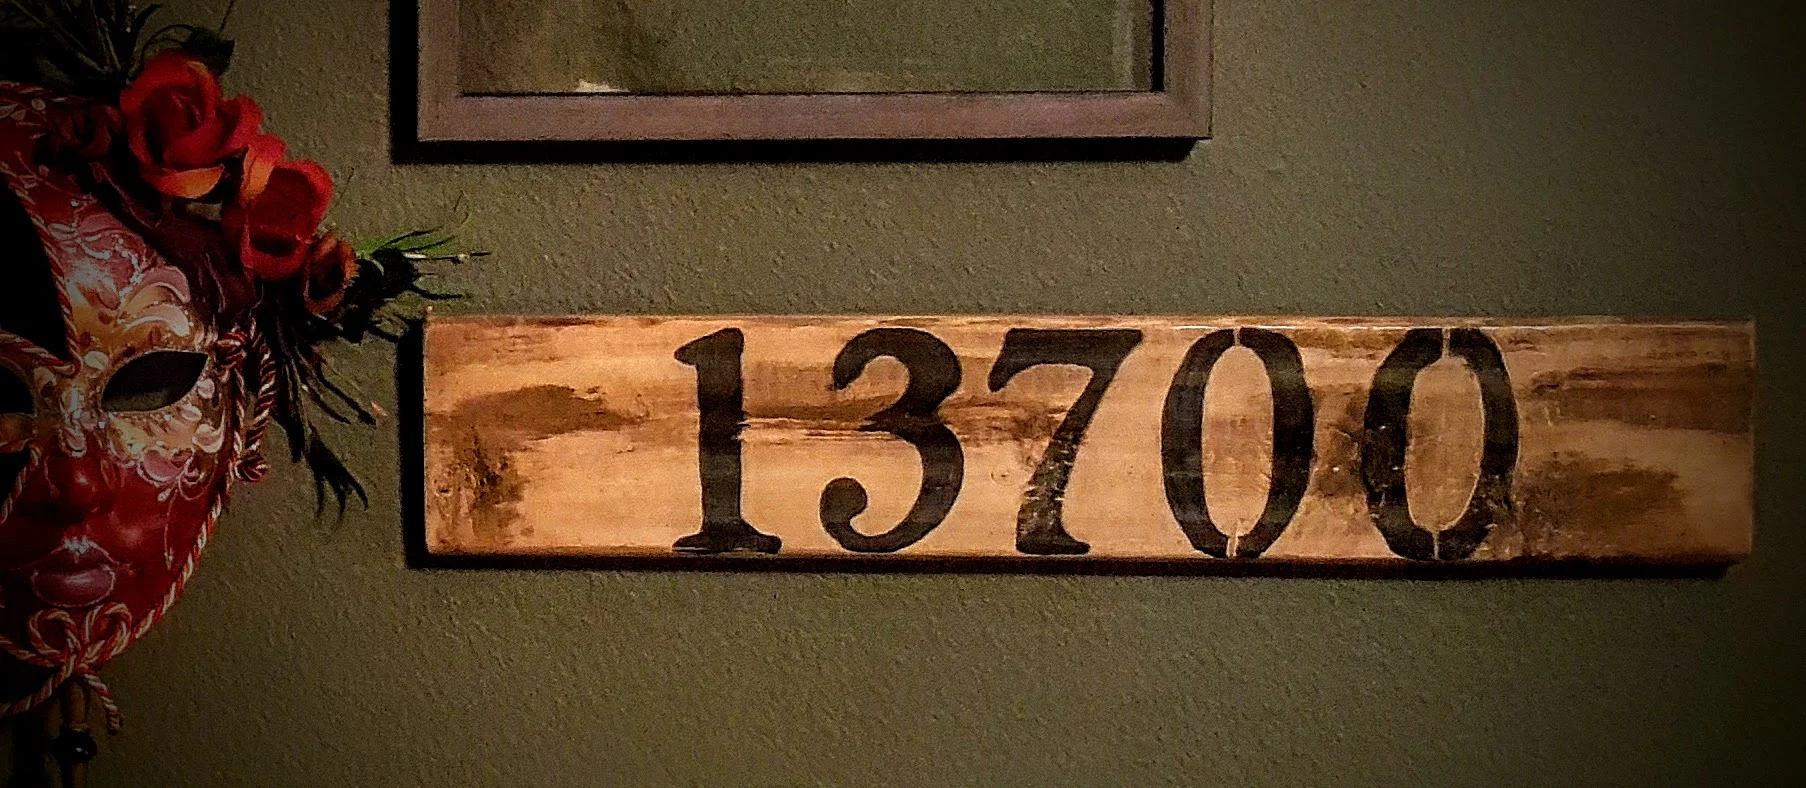
The first one was an address sign with 13700 on it. All my happiest memories in life so far were made at 13700. It's where my husband and I first started out as a married couple and where we just grew into who we are. It's where my family, framily and friends gathered all the time and where I've circled infertility, learned how to be settled and really just grew up.

The second one is made from handwritten sheet music from a musical in the early 1900s. "Swing Low," "Were You There?" and "Deep River." I bought this years ago with the other pieces in Maryland.

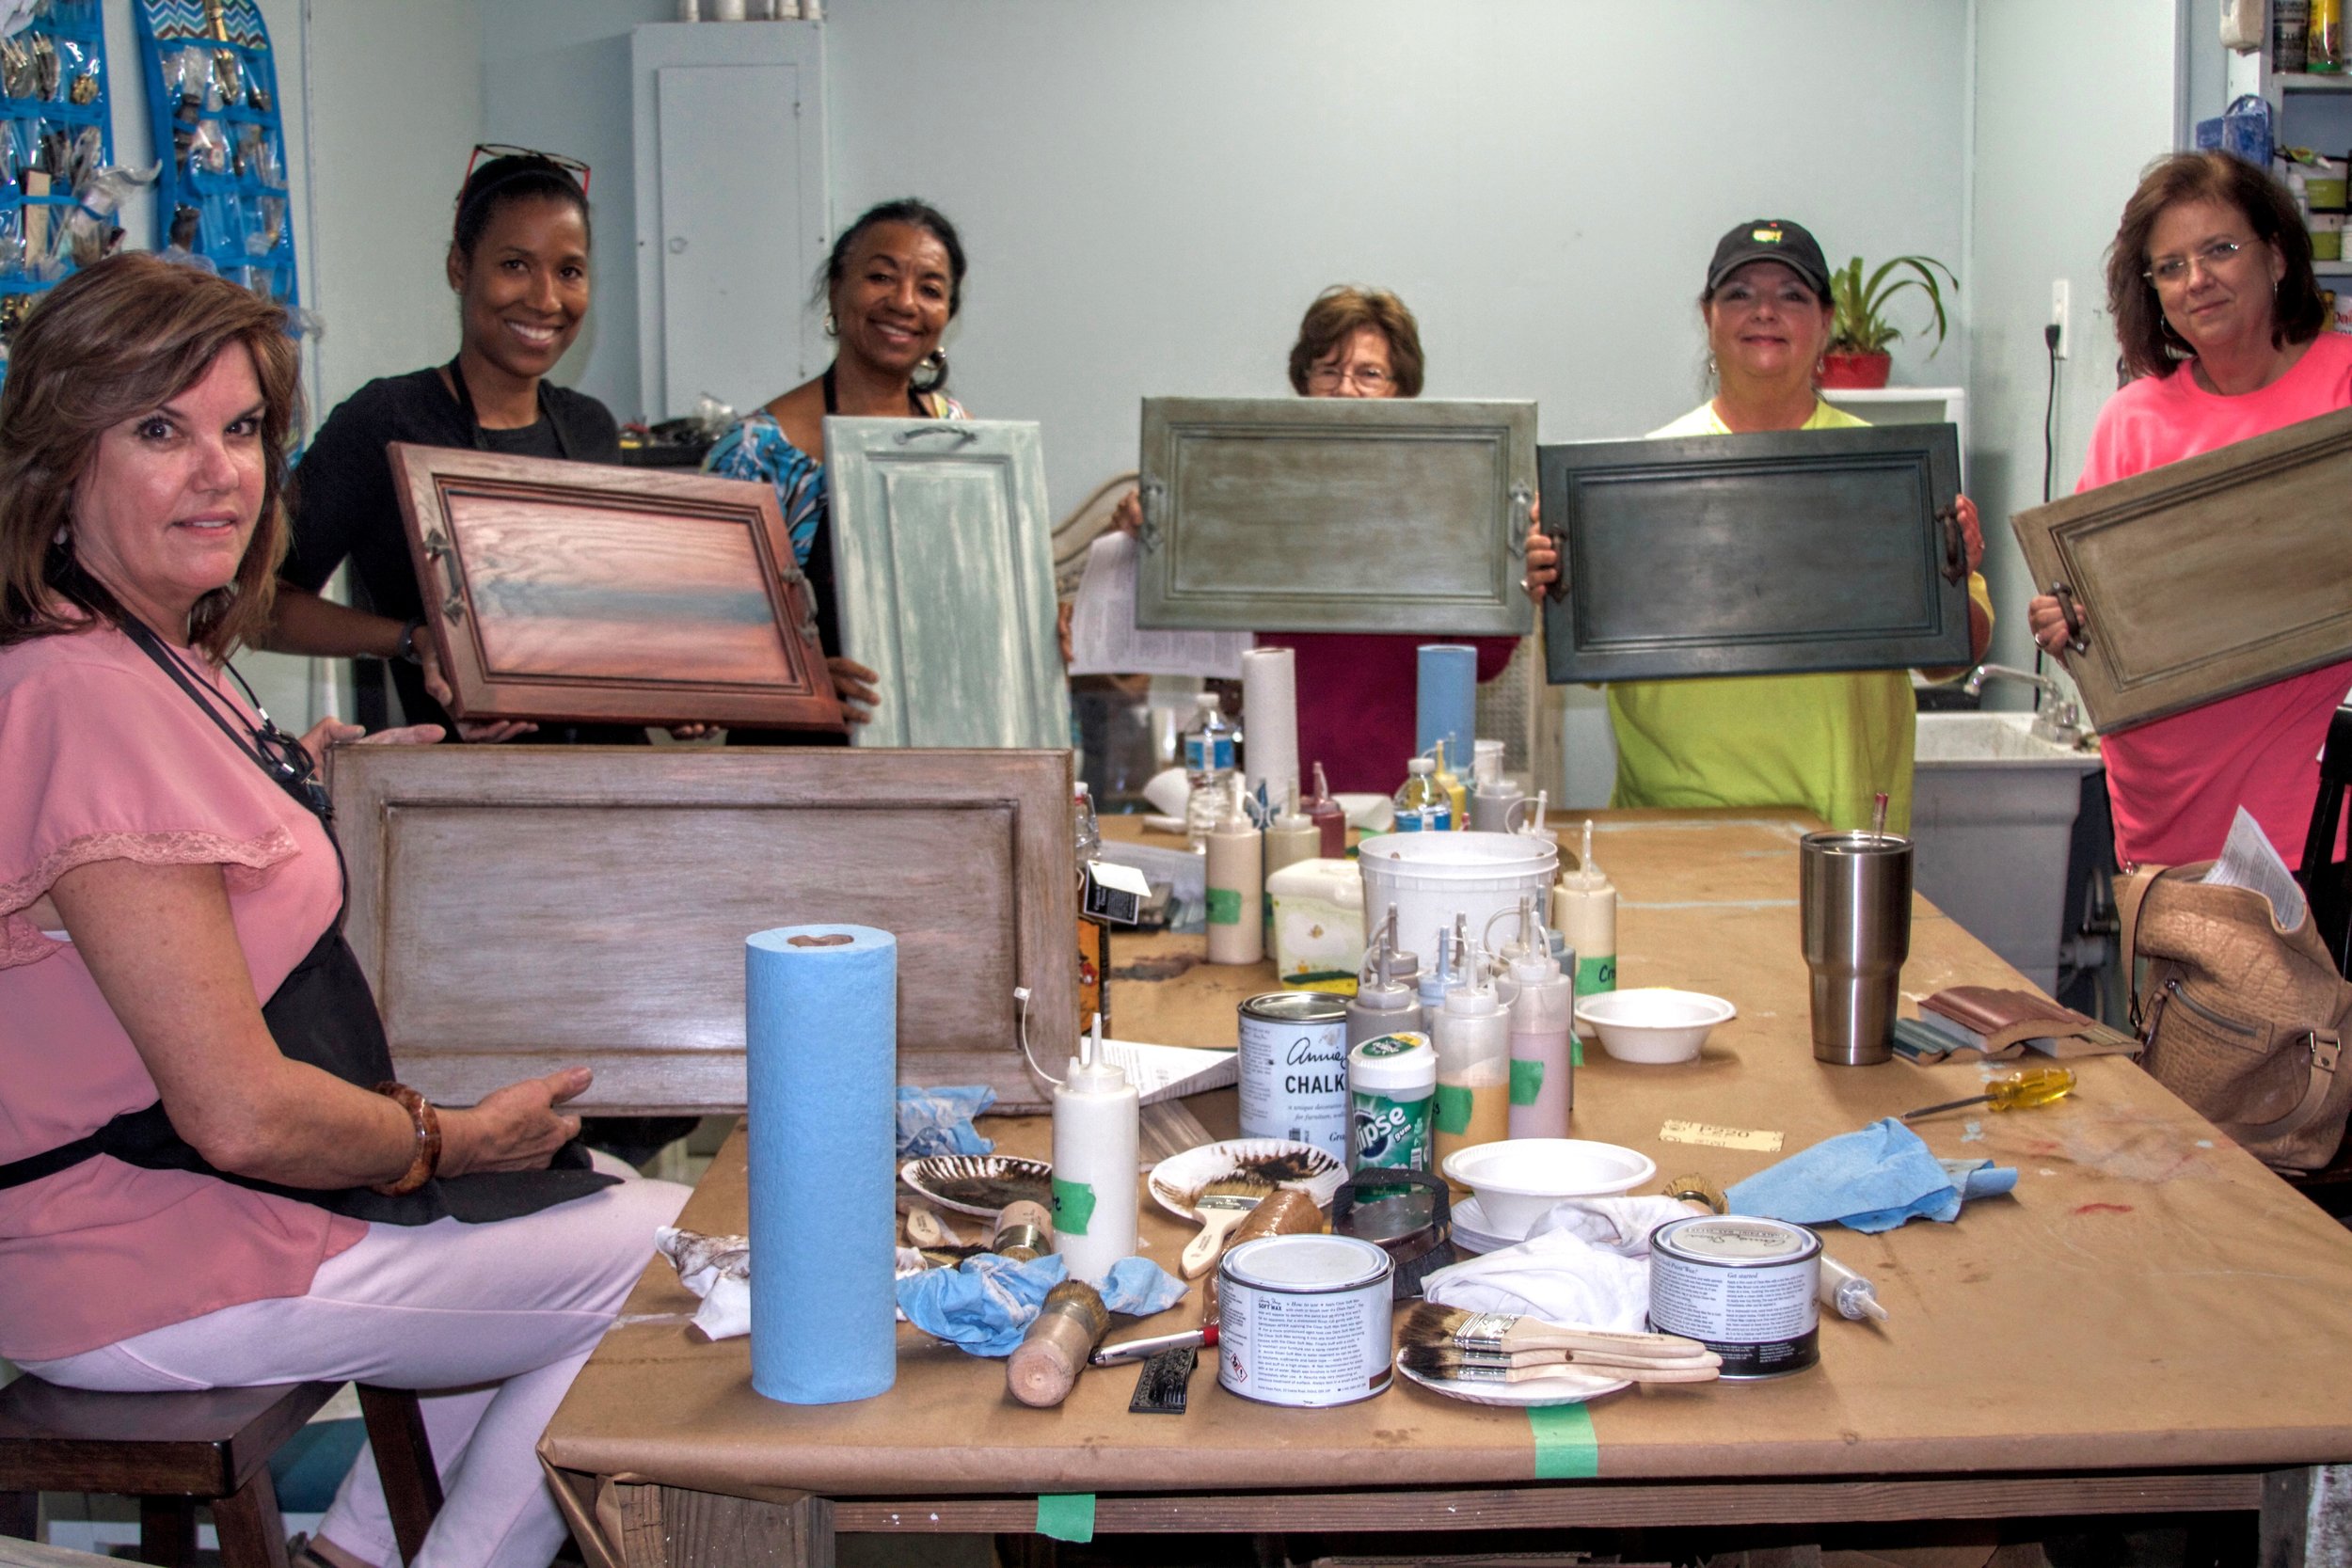
The tray was a fun time and I enjoyed meeting the ladies and learning about different painting techniques. So there is a story behind it too. The vases were made using dollar store vases and dots and tape to create a design and then spray paint.

I love the way it has all come together. It's visually interesting and the television is no longer the focal point of the wall. I even have room to add more pieces should I ever decide to. I like that I decided to use the whole wall instead of just up high above the television.