From My Inbox: Screw Them Voices, Yo!

I received this message on Facebook the other day:

Hi Monica! We have never met but I’ve followed your blog for a few years now. I use to live for your blogs/videos about natural beauty/hair care, cooking, housekeeping, fitness and confidence. I know there are a lot of similar blogs out there but yours really connected to me in so many ways. You are awesomely fabulous!

I sometimes wish I can ask you how you do it all. I’m turning 40 this week and although I’m so grateful and happy for so much in my life there are few things I really need to conquer. I feel my biggest set back is the noise in my head, the mental clutter, the self dialogue. Can you please preach to me about how you overcome that to be more productive and active in your daily life? What kind of affirmation motivate and keep you on track?

I completely understand if this is too personal to answer.

Best Regards,

D

So I tipped over to D's page and clicked around a bit before responding...

Why in the world would it be too personal to answer???????????
Imma fight you.
First things first...gimme them babies.
THEM CHEEKS!!!!!!! I WILL EAT THEIR LIL DELICIOUS FACES AWWWWWWWWWWF! LOLOLOLOLOL!
You will always have the power to be your own worst enemy so it’s something you need to seriously work on if that voice inside your head is negative.
And...why should it ever be negative?
You’re smart, beautiful, fun and funny.
Looks like you have a lovely family.
Focus on all the good things, all the time.
I was abused as a child. Big time.
I heard some really ugly things.
As a child.
I look at who I am despite all of that and I know deep down in my heart that I’m a good person in all the areas where it counts.
And THAT is what I use to silence the negative shit that can rattle around in my head sometimes.
I get up sometimes and I think some ugly shit.
And then I shoot that shit down.
I am a good person. I live my life to be of service when I can. I do no harm. I take no shit. Why? BECAUSE I AM A SURVIVOR. I AM THE SHIT.
If you want to compare yourself to crazy stuff think of all the people stuck in their negative circumstances and that’s not you.
Why?
BECAUSE YOU ARE THE SHIT!
Shit.

The conversation went back and forth for a bit with my reminding her to not be a martyr and how martyrs have wrinkles and shit and she's too cute for all that and telling her that she should hire a housekeeper if she can afford it because nobody with kids should have to clean their own home if they can afford to outsource that job.

See...I struggle with why people talk so much crazy shit to themselves.  You'd never say the stuff you say to yourself to someone else so why, knowing the power of loving yourself...would  you ever say it to you?  If someone walked up on you and said some of that ugly ish to your face that you have rattling around in your head, I have no doubt you'd launch at them trying to take them out so turn that same energy into beating that negative voice out, back and down.  You don't have to deal with that shit.  Nobody has to.

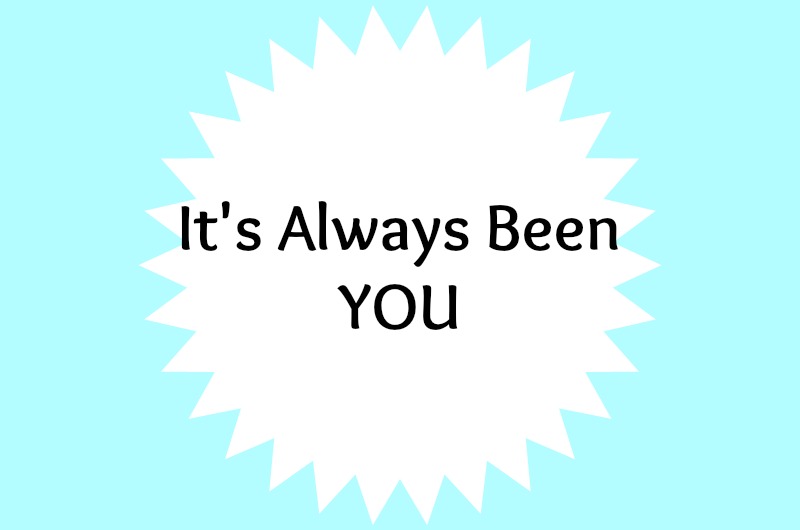
You need to be who you need.  It's always been YOU.

Show Us The Middle...Why I love the Show "Atlanta"

I like to know what happens in the middle. Started from the bottom and now we're here? What happened in the middle? I bet that middle is interesting as hell. I bet I will learn a LOT from that middle. I bet that middle looks a lot like MY middle.

That's my major problem with movies and shows about slavery in 2016. We don't have enough of the middle out there. We don't have enough of the building blocks to where many Blacks are now. So you skip over that entire middle and take people either BACK to slavery or straight to Louboutins, expensive weaves and big houses on the hill? Where is the middle? People need to see the middle.

Show people the struggles in the middle so they know they aren't out there dealing with this stuff on their own. Let people see how other folks dealt with the same ISSUES in the middle of all their other everyday issues and balanced them out. The middle can be a rocky azz road. That "pretty" part is hard to come by. More people need to see THE MIDDLE.

Folks walking around looking at the Louboutin life feeling bad about their life because nobody showed them that the meal of Spring Vegetable Ramon with a fried egg on the side used to be a staple IN THE MIDDLE for far more than just them.

Music, television, and film these days, catering to people who look like me, leaves the middle out completely so these kids get disappointed with their life because they never see THE MIDDLE. They think they are supposed to just jump up and have the Louboutin life and when they find out that a pair of Louboutins cost more than they are bringing home in a month from their hourly job...that disappointment sinks deep. It changes the fabric of their get up and go. They start thinking that it's s imply too hard to get there because THEY NEVER GET TO SEE THE MIDDLE.

And poor White people just don't get a break at all. They see Whites on television living the good life but nobody tells them how they get out of poverty. They start wondering WTF? Why "ain't" I upper middle class successful? All these other people I see on television are. I'M SUPPOSED TO BE TOO RIGHT? Poor Whites in entertainment are always stuck out spitting tobacco posting private property signs in their yards which don't have grass in a sea of abandoned pickup trucks. Nobody shows them THE MIDDLE either.  So they stay mad all the damn time.

Yeah...THE MIDDLE is important. Don't forget that. A lot of shit goes on in THE MIDDLE which looks JUST.LIKE.YOUR.SHIT. 

You got what it takes. Don't let the entertainment interests of a few greenlighters make you think you don't need to know THE MIDDLE.

SHIT.

Spicy Boiled Peanuts

My husband loves boiled peanuts and I love my husband so I make him boiled peanuts.

Even though I'm from the Deep South, I've never had boiled peanuts.  Robby used to talk about them all the time when we were up North saying how much he used to really enjoy them.  I could never find raw peanuts so I couldn't make any for him.

I ran into some raw peanuts recently and decided to make him some.  I chose the slow cooker method because it seemed fool proof.

I don't remember how many peanuts I had but it was at least 2 - 3 pounds.  He likes them spicy, so I doctored up some serious spicy stuff.

Raw peanuts

1/3 cup cayenne pepper 

1 boil-in-bag crab boil

1/4 cup salt

Seasoning

Rinse peanuts.  Add crab boil-in-bag to crockpot.  Add peanuts.  Add seasoning.  (Garlic salt, black pepper, Creole seasoning, etc.) Cover with water.  Stir.  Cook on low for 24 hours.  Stir a few more times.  Taste one after 18 hours.  Adjust seasoning accordingly.

I cooked them outside on the deck.  Why?  It smells like vinegar and feet while cooking.  24 hours of that is NOT my ideal nose tickle.  

Oh...and I store them in half gallon mason jars in the fridge using the "juice" to keep them wet. He puts some in a bowl and microwaves them. 

Racist Uncle Was Right

First off, Racist Uncle isn't really racist he's just inappropriate as shit.  He doesn't have a problem with people based on their skin color, his problem is strictly based on the stupid ish people do, say and fall for.  We call him Racist Uncle because he has absolutely no qualms about referring to said stupid person by the worst slurs our world has created.  And I'm talking IT DOES NOT MATTER WHAT COLOR YOUR SKIN IS...if you do something jacked up...he hates you.

Period.

I spend the majority of the time talking to Racist Uncle on edge when talking about current events.  We all know only the worst of the worst crap makes the news so he has a whole lotta people to talk smack about.  And I am constantly telling him..."Dude...you can't say that about people!"  And he's all like..."I don't know why in the hell not.  That gotdamn _______ shot up _____.  He shoulda just killed his ownself if he was so damn disturbed hell!"  

If you took away the racial slur...he'd be right.

This post isn't about Racist Uncle being right about people though.  It's about him being right about something important he told me.

"Niece, when you're going through some stuff, only drink the good shit.  Drink too much of that bad shit and it will jack you up."

And I've always taken that advice.  When going through a tough time, I only drink the good stuff.  LOL!  My latest good stuff?  Don Julio Blanco stored in the freezer and served in a highball straight with a twist of lime.  Maaaaaaaaaan...I sip it slow with the music flowing and my foot tapping to the mellow beat.  

The good stuff cuz this election...lawd...

My Golden Boy!

This past weekend my Golden Boy has his bi-annual piano recital.  This was the first time he played the piano while he sung a song and I was way impressed.  Like...WHOA.

This kid is going far in life but he will never, ever, ever be cooler than his T-Monnie no matter how hard he tries to look in pictures.  LOL!  

Make Wood Wall Art Out of Anything Paper With Modge Podge!

20160928_132616.jpg

Step 1:  I wanted it to look old so I beat up a piece of wood I had from a shelf that I built with a hammer.

Step 2:  Sand it all over so you don't have splinters.

Step 3:  Stain.

Step 4:  Paint with Modge Podge.

Step 5:  Add paper items.

Step 6.  Let dry for 15 minutes.

Step 7:  Paint over whole thing with Modge Podge.

Step 8:  Cover with a clear satin topcoat for protection.

Step 9:  Let dry overnight.

Step 10:  Add sawtooth hangers to back.

Me likey.  I love how it looks really old.  

Have you ever done a Modge Podge project?  What was it?  

DIY Decorating Around a Flat Screen Television

I've had some stuff I've wanted to frame for a while now but never got around to doing it.  And...I had a super blank wall in the room I like to read in.  I have a television in there that I use to binge watch programs The Robinator doesn't want to watch like "Parenthood" and listen to music.  The room is comfortable and I've been finishing it slowly.  

That blank wall is opposite my mirror gallery and behind the television.  

Have I mentioned that I hate how televisions take up a wall?  Like...there never seems to be anything interesting about the wall the television is in front of.  I've seen where interior designers put a lot of art on the wall behind the television and I kind of liked that.  Then...I thought about other stuff that I like too and decided to make a mixed media wall.

Our friends, Kenny and Booth, have an amazing home.  Not because it's like this grand estate or anything (even though it is), but because everything in it has a story.  Anything your eyes light on has a unique history and story.  Walking through their home with one of them is like a cultural personalized museum tour and I love that everything has a story behind it.  They didn't just roll up to a furniture store and buy a matching living room set.  Every piece is unique and personalized to their personalities and the way they live their life.  They have fascinating art and bits of all sorts of amazing things to look at.  It's like a sensory party that you never want to leave. I could sit in their great room for hours and hours perfectly content.

And that's what I want.  I want spaces and things with personal and unique stories.  This room is the first one that I'm doing that way just to see how well it fairs and I am loving it so far.  I can't wait until I decide on window treatments because that will mean that I am finally finished with it as I've said they will be the last things I do in each room.

Michael's was having a 50% off sale on their wall frames so I picked up some of them for the vintage musical programs and art that I had.  I made a tray at an Annie Sloan paint techniques class I attended, did a canvas using stencils and added two wood pieces that I did myself.

The first one was an address sign with 13700 on it.  All my happiest memories in life so far were made at 13700.  It's where my husband and I first started out as a married couple and where we just grew into who we are.  It's where my family, framily and friends gathered all the time and where I've circled infertility, learned how to be settled and really just grew up.  

The second one is made from handwritten sheet music from a musical in the early 1900s.  "Swing Low," "Were You There?" and "Deep River."  I bought this years ago with the other pieces in Maryland.  

The tray was a fun time and I enjoyed meeting the ladies and learning about different painting techniques. So there is a story behind it too.  The vases were made using dollar store vases and dots and tape to create a design and then spray paint.  

I love the way it has all come together.  It's visually interesting and the television is no longer the focal point of the wall.  I even have room to add more pieces should I ever decide to.  I like that I decided to use the whole wall instead of just up high above the television.  

My TAME thoughts on the election...

Vote.

Don't vote for the Republican candidate.

He's not a good person.

Vote for the Democratic candidate.

She has her faults.

But she's not him.

If you vote for a 3rd party candidate, in this election, you're basically voting for him.

Don't vote for him.

Bok choy and Mushroom Saute

1 head of bok choy, chopped

1 container of mushrooms

Roasted sesame oil

Sesame seeds

Soy sauce

Red pepper flakes

Put a bit of roasted sesame oil in a skillet with a cover.  Add bok choy and mushrooms.  Drizzle with soy sauce and sprinkle sesame seeds and red pepper flakes.  Cover and cook on medium low for 10 minutes.  Stir.  Cover and cook for 2 additional minutes.  

Should still have a bit of crisp to it.  Add salt if you like but the soy sauce should cover it.  (I use gluten-free soy sauce.)

We eat this a lot.  Bok choy has all kinds of super healthy benefits.  Check it out HERE.

Antique Victorian Oak Eastlake Spoon Carved Vanity Dresser Chest

This piece?  SWOON!  1800s.  Astonishing.  Look at the finish before I started working on it!  

How amazing is that transformation????????  I only used Howard's Wax-N-Feed once I'd done the repairs and sanded out the insides of the drawers, followed with a quick dry rub of stain.   I used Brasso on the drawer pulls and man...it is soooooooo gorgeous to me!  LOVE.IT!!!!!

Cavalier Cedar Chest - FINISHED!

Remember that cedar chest I bought and bragged about HERE?  

Well, I finally got around to it.  I was scared because it's so awesome and I didn't want to screw it up.  I found out about these AMAZING products and, with some 0000 steel wool and a whole lot of elbow grease after the repairs were done, it looks amazing.  

I tell you what...of all the crap I know how to do and do pretty well, this has got to be my favorite thing to do.  It is just so soothing to put on an audiobook and have at it!

Speaking of audiobooks, have you added the Overdrive app to your phone yet and synced it with your library card?  I'm telling you...it's the best thing ever.  That and Hoopla.  LOVE.THEM!

Oh yeah...the products I used?  

1.  Howard Restore-A-Finish, Cherry:  I applied this with the steel wool.  I just REALLY got into it and it worked so well! 

2.  Howard Wax-N-Feed:  This product is my new favorite thing in the EN.TIRE.WORLD!  All of my stuff will be waxed and fed by this stuff from now on at least once a year!  This stuff is amazing!   

My new FAVORITE thing! OXO Good Grips Soft-Handled Garlic Press

If you're like me, you buy something and use it until it breaks and then you replace it.  You're not out and about thinking to yourself...hey...I need another garlic press even though nothing is wrong with my current garlic press.  It's just not done.

My garlic press broke.  I've probably had it for 20+ years so it had a good, long, life.  So it broke and I went out looking for a new one.

You never think you can improve on things like garlic presses ya know?  They are all pretty basic.  Um...WRONG!  

I got this one:  OXO Good Grips Soft-Handled Garlic Press  

You press the garlic, flip the handle over and it pushes out the skin.  *BLINK*  No...really...*BLINK*  Now...those of you who have garlic presses which do this...I bow down to thee because my life has changed.  I just pressed a while bulb of garlic, three cloves at a time easy peasy.  This is seriously my new favorite thing.

I'm a simple, simple girl.

Does your garlic press clean the skin out for you too?  WHY DIDN'T YOU TELL ME?????????????

Create a Mirror Gallery with $30 Worth of Vintage Mirrors

I've wanted to do a mirror gallery for a while now.  I considered doing it along the stairs but didn't have all the mirrors I needed when I was ready to do the gallery along the stairs so I used the typical pictures in frames there.

But I still wanted a mirror gallery and decided it would be awesome in my woman cave, which is coming along quite nicely and is the perfect place to read and surf when the other human in our home watches all things sports related.  LOL!

So I've been buying cool and interesting mirrors whenever I saw them.  This entire lot cost me about $30.  

Some needed more fixing than most but most just needed to be painted, details highlighted and then distressed using Annie Sloan Dark Wax.  The large one had a big chunk out of it and it was almost broken in two at the top so I had to glue it and then use some Lightweight Filler to fix the big missing chunk.  I used antique gold paint and dark wax and made the "new chunk" look like the rest of the frame.  GO ME!  That was really cool.  I find that I'm really enjoying fixing stuff that other people wouldn't even try to fix.  Tomorrow I'm fixing a broken leg spindle on a cane seat chair...but hey...another post.  

MOVING ON!

I put some Mod Podge in matte over the paper to give it a more finished look since the paper was faded.  I considered replacing the paper with something else but I liked how it was faded in some spots.

I decided to paint two of the mirrors white which made no sense to anyone but me.  Hell...didn't even make sense to me at the time but I wanted to do it so yeah...that's what I did.

Then...I played around with placement on the floor until I had it like I liked it.  

When I was ready to hang them, I measured from end to end and put the measuring tape down in front of the sofa at the measurement.  Then...I hung the big one first and next...the bottom right one.  I filled out the far right column first and then the middle and worked the rest in.  I only made one change from the layout that Dr. Punkin approved.  Don't tell her I said that though.  She'll get the big head.

So yeah...for $30, I got a pretty cool mirror gallery.  This room is coming along nicely.  Just need to frame some art that I plan on hanging in here and decide on window treatments.  I want another chair or two but only if I can find the exact chairs I want.  I'm crazy about these chairs:

That chair is SO.SICK!  I need two of them.  PLEEEEEEEEEEEEEASE UNIVERSE LET ME ROLL UP ON TWO THAT I CAN REUPHOLSTER TO PERFECTION!

Okay, okay...oh...wait...that's it.  LOL!  

Yall like my mirrors?  Do the white ones throw you off?

How to fix chipped wood or veneer.

If you have nice pieces at your home with chips or broken veneer, you'll be surprised at how easy these things are to fix.  I've always wanted a porch rocker from Cracker Barrel but have never pulled the trigger.  I was at a consignment store and saw one and well...I had to have it. Solid wood?  Check.  And you know how I feel about solid wood.  HOOOOOOOOOTY HOOOOOOO!

I got a really good deal on it because one of the rockers had a chipped end and needed some fixing so hey...I can fix stuff.  LOL!

This stuff is pretty cool in that it brought me back to my childhood when I mixed it up.  It smelled exactly like the stuff my daddy used to use to fix our boat and, I guess that's exactly what it was.  Lightweight Body Filler.  Has that ever happened to you?  A smell takes you back?  It is a weird and cool experience huh?

If you're using this, you'll need one thing for sure, Bondo spreaders.  These are the only things which the hardened body filler won't stick to permanently.  Whatever you mix it with and on/in will be ruined forever so yeah...whip out a paper plate or bowl and a plastic spoon.

After mixing it up, glob it on whatever you're fixing pretty good and then use the spreader to smooth it evenly.  It will dry pretty quickly so please make sure you work fast.  Once it's dry...SAND IT SMOOTH.

Then...well...paint it and make it purdy.  You like purdy don'tcha?  Yeah...you do.  I painted the rocker in Annie Sloan English Yellow with a bit of a stenciled detail in Annie Sloan Pure White.  Yes.  It makes me happy.  :)

Now that I have a rocker...maybe I'll take up knitting.  LOL!  

Refinished and Painted Vintage Windsor Wood Arm Chair

This might be my favorite piece yet.  It is so solid and fun now that it has been restored to awesomesauceness.  Yup.  That's a word.  Look it up.  Didn't find it?  Oh...my bad.  :)

This lil dude was busted and disgusted.  The bottom was broken and there was a ton of just...GRIMEY GRIME on the arms.  Dried on grimey grime.  Just gross.  But...as we've covered before...solid wood can be sanded and cleaned up so well so I repaired it with wood glue, contact cement and wood filler and then got out my palm sander to remove all the grime off it.

Then I painted it but it was just regular and I wanted it to be fun.  This will probably end up in the kids' guest room once I find the perfect size desk so, of course, I wanted it to be neat and indestructible too.  LOL!  I used some of my stencils and did a rustic French numbering stencil on the seat using chalkboard paint but it looked too "new" and I didn't like it.  To combat this I mixed one part paint to two parts water in a wide mouth jug and shook it up really well and then applied to the seat wiping it off almost immediately with blue shop towels for a white washed look.

The feet on it were rusted and non-removable so I taped the legs up and hit them with some gold paint.  To finish it, I sprayed it down well with Minwax polycrylic three times.  Should be good to go.

And now it's so cute...I might not want a kid sitting in it.  Indestructible or not.  So there.  LOL!  


Solid Oak Round End Table Refinished in Annie Sloan Country Grey with Stained Top

I'm totally beginning to have a thing for round coffee tables and end tables.  Not plain ones mind you...but some with a bit of oomph.  What is oomph you ask?  Hell if I know...I just know it when I see it.  

When I found this table it had a busted leg.  Totally ew.  Turns out, broken wood pegs are relatively simple to fix though.  You take a drill and drill through the broken peg until the hole is completely cleaned out.  Then?  Add some wood glue and bang in a new wood peg.  You can get a pack of like 10 of them for under $2.  Crazy huh?  When I think of all the things I've encountered with a busted wooden peg and it could have been fixed for like TWENTY CENTS???????  

LAWD... SHAME! SHAME! SHAME!

So...this was pretty basic.  Like...seriously.  When you use Annie Sloan chalk paint you don't have to sand it so I only sanded the top because I wanted to stain it and to stain something...ya gotta remove the current finish so the wood can absorb the Minwax Dark Walnut stain.  There was just no way I was painting over that gorgeous inlaid top.  It was just so neat to me that it was laid in quarters like that.  The beading along the side was a detail I wanted to make pop so after painting the base in Annie Sloan Country Grey (my favorite color it seems)  and under the top, I rubbed dark wax under the top.  As a protectant, I really like General Finishes High Performance Top Coat in satin.  I think I did two coats on the top.  Anything vertical I've learned to use a polyacrylic spray so that's what I did there.  The piece came out so lovely and man is this thing SOLID!  It won't move unless you actually move it.  A simple bump won't sent it sprawling into the wall to make a knick in your paint.  WHOOOOOHOOOOOOOOO!

You'll find that round end tables are pretty versatile for the space you're looking to fill too.  Squares and rectangles are pretty...um...finite.  I guess that's a good way to put it.  If not...pick some words, put them together and VIOLA!  Hopefully you know what I'm trying to say.  LOL!

Refinished Nightstand Between Twin Beds in Kids' Guest Room

20160713_142026 (1).jpg

When looking for pieces to refinish, do yourself a favor and choose REAL WOOD pieces only.  Don't get cute and get stuck with some particle board you won't be able to do anything with except paint.  Nothing wrong with painting, of course, but the great thing about real wood is that if you screw up...you can start over.  No problem.  If you don't like it...you can start over.  No problem.  

This piece had something I hate.  A non-working "drawer."  Like...there was a drawer pull on it and a fake line to simulate a drawer but it was just a side.  I was looking for a nightstand to put between the kids' guest bedroom.  It has twin beds and not enough room for two end tables so I needed to be pretty specific with size.  Also...I didn't want it to be too tall.  Initially, I was going to use a bookcase but struggled with lamp placement.  Since it's a guest room, something with a drawer isn't necessary and I've since put a low basket with a liner under it to hold books.  

Still working on the room for now, of course.  I'm planning to do a light colored wall behind the beds and decorate it with stars.  Why?  I like stars.  Duh.  LOL!  Funny because my nephew is currently visiting and he has his own ideas of design and implemented them accordingly.  *sigh*  He's quite proud of his handiwork.  What say you?  Think he has a future in interior decor?

The piece was scratched up like crazy so I removed the hardware on the faux dresser and covered the holes and the lines with wood filler that can be painted.  Then...I sanded the top really well to get as many of the scratches off the top as possible.  

I wanted a "front" so I used contact cement to add a pair of latex appliques to it.  I didn't decide this until I'd already put a coat of paint on it.  Next time, I'll know to make the decision BEFORE I've started.  Will make it a lot easier.  I added a bit of gold Rub N' Buff to the appliques so that they would stand out a bit.  I did the same to the bottom ring on the legs.

I put three coats of General Finishes High Performance top coat on the top to make it virtually indestructible and a dark wax along the base and legs for more of a shiny patina.  

I paid $5 for this table so yeah...even if one of the nephews Hulk smashes another one on top of it...I'm good.  LOL!

Plant Stand Makeover in Annie Sloan Provence and Dark Wax

This was tragic in the beginning. TRA-GIC!

I thought it was going to be a simple job of stripping and then painting but noooooooooooooo!  It had been painted and then covered with contact paper and then?  PAINTED AGAIN!  I didn't get anywhere with an entire can of Citristrip because of the stupid contact paper.  Once I got the top coats of paint off, then I had to pull off the contact paper and THEN I had to strip that paint off.  Seriously...I almost gave up on this thing thinking that a plant stand just really isn't worth all this trouble so I left it alone for a few days and worked on something else.  Then I thought about how gorgeous my trailing begonia would look on it so I stripped it, sanded it and painted it.  Then?  I got jiggy with it and used my stencils to put a few designs on it.  After that, I used 100 grit sandpaper to distress all the edges of the wood and went over it with dark wax.   

And now?  Me happy!  Had I known about all of the layers of paint and the contact paper in the middle?  Yeah...Idda passed.  I never want to do that again.  

Isn't it purdy?

Vintage French Provincial Nightstand in Pink and Berry!

First time I saw this...it was scary.

And now...it's all lovely and ish.  Perfect for a Princess' bedroom.  Isn't it gorg?